SLIDE 1 1
Engr 003 Mission College
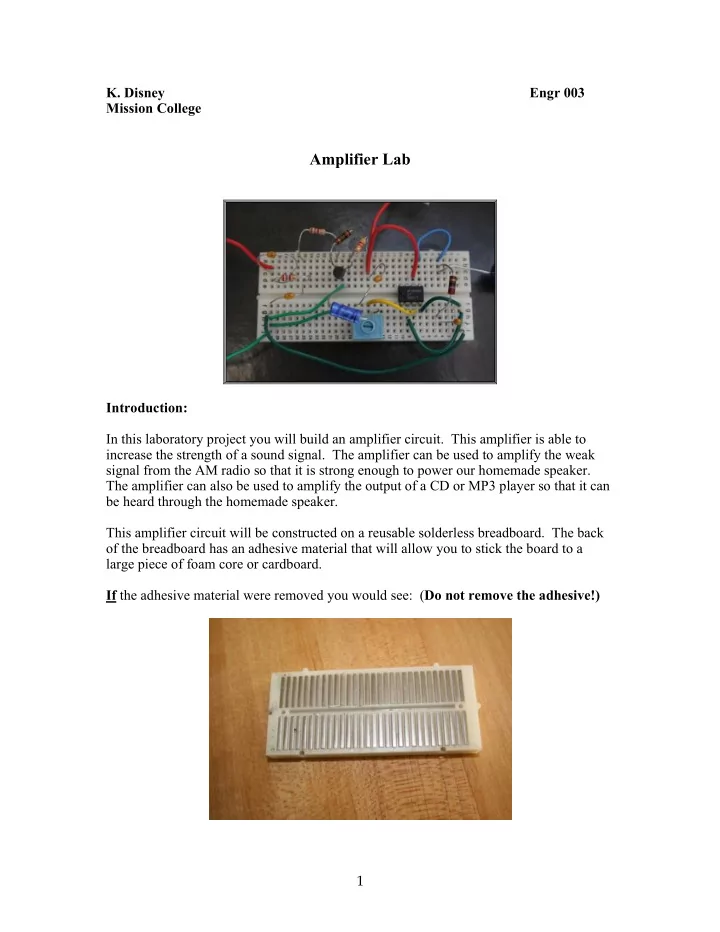
Amplifier Lab
Introduction: In this laboratory project you will build an amplifier circuit. This amplifier is able to increase the strength of a sound signal. The amplifier can be used to amplify the weak signal from the AM radio so that it is strong enough to power our homemade speaker. The amplifier can also be used to amplify the output of a CD or MP3 player so that it can be heard through the homemade speaker. This amplifier circuit will be constructed on a reusable solderless breadboard. The back
- f the breadboard has an adhesive material that will allow you to stick the board to a
large piece of foam core or cardboard. If the adhesive material were removed you would see: (Do not remove the adhesive!)
SLIDE 2 2 Each strip of metal is one node, or connection point, where parts can be connected
- together. Each node has five contacts or holes where circuit elements can connect to the
node. This amplifier circuit is comprised of: resistors, capacitors, a potentiometer (a variable resistor), a transistor, and the LM 386M integrated circuit (IC). There are two stages of amplification. The first stage of amplification is achieved with the bipolar NPN transistor, and the second state is achieved with the IC. Components: 2N3904 (NPN BJT Transistor) LM386N Low Volt Audio Amplifier 9V battery 9V battery straps Battery Clip for holding battery 1 4.7 yellow, violet, red 1 27 red, violet, black 1 1 Mega brown, black, green 2 2.7 K red, violet, red 1 10 pot. 1 100uF 3 0.1uF 1 0.001uF 1 1.0 uF Tools and Supplies: 4” X 5” Foam Core 22 gauge solid wire in multiple colors Wire cutters & strippers Small flathead screwdriver (trim pots) Audio source (CD or MP3 or PC) Audio cable Speaker Six Alligator wires One Node with five connections
SLIDE 3
3 Circuit Schematic: Note: With the exception of the 1 uF and 100 uF capacitors, the resistors and small capacitors can be inserted in either direction. The dent in the capacitor package indicates the positive side of the capacitor. Assembly Steps: Step 1: Identify the components. The resistors are the small cylindrical objects with colored stripes. Identify the resistors using the corresponding color bands. Note that the gold band can be ignored. Step 2: Tape the resistors, capacitors, AND other electrical components to the schematic sheet located at the end of the lab document. This will facilitate rapid and error- free identification and will shorten the overall lab time. Step 3: Parts will be plugged into the board from left to right. Use the pictures as a guide. You do not have to use the exact same nodes shown in the pictures. First insert the transistor, the audio amp, and potentiometer as shown. Make sure each pin or terminal is connected to a different node. Small dot on IC must be located here.
SLIDE 4
4 Step 4: Insert two wires into the two ends of the board. These will be used for audio input and ground. Step 5: Next insert the 0.1 uF capacitor from the input node (Top- node 30) to another nearby node.
SLIDE 5 5 Step 6: Next insert the 2.7K Step 7: Insert the 0.001 uF capacitor between the resistor and the ground node. Step 8: Now insert the other 2.7K from the resistor to the base (middle terminal) of the
- transistor. See pin-out below for the transistor.
SLIDE 6
6 C – Collector B – Base E – Emitter Step 9: Next insert the 1M from the base of the transistor to the collector (top terminal). Step 10: Connect the transistor’s emitter to ground with a wire. C B E
SLIDE 7
7 Step 11: Insert the 4.7 K from the collector to a node that will be your 9 volt input. Put a wire into this node and mark it as 9 Volts. This is where you will connect your battery later. Step 12: Insert the + side of the 1uF capacitor from the collector node to the right end of the potentiometer. (Use the right side of the pot since the other side must be grounded and the left side of the pot is closer to your ground node.) Now connect the other side of the pot to the ground node.
SLIDE 8
8 Step 13: With a wire connect the middle of the potentiometer to the pin-3 on the IC. LM 386 Pin lay out: Step 14: You will next connect pin-2 and pin-4 to ground. Before doing this you will have to make another ground node. A new ground node is made by placing a wire between the new node and the existing ground as shown above. New Ground Node
SLIDE 9
9 Below you see pin-2 and pin-4 grounded to the new ground node. Step 15: Connect pin-6 to the node designated to be 9 volts.
SLIDE 10
10 Step 16: Put a 0.1 uF capacitor between the 9 volt node and any ground node. In the picture below the left side of the pot is used for ground. Step 17: Place a wire from pin-5 to another nearby node.
SLIDE 11
11 Step 18: Place a 27 resistor from this node to another nearby node. From this node place a 0.1 uF capacitor to ground. Step 19: Place the + side of the 100 uF capacitor into the node where the 27 resistor connects to pin-5. The other terminal of the 100 uF capacitor will be the amplifier’s output that connects to the speaker. The circuit is complete!
SLIDE 12 12 Testing: Connect battery cables to the 9 Volt battery. Connect alligator cables to the two ends of a
- speaker. Plug an audio jack into an audio source (PC, MP3, or CD).
Next connect one side of the speaker to ground and one side to OUT on the amplifier circuit. Then connect the + side of the 9 volt battery to the 9 Volt node and the – side of the battery to the ground node. Before connecting the audio source to the input, twist the white wire to the copper ground
- wires. Use only the red wire as your audio input.
Adjust the volume output of the audio source to a low setting. This will minimize amplification of any distortion. Adjust the volume of the amplifier circuit by turning the pot with a small flathead screwdriver (i.e. trim pot). whit e red copper white e red copper
SLIDE 13 13 Integration with the home-made speaker: You may use either a pre-made speaker or your own to test the amplifier circuit. If you choose to use a pre-made speaker at first, once the circuit performs well with a pre-made speaker you can substitute your homemade speaker. Integration with AM Radio: Remove the ear bud from the AM Radio. Use the node after the diode as your audio source for the amplifier circuit. Make sure there is one common ground for all parts. Questions:
- 1. Explain how a NPN transistor works. Refer to class notes. Extra Credit: How
does the transistor amplify the audio coming into its base?
- 2. How is a transistor different than a relay?
- 3. What is the name of the part that was used before transistors in radios and
computers prior to 1950’s?
- 4. Explain three advantages of using transistors compared to these older parts?
- 5. What does the capacitor between the + 9 volts and ground do? Ask if unsure.
- 6. Research other uses for potentiometers (pots). State another application for a pot.
9 Volts Antenna Diode Ground Audio Amplifier