
SLIDE 1
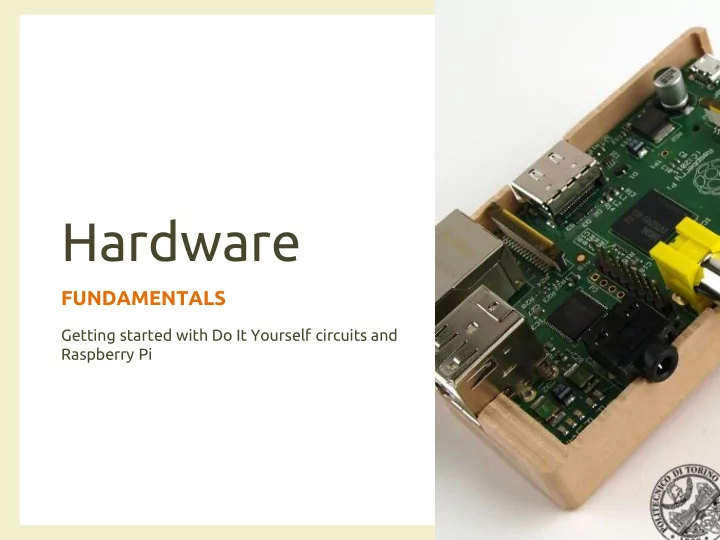
Hardware
FUNDAMENTALS
Getting started with Do It Yourself circuits and Raspberry Pi
Hardware FUNDAMENTALS Getting started with Do It Yourself circuits - - PowerPoint PPT Presentation
Hardware FUNDAMENTALS Getting started with Do It Yourself circuits and Raspberry Pi Hardware? Three main types of hardware (in this course) Commercial, off-the-shelf devices/appliances Do It Yourself solutions The central gateway
FUNDAMENTALS
Getting started with Do It Yourself circuits and Raspberry Pi
– Commercial, off-the-shelf devices/appliances – Do It Yourself solutions – The central gateway
3/10/2014 Hardware fundamentals 2
– The central gateway – Do It Yourself solutions
– Will be treated in detail throughout the course
3/10/2014 Hardware fundamentals 3
3/10/2014 Hardware fundamentals 4
– When available
3/10/2014 Hardware fundamentals 5
– Medium cost – Ready for DIY – Less easy to interface commercial devices – High computational power – Good connectivity
– Low cost – Ready fo DIY – Easy to interface commercial devices – Good computational power – Good connectivity
– Cheap – Ready for DIY – Difficult to interface commercial devices – Low computational power – Low connectivity
3/10/2014 Hardware fundamentals 6
A SHORT INTRODUCTION
A short introduction on Raspberry Pi including hardware, software and DIY capabilities
– The same you would have found in the iPhone 3G and the Kindle 2 – ARM11, 700MHz, 32bit – 512MByte of RAM
– everything is stored on an SD Card
– 2 USB 2.0 ports – Up to 500mA – Not advisable to use for high power loads
– Standard 10/100 (Model B only) – WiFi connectivity via a USB dongle
3/10/2014 Hardware fundamentals 8
– 14 different resolutions – Composite out available (NTSC / PAL) – Can be converted to
– Visual feedback on the Pi status
– Designed to drive high-impedence loads (e.g., active speakers)
– Micro USB connector – Typical rating 5V, 1200mA – Could work from a PC USB (but exceeds USB max current...)
3/10/2014 Hardware fundamentals 9
– To read buttons and switches – To control actuators – Etc.
– To communicate with a LCD or OLED display
– To directly connect a camera module
3/10/2014 Hardware fundamentals 10
– 5V – At least 700mA
– 8GByte – Class 6 or higher for reasonable performances
cards
– Max sink current: 16mA – Max source current: tunable from 2 to 16mA
– Total drawable current
– Total drawable current
increasing the power supply ratings
3/10/2014 Hardware fundamentals 11
– Raspbian
recommended” one
– Occidentalis
to support electronic development
– Arch Linux – PiDora
Raspberry Pi
– Raspbmc
distribution
media center
– OpenElec
based on Syslinux
3/10/2014 Hardware fundamentals 12
– Bit-for-bit representation of how the data shall be written on disk – Cannot be simply copied to the SD card – A disk imaging utility must be used
3/10/2014 Hardware fundamentals 13
3/10/2014 Hardware fundamentals 14
3/10/2014 Hardware fundamentals 15
– User: pi – Password: raspberry (must possibly be changed)
– cat /proc/cpuinfo
– python - -version
– easy_install Rpi.GPIO
3/10/2014 Hardware fundamentals 16
DEMO PROJECTS
– Light-up a red LED using one GPIO port – Control the LED switching from Python
– The Raspberry Pi – A red LED – A NPN transistor (BC337-25 in our example) – A couple of resistors
3/10/2014 Hardware fundamentals 18
by the GPIO output,
– safer to use as control for a power switch (a transistor)
not exceed the maximum ratings
– 40mA on all GPIO
– 8mA on a single GPIO (can be tuned) – Better if lower than 1mA
3/10/2014 Hardware fundamentals 19
330Ω GPIO output GPIO
4.7kΩ 330Ω +5V BC337-25
– The LED causes a voltage drop from 1.2V to around 2V – IGPIO = 3.3V-2V/330Ω = 1.3V/330Ω = 3.94mA – IGPIO = 3.3V-1.2V/330Ω = 2.1V/330Ω = 6,34mA
3/10/2014 Hardware fundamentals
330Ω GPIO output
20
– The LED causes a voltage drop from 1.2V to around 2V – IGPIO = 5V-2V/330Ω = 3V/330Ω = 9mA
– hfemin = 160 – IB=3.3V-0.6V/4.7kΩ= 574 μA
3/10/2014 Hardware fundamentals 21 21
GPIO
4.7kΩ 330Ω +5V BC337-25
3/10/2014 Hardware fundamentals 22
import RPi.GPIO as GPIO import time #set-up pin numbering GPIO.setmode(GPIO.BOARD) #set-up pin function GPIO.setup(15,GPIO.OUT) #iterate 10 times for i in range(10): GPIO.output(15,1) #set the output at 1, LED on time.sleep(1) # keep it for 1 second GPIO.output(15,0) # set the output at 0, LED off time.sleep(1) #keep it for 1 second
Turn alternatively on and off the LED for 10 times
– Design a cheap light sensor – Read the «light level» by using Python
– The Raspberry Pi – A photo-resistor – 2 fixed resistors – A capacitor
– No analog input available
3/10/2014 Hardware fundamentals 23
3/10/2014 Hardware fundamentals 24
GPIO output at logical 0 GPIO as input VDD = + 3.3V VH > 2V t1 = Time to reach logical 1 t1 depends on the circuit time constant (RC) By varying RC t1 increases or decreases If the R value depends on the amount of incident light, then t1 depends on the light intensity Photoresistors: reduce their actual resistance when illuminated
– VGPIO<0.7 V
– VGPIO> 2 V
3/10/2014 Hardware fundamentals 25
+3.3V 10kΩ 2 - 20kΩ 1μF GPIO input 330Ω
– RCmin = 2kΩ * 1μF =2ms – RCmax = 21kΩ * 1μF =21ms
3/10/2014 Hardware fundamentals 26
+3.3V 1kΩ 2 - 20kΩ 1μF GPIO input 470Ω
– Set GPIO as output – Write 0 – Set GPIO as input – Count time to get 1 in input
3/10/2014 Hardware fundamentals 27
+3.3V 10kΩ 2 - 20kΩ 1μF GPIO input 470Ω
3/10/2014 Hardware fundamentals 28 import RPi.GPIO as GPIO, time, os DEBUG = 1 GPIO.setmode(GPIO.BOARD) def RCtime (RCpin): reading = 0 GPIO.setup(RCpin, GPIO.OUT) GPIO.output(RCpin, GPIO.LOW) time.sleep(0.2) GPIO.setup(RCpin, GPIO.IN) # This takes about 1 millisecond per loop cycle start = time.time() while (GPIO.input(RCpin) == GPIO.LOW): reading += 1 print (time.time()-start)*1000.0, "ms" return reading GPIO.setup(15,GPIO.OUT) while True: rc = RCtime(13) #print rc if rc < 1000: GPIO.output(15,GPIO.LOW) else: GPIO.output(15,GPIO.HIGH)
Turn on the LED if the lighting level drops
– Light-up a red LED using one GPIO port when a button is pressed – Detect button pressing from Python
– The Raspberry Pi – A red LED – A NPN transistor (BC337-25 in our example) – A couple of resistors – A capacitor – A push-button
3/10/2014 Hardware fundamentals 29
– To avoid capturing button bounces – Based on the RC circuit – TTL 3V has Von at 2V – In first instance we can assume that the time required to reach such level is equal to RC (time to reach 63%
3/10/2014 Hardware fundamentals 30
– 4.7kΩ*1μF = 4.7ms
3/10/2014 Hardware fundamentals 31
3/10/2014 Hardware fundamentals 32
import RPi.GPIO as GPIO, time, os DEBUG = 1 #set-up pin numbering GPIO.setmode(GPIO.BOARD) def button_to_led (RCpin): # set-up pins GPIO.setup(RCpin, GPIO.IN) GPIO.setup(15,GPIO.OUT) # This takes about 1 millisecond per loop cycle while (True): if(GPIO.input(RCpin) == False): GPIO.output(15,GPIO.HIGH) else: GPIO.output(15,GPIO.LOW) return button_to_led(11)
Turn on the LED when the button is pressed (by design the GPIO input will be at 0)
01PRD AMBIENT INTELLIGENCE: TECHNOLOGY AND DESIGN
Dario Bonino dario.bonino@polito.it