Digitizing 35mm Slides by Dan Hyde Last update July 14, 2020 I - - PDF document

digitizing 35mm slides by dan hyde last update july 14
SMART_READER_LITE
LIVE PREVIEW

Digitizing 35mm Slides by Dan Hyde Last update July 14, 2020 I - - PDF document

Digitizing 35mm Slides by Dan Hyde Last update July 14, 2020 I have several thousand old 35mm slides from the 1970-1990 era. I would like to digitize a bunch of them in order to display and preserve them. But how to do it? This article


slide-1
SLIDE 1

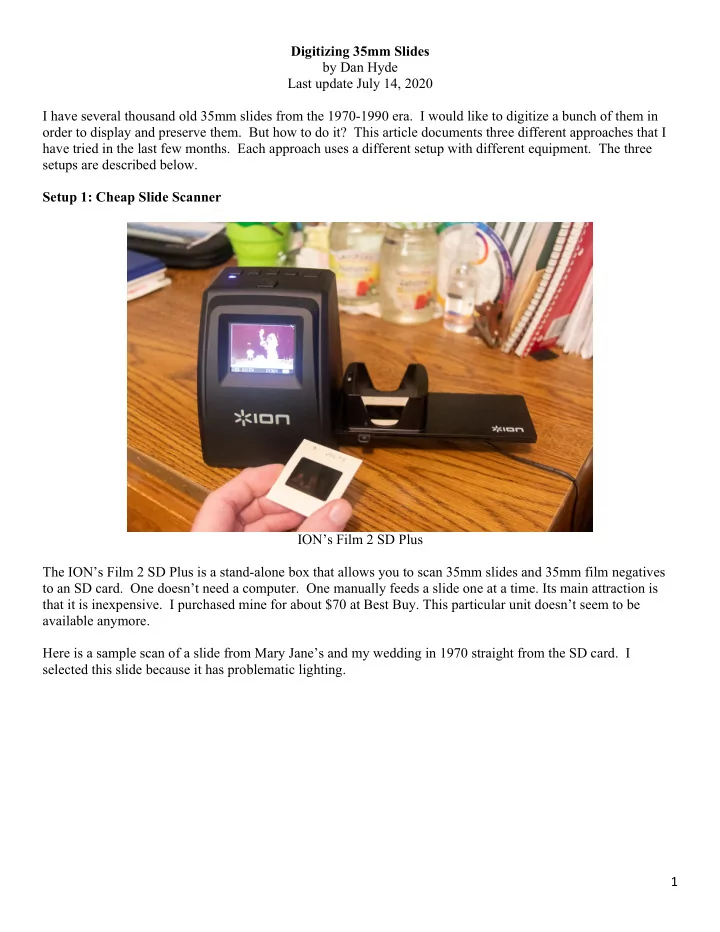
1 Digitizing 35mm Slides by Dan Hyde Last update July 14, 2020 I have several thousand old 35mm slides from the 1970-1990 era. I would like to digitize a bunch of them in

  • rder to display and preserve them. But how to do it? This article documents three different approaches that I

have tried in the last few months. Each approach uses a different setup with different equipment. The three setups are described below. Setup 1: Cheap Slide Scanner ION’s Film 2 SD Plus The ION’s Film 2 SD Plus is a stand-alone box that allows you to scan 35mm slides and 35mm film negatives to an SD card. One doesn’t need a computer. One manually feeds a slide one at a time. Its main attraction is that it is inexpensive. I purchased mine for about $70 at Best Buy. This particular unit doesn’t seem to be available anymore. Here is a sample scan of a slide from Mary Jane’s and my wedding in 1970 straight from the SD card. I selected this slide because it has problematic lighting.

slide-2
SLIDE 2

2 Results using ION’s Film 2 SD Plus – straight from SD card Manipulating the previous image in Lightroom for white balance, and other basic adjustments Some may find the unit useful but I found it disappointing in image quality. There are a bunch of 35mm slide scanners on the market in the $50 to $150 range, but from what I have read they all produce disappointing image results.

slide-3
SLIDE 3

3 Setup 2: Use your DSLR Camera and shoot the slides yourself One solution is to use your high quality DSLR camera and a macro lens. Here is how I did it.

  • 1. You need a source of white light such as a light table. I used my iPad running the app “Trace Table.”
  • 2. You need to cover the light source except for a rectangle the size of the slides. I used black felt cloth

large enough to cover my iPad. In the middle of the cloth, I cut a rectangle slightly larger than 35mm by 24mm (size of a 35mm slide). I used Blue Tape to tape the cloth to my iPad so it wouldn’t move if I accidently bumped it. If you don’t block the light, you will get flare around the edges of the slides that interferes with the image. I think black paper would be a good alternative to the black felt.

  • 3. Mount your camera on a tripod so you can shoot the slides. My tripod allows me to swing the center

column to be horizonal. That way I can shoot down on the slide lying on the iPad. Since I wanted to focus each slide carefully, I mounted my camera on a focusing rail to make it easier to focus. Since one is shooting macro and small, the slightest vibrations can ruin an image. Therefore, I used a remote shutter switch (cost about $20, an example for Canon cameras is the Canon RS-60E3 Remote Switch) and was careful to shoot when I saw no vibrations.

  • 4. I set my Canon 80D camera to Program Mode (P), to a low ISO, e.g., 400 and used Canon’s Liveview

so I could see the slide’s image on the camera’s rear screen. Since the iPad has plenty of light, I let the camera select the shutter speed and aperture.

  • 5. I used my Canon 60mm macro lens to allow me to get close enough so the slide’s image fills the

camera’s screen. At this close range, your camera’s autofocus system may refuse to work or give the wrong results. Therefore, set your lens to manual focus and focus manually.

  • 6. To handle the slides, it is best to wear lint-free white gloves. Otherwise, it is easy to get fingerprints on

the slides. I used an air bulb to blow off any dust on each slide. Face the emulsion side of the slide away from the camera, i.e., down in my case. On a 35mm slide, one side is shiny and the other side--the emulsion side--is duller. If you shoot the wrong side, you can flip the image horizontally later in post.

  • 7. Carefully lay a slide on the hole cut in the felt, align the slide to the image you wish, focus manually,

and shoot. Watch for and avoid vibrations. Once you have the setup, you can quickly shoot a pile of

slide-4
SLIDE 4

4 35mm slides. You will probably have to refocus for each slide and do some significant post processing

  • f each slide in a photo editing program like Adobe Lightroom.

Using Setup 2, here is the result with the same slide of Mary Jane’s and my wedding in 1970. Straight from the camera using Setup 2. The previous image after minor adjustments in Lightroom to bring out details in the cake and dress.

slide-5
SLIDE 5

5 The result is clearly better than the cheap ION box. However, I found I had to do a lot of fiddling with the

  • setup. I found I had to refocus every slide and had to retake shots often because I didn’t align the slide correctly
  • r didn’t lay the slide perfectly flat.

I figure including the time for the shooting and the post processing, you would be doing good if you could average 5 minutes a slide. That’s 12 slides an hour! If you wanted to scan 100 slides, it would take you 8.3

  • hours. These results would probably turn most photographers off from digitizing several thousand slides! J

Setup 3: Spend More Money for a Good Slide Scanner Since a good professional slide scanner can cost $5000, I had avoided searching for a better film scanner than the one in Setup 1. Once I had decided to give a presentation to the Lewisburg Photography Club, I decided to see if there was a relatively inexpensive solution that could do better than my DSLR setup in Setup 2. Surprisingly, I found one for $500. This is described in Setup 3. plustek OpticFilm 8200i SE 35mm slide and film scanner After spending several hours Googling the web for 35mm slide and film scanners, I discovered that people raved about one model, the plustek OpticFilm 8200i SE. They said it produced great images and it was only $399. I decided to take the plunge and purchase one. It can scan at resolutions up to 7200 ppi, though reviewers claim that 3600 ppi produces just as good images but is faster. Though the digital sensor may be designed for 7200 ppi, other components seem to limit the quality above 3600 ppi. The unit plugs into a computer via a USB cable and comes with software for both Windows and Mac. The reviewers stated that the supplied software, SilverFast, was clunky and not great. They highly recommended purchasing the software package VueScan. The VueScan software cost me an additional $99. I tried both the supplied software SilverFast and VueScan. VueScan is a clear winner and worth the extra money! The plustek 8200i comes with a nice slide holder for four slides that you insert into a slot on the side of the box. You must manually push the next slide into position. The reviewers recommended that one purchase an extra slide holder so one can load a second holder while scanning from the supplied one. I purchased two extra slide holders for $20. After careful inspection of the images on the next page, you will see that the result from the plustek/VueScan scan is better than the result from my DSLR camera in Setup 2! Even without any post processing in Lightroom, the plustek and VueScan combo’s resulting image is very good on a slide with problematic lighting.

slide-6
SLIDE 6

6 The famous wedding slide with a scan of 3600 ppi with infrared detection on and other auto settings on. The wedding shot straight from plustek with 3600 ppi scan and infrared detection cleaning on. I used Lightroom on the previous image to slightly brighten the shadows.

slide-7
SLIDE 7

7 Photo of black and white image of the infrared scan to show the dust and scratches. The unit has an integrated infrared dust and scratch removal feature that reviewers stated works very well. When this feature is turned on, a special scan with an infrared beam detects dust and scratches that are then removed from the image digitally like Photoshop does with its Spot Healing Brush. VueScan shows a black and white image so you can see the dust and scratches, as shown in above image. This extra scan does take more time, in the order of 30 seconds more. Photo of VueScan’s user interface showing dashed rectangular crop box after a Preview.

slide-8
SLIDE 8

8 Preview (prescan) and scan at 3600 ppi with infrared detection cleaning together takes about one and a half

  • minutes. One pushes in the slide then clicks “Preview” in VueScan (lower left in above image), adjusts the

cropping window if needed, and clicks “Scan” in VueScan. No fiddling! No hassles! Since the output quality from the plustek/VueScan combo is very good, one does not need to do any post processing on most slides. Therefore, I figure one can insert new slides and scan them under two minutes on average or about 30 slides an

  • hour. Still slow but faster than the Setup 2 approach.

The big difference between the plustek and the expensive $5000 slide scanners is batching. For the plustek scanner, you need to manually feed in each slide. The more expensive scanners allow you to load 50 or more slides in a batch, press the button, and walk away for several hours. The Pacific Image PowerSlide X Automated 35mm Slide Scanner is one slide scanner that allows you to batch up to 50 slides. It only cost $900, but unfortunately, the reviewers say it is very noisy, prone to jam, and not

  • recommended. For a quality slide scanner that batches 50 slides, one needs to spend $3200 on a Braun

MULTIMAG SlideScan 7000 Film Scanner. The Braun batches 50 slides in a horizontal tray like many old slide projectors used. From reading reviews, the Braun seems to be reliable and quiet. But who has $3200 for the specialized task of scanning slides? In conclusion, I’m very happy with the performance of the plustek and VueScan combination and it only cost me $500. One can set up VueScan to ring a tone at the end of each scan to gain your attention so you can do the next manual action, e.g., adjust the crop box on what you want to scan after a Preview. Most of the time VueScan selects a good crop box for you and you just press “Scan” to continue. Therefore, you can be productive doing other work on your computer while you baby the scanner. I really like that I usually don’t need to do any post processing on the digitized images. That’s a big time saver. Issues White lint-free gloves.

  • 1. Don’t handle slides with bare hands! Wear white lint-free gloves. White lint-free gloves cost $9 for

12 pairs at B&H. It is very easy to put oily fingerprints on your slides by accident! Hard to see those fingerprints and hard to remove.

slide-9
SLIDE 9

9

  • 2. Dust, cat hairs, and scratches – Use an air bulb (on right in above photo) to blow off dust and a camel-

hair brush (upper left) to gently sweep off dust. I use both on both sides of a slide before I scan it.

  • 3. Fingerprints – Be careful handling your slides. It’s easy to accidently place a fingerprint on the slide.

Wear lint-free gloves. Fingerprints can be removed with a micro-fiber cloth (black cloth on the left).

  • 4. Use anti-static brush – If you have lots of trouble with dust on your slides, you might try an anti-static
  • brush. I don’t use one as I’m afraid I might scratch the slide. I use an air bulb and a camel-hair brush

made for negatives.

  • 5. Bent or warped slides – Try to flatten if possible. The slide holder that comes with the plustek scanner

is very good at holding 35mm slides snug and flat.

  • 6. Mildew and mold – MAY be removed with film cleaner fluid. If the mold has eaten into the emulsion,

there is little one can do. If mold is in a uniform area like the sky, you can try removing the bad area in postproduction with a software photo editor like Lightroom.

  • 7. Storage of slides – Store your slides in a cool, dry environment where the temperature and humidity are
  • controlled. Don’t store in a garage, basement, or attic or it will be mold and mildew city!
  • 8. File names associated with slides – VueScan allows you to set up the folder and format of the base file

name and automatically advances the count by one after scanning each slide. You can just forget about it once you set it up. In contrast, the SilverFast software that’s supplied with the plustek scanner requires you to enter the file name for each slide! Big pain! It’s very easy to forget to update the file name! One of MANY reasons to avoid the supplied SilverFast software.

  • 9. Which slides to scan? Scanning 35mm slides is a lot of work. Be very selective which ones you scan!