2 prep heated bed sandwich
play

2 - #prep Heated Bed: Sandwich IF you're upgrading from cold bed to - PDF document

2 - #prep Heated Bed: Sandwich IF you're upgrading from cold bed to heated bed Reuse 4 bearings from the cold bed Reuse smooth rods IF you're upgrading from JellyBOX 1.2 or earlier, all the holes may not be pre-cut in your acrylic


  1. 2 - #prep Heated Bed: Sandwich IF you're upgrading from cold bed to heated bed • Reuse 4 bearings from the cold bed • Reuse smooth rods IF you're upgrading from JellyBOX 1.2 or earlier, all the holes may not be pre-cut in your acrylic parts. • Get a drill ready • 8mm drill bit (or bigger) • 3mm drill bit (or bigger; any that will work with 4'' zip tie, which is 2.4mm thick) 
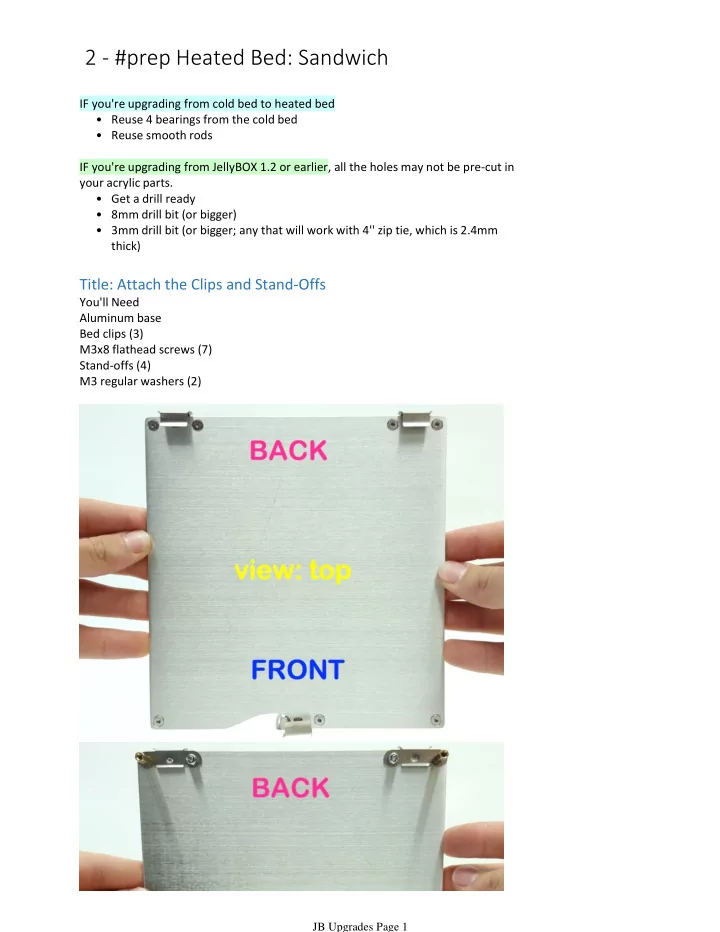
Title: Attach the Clips and Stand-Offs You'll Need Aluminum base Bed clips (3) M3x8 flathead screws (7) Stand-offs (4) M3 regular washers (2) JB Upgrades Page 1

  2. In short, use the hardware to attach two clips in the back and one in front. Read on for more detailed instructions. Attach the clip that is bent in the middle in front. Use only one screw and leave it a bit loose so that the clip can swivel open and close. JB Upgrades Page 2

  3. All the spacers go in corners. In the back, use the spacers in corners in place of the M3 nylocks. In front , put one regular M3 washer underneath the spacer (these washers offset the thickness of the clips used in the back). There are no washers between the locknuts and the clips - the clips themselves function as washers. Tighten all of these well. Title: Silicone Heater JB Upgrades Page 3

  4. Title: Silicone Heater Insert the aluminum build plate. This way, the clips won't be in the way. Turn the assembly upside down. JB Upgrades Page 4

  5. Peel the adhesive backing of the silicone heater. Stick the heater onto the bottom of the bed assembly. Make sure the wires are exiting on the same left side as in the picture. (Sorry. Hidden under my left hand.) Press the heater down gently but firmly. Tip: Try to stick the heater as far back as possible. JB Upgrades Page 5

  6. In the front, you may end up with a slight overlap between the front clip and the heater. That's ok. Title: Cork Insulation Peel the backing off the cork insulation. JB Upgrades Page 6

  7. JB Upgrades Page 7

  8. Stick it onto the silicone heater. There will be about 1mm gap on all sides. The cuts-slots in the cork will help you follow the bumpy contours of the heater wiring. Start by firmly pressing on all the flat parts of he cork, and carefully finish up with the wire area. Title: Attach the Bearings JB Upgrades Page 8

  9. Now let's attach four bearing on the bottom of the acrylic base. Note: The pictures in this guide mostly feature a pre-production acrylic plate with no etchings. Yours is nicer (like the one shown here)! JB Upgrades Page 9

  10. Peel the protective layer off the acrylic base. JB Upgrades Page 10

  11. JB Upgrades Page 11

  12. Attach the 4 bearings with eight 4'' zip ties. Make sure the bearings are on the bottom when looking from front! Pro Tip: First thread in all the zip ties. Then put in all the bearings. Then tighten all the bearings with vise grip. It's more efficient than one-by-one. Title: Put it Together JB Upgrades Page 12

  13. Final step is the put the acrylic base and the rest together. JB Upgrades Page 13

  14. Start by pulling the heater wires through the acrylic base as shown in the picture. Be careful when pulling through the heat-shrunk connection point of the thin thermistor wire. JB Upgrades Page 14

  15. Secure the connection with four M3x10 cap screws and four serrated washers. Did I mention serrated washers? Only use the short shaft of the hex key - it gives you enough force and you won't overtighten the screws. Title: Tip: Fixing a Loose Build Plate JB Upgrades Page 15

  16. Quick release build plate on heated platform sure is convenient (!), but it may come loose at times. To fix this issue, you can: • re-compress the metal clips • (Filip's favorite) put some blue tape onto the edge of the build plate. Use as many layers as needed. Success! Title: Done! JB Upgrades Page 16

Download Presentation
Download Policy: The content available on the website is offered to you 'AS IS' for your personal information and use only. It cannot be commercialized, licensed, or distributed on other websites without prior consent from the author. To download a presentation, simply click this link. If you encounter any difficulties during the download process, it's possible that the publisher has removed the file from their server.

Recommend


More recommend