
SLIDE 1
- P. Stagge
Turning Point Software 1 2012 Creating and Inserting Slides Using Turning Point Software Creating and Inserting Slides Creating a new slide:
- A. Locate the Turning Point icon on the desktop and double click
If there is no icon on the desktop Click the Start button located in the left hand corner of the task bar Click All Programs Locate the Turning Technologies folder Select the Turning Point folder Click the Turning Point icon The Turning Point dashboard will open up
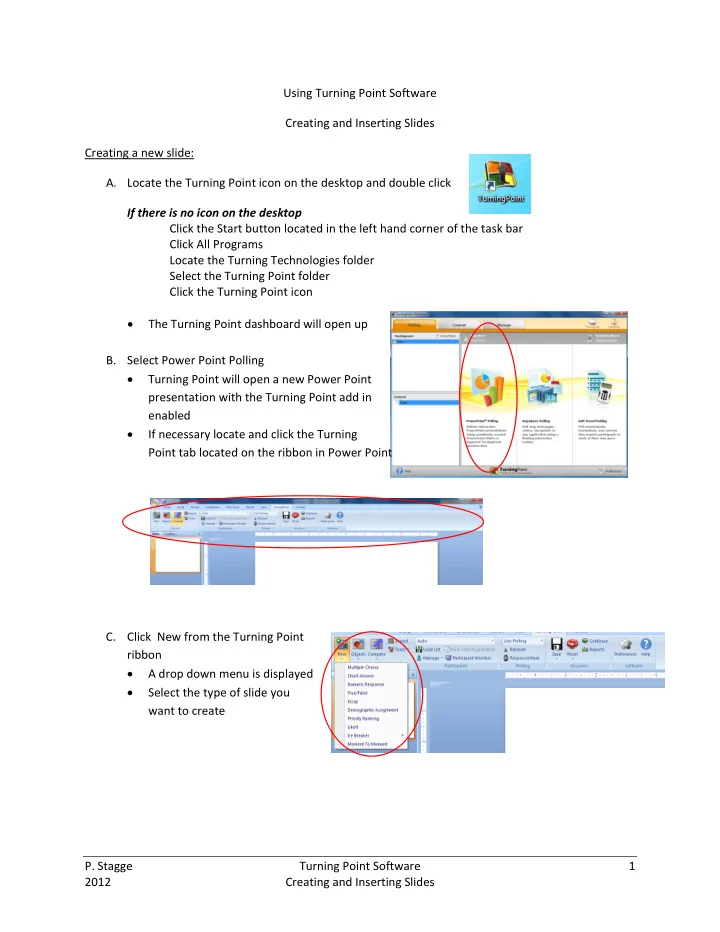
- B. Select Power Point Polling
Turning Point will open a new Power Point presentation with the Turning Point add in enabled If necessary locate and click the Turning Point tab located on the ribbon in Power Point
- C. Click New from the Turning Point