
SLIDE 1
Proj 1: Solution Proj 1: Solution
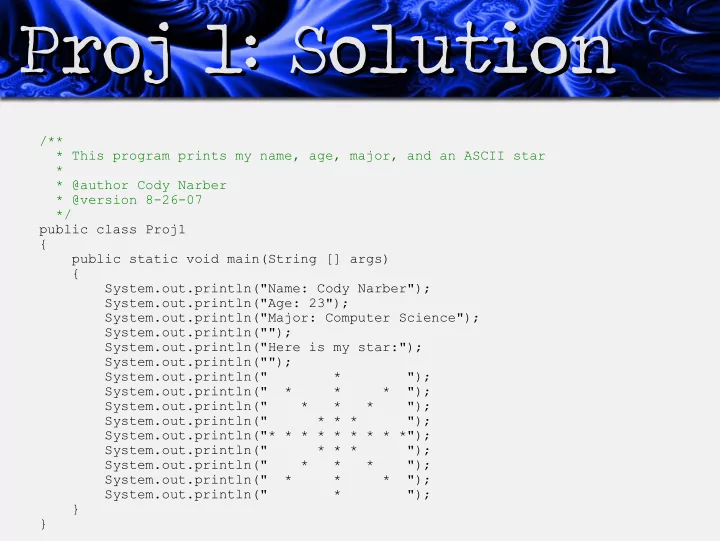
/** * This program prints my name, age, major, and an ASCII star * * @author Cody Narber * @version 8-26-07 */ public class Proj1 { public static void main(String [] args) { System.out.println("Name: Cody Narber"); System.out.println("Age: 23"); System.out.println("Major: Computer Science"); System.out.println(""); System.out.println("Here is my star:"); System.out.println(""); System.out.println(" * "); System.out.println(" * * * "); System.out.println(" * * * "); System.out.println(" * * * "); System.out.println("* * * * * * * * *"); System.out.println(" * * * "); System.out.println(" * * * "); System.out.println(" * * * "); System.out.println(" * "); } }