
SLIDE 1
1
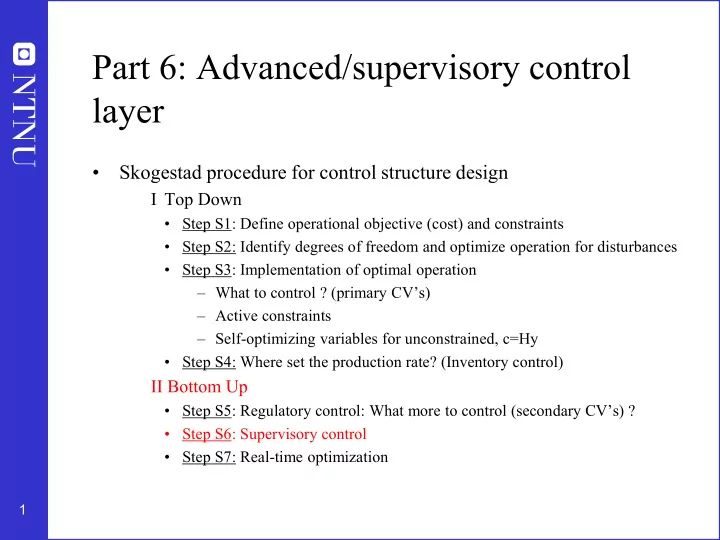
Part 6: Advanced/supervisory control layer
- Skogestad procedure for control structure design
I Top Down
- Step S1: Define operational objective (cost) and constraints
- Step S2: Identify degrees of freedom and optimize operation for disturbances
- Step S3: Implementation of optimal operation
– What to control ? (primary CV’s) – Active constraints – Self-optimizing variables for unconstrained, c=Hy
- Step S4: Where set the production rate? (Inventory control)
II Bottom Up
- Step S5: Regulatory control: What more to control (secondary CV’s) ?
- Step S6: Supervisory control
- Step S7: Real-time optimization