SLIDE 1
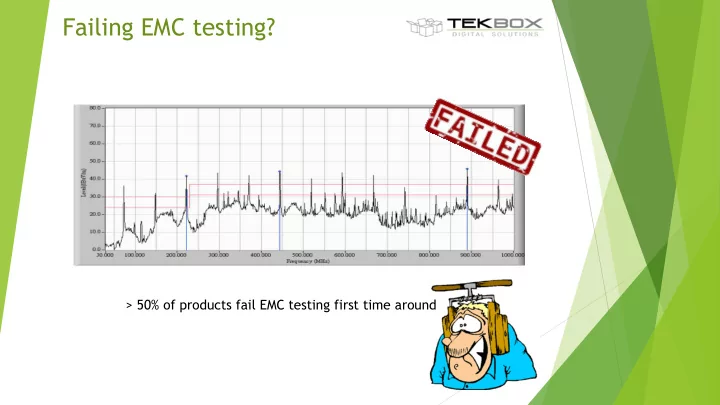
Failing EMC testing?
> 50% of products fail EMC testing first time around
SLIDE 2 Situation
An engineer of a small or medium size enterprise usually has to rely on his experience and on best practice methods in order to design an EMC compliant product. Nevertheless, it is estimated that > 50% of products fail testing first time
- around. Anytime an engineer sends a new product for compliance testing, it is a
shot in the dark. Failing is very expensive. Not only that re-testing costs are high, but also the project schedule and market introduction gets delayed.
What to do?
Besides applying best practice with respect to all EMC related aspects
- f the design, it is essential to carry out pre-compliance testing
- Pre – compliance testing in a test house
- Pre – compliance testing in-house
SLIDE 3
EMC pre-compliance testing
Pre – compliance testing in a test house Radiated emission tests are typically carried out in anechoic chambers, using antennas to pick up the radiated signals. Due to bandwidth limitations, several antennas are required to cover the complete frequency range. Furthermore, it requires much space and the cost of the equipment for a standard conformant setup is immense. Advantage: standard compliant test set up and accurate measurement results Disadvantage: very expensive; time consuming – a test house is not always around the corner and not any time available; quick modifications of the DUT can not be carried out as conveniently as in the own lab Pre – compliance testing in-house Advantage: there are solutions for any budget; convenient; modifications can be checked with respect to their effect on EMC immediately; Disadvantage: depending on the available equipment, the set-up may not be standard conformant; measurement results may need to be considered being rather qualitative or relative than quantitative, results must be interpreted carefully in order to develop countermeasures historical data needs to be tracked to form meaningful limits on radiation
SLIDE 4 Tekbox EMC pre-compliance solutions
One of the key components for an in-house EMC compliance test set up is a spectrum analyzer. Spectrum analyzers have significantly dropped in price over the last years. Entry level models already start at approximately 1,5K USD. However price of the remaining equippment required for pre-compliance testing is still high. In the laboratory of Tekbox, various EMC pre-compliance accessories were built
- ver the years for the purpose of in-house testing. It significantly reduced our failure
- rate. Consequently we decided to industrialize our tools and to offer it at a very
competitive price. With Tekbox products, EMC pre-compliance testing has become affordable for any company. A complete pre-compliance set up may cost less than repeating a failed EMC test at the test house. Products: 5µH LISN for conducted emission testing of DC powered equipment TEM cell for radiated emission and immunity testing EMC probe set to localize the origin of emissions or to localize the origin of immunity issues Roadmap Q2/Q3 2015: 50µH LISN for conducted emission testing of AC powered equipment Low cost power amplifiers for immunity testing; larger TEM cell for larger products
SLIDE 5 EMC precompliance test flow
- Step 1: Conducted emission testing and improvement
Conducted emissions often go hand in hand with radiated emissions. Reducing conducted emissions usually also reduces radiated emissions Required equipment: spectrum analyzer + LISN
- Step 2: Radiated emission testing
Check the radiated spectrum for spurious with excessive level Required equipment: spectrum analyzer + TEM cell
- Step 3: Localize the source(s) of excessive radiation and improvement
Scan the board with near field probes to track down the sources of radiation and apply countermeasures Required equipment: spectrum analyzer + EMC near field probes
- Step 4: RF immunity testing
Check the product for RF immunity issues Required equipment: RF signal gemerator + RF power amplifier + TEM cell
- Step 5: Localize the origin of immunity issues and improvement
Feed the near field probes with an RF signal and scan the board to track down the origin of immunity issues; apply countermeasures Required equipment: RF signal gemerator + (RF power amplifier) + TEM cell
SLIDE 6
Conducted emission testing
Setup for conducted emission testing of DC-powered equipment (e.g. CISPR25) The DUT shall be isolated and elevated from the groundplane. The spectrum analyzer shall measure the conducted emissions on both supply lines. The RF output of the unused LISN shall be terminated with 50 Ohm. If the power return line is less than 2 m, a setup with a single LISN is sufficient. For the exact details of the set up and for the limits of conducted emissions refer to the CISPR 25 or relevant applicable standard.
SLIDE 7 Conducted emission testing
Setup for conducted emission testing of AC-powered equipment (e.g.CISPR16) The DUT shall be isolated and elevated from the groundplane. The spectrum analyzer shall measure the conducted emissions on both line and neutral. The value of the parallel combination of the capacitors is 12µF from line and neutral to ground. This causes around 0.75A flowing into the earth connection and would trip the ground fault switch. Hence, an insulation transformer is required and good grounding is essential for safety. For the exact details of the set up and for the limits of conducted emissions refer to the CISPR 16 or other relevant applicable standard. A built in limiter or a limiter between the LISN RF output and spectrum analyzer is essential for the protection
SLIDE 8
Radiated emission testing
Setup for radiated emission testing Terminate any of the two ports of the TEM cell with the 50Ω load, connect the DC-Block to the other port and connect it to the input of the spectrum analyzer. Place the DUT under the septum and power it on. Monitor the radiated spectrum. As a rule of thumb, given that the PCB is positioned not much higher than 1-2cm above the bottom wall, any spurious with amplitudes higher than 40dµV may potentially cause a failed compliance test. Use compliance tested DUTs and the corresponding test reports as a reference for measurements in the TEM cell.
SLIDE 9
Localizing the source of emissions
Localize the source of unwanted emissions on the DUT PCB using near field probes and a spectrum analyzer. Implement counter measures and re-test the DUT inside the TEM cell to verify if the modifications result in a reduction of the radiated emissions
SLIDE 10
RF immunity testing
Setup for RF immunity testing Terminate any of the two ports of the TEM cell with the 50Ω load, and connect the signal generator + power amplifier to the other port. The signal needs to be AM modulated (80%) according to most standards. The power of the signal has to be chosen according to the required field strength. Place the DUT under the septum and power it on. Sweep the signal generator and monitor the DUT for RF immunity issues. The picture above shows a minimum setup. Inserting a directional coupler with connected RF power meter in between power amplifier and TEM cell would be of advantage to monitor power levels.
SLIDE 11
Localizing the origin of immunity issues
Localize the section on the DUT PCB which is susceptible to RF . Use a power amplifier only, if the output power of the Signal generator alone was not sufficient to reproduce the immunity issue. Implement counter measures and re-test the DUT inside the TEM cell to verify if the modifications removed the RF immunity issues.
SLIDE 12
Further details can be found in our product manuals on www.tekbox.net