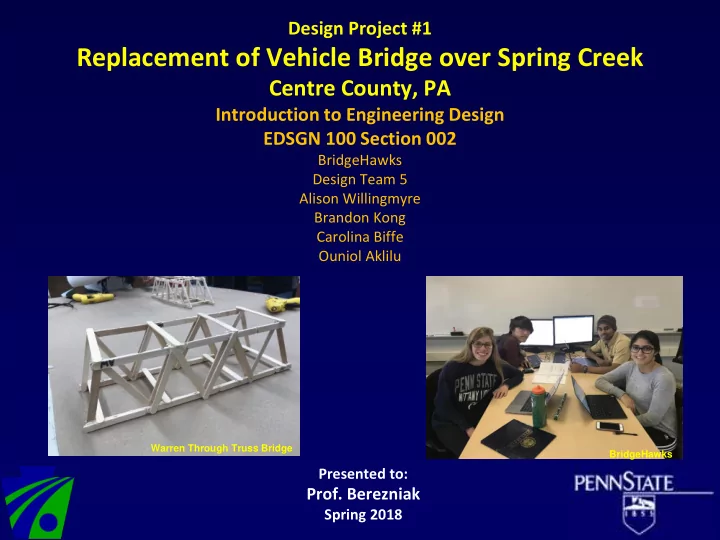
SLIDE 1 Warren Through Truss Bridge BridgeHawks
Design Project #1
Replacement of Vehicle Bridge over Spring Creek
Centre County, PA
Introduction to Engineering Design EDSGN 100 Section 002
BridgeHawks Design Team 5 Alison Willingmyre Brandon Kong Carolina Biffe Ouniol Aklilu Presented to:
Spring 2018
SLIDE 2
Statement of the Problem Severe flooding has caused a bridge located on a road of heavy traffic to collapse, causing many problems along with it. Access to medical care at the Mount Nittany Medical Center and local commerce depended on this bridge and must now be re-routed disrupting the daily flow of traffic.
2
SLIDE 3 Project Objective Quickly and effectively design a vehicle bridge to replace the
- riginal bridge that resided over
Spring Creek in response to the flood emergency.
3
SLIDE 4
Required Design Criteria
The replacement bridge must include: ✓ standard abutments ✓ one span ✓ medium strength concrete as deck material ✓ no cable anchorages ✓ designed for the load of two 225kN trucks, one in each traffic lane ✓ bridge deck elevation should be 20 meters ✓ bridge deck span should be 40 meters ✓ concept designs for a Warren and Howe through truss bridge should be completed.
4
cable anchorages
SLIDE 5
The Technical Approach Phase 1: Economic Efficiency
Based on the criteria in the previous slide, the cost should be determined using the EEBD 2016 software program. Each through truss bridge cost should be optimized while still ensuring that the replacement bridge can safely support the dead load and required live load. In other words, each bridge should have the lowest cost possible within the range of $150,000 to $250,000 while remaining safe.
5
SLIDE 6 The Technical Approach Phase 2: Structural Efficiency
A standard prototype for each bridge will be created and load tested to
- failure. From this, the bridge
exhibiting the best structural efficiency should be determined. The structural efficiency is the ability of a truss bridge to safely dissipate live
- loads. It is calculated by
6
“Real life” load testing
SLIDE 7 The Results Phase 1: Economic Efficiency
Warren Truss
- Quenched & tempered was used in majority; had high strength to weight ratio
allowing for thinner members (which caused the greatest cost reduction).
- Carbon steel was exception in members 6,8, 13, and 15…has a limit of how slim
it can be.
- Hollow tubes were used majority; their cost was less than a bar of equal
compressive and tensile strength.
7
wherever possible. Less material = lower cost.
Howe Truss
- Quenched & tempered steel was determined to be the most efficient material
in relation to cost. It was used throughout.
- Solid bars were used where the tension was the largest.
- Hollow tubes were used where compression was the largest.
- Tried to use hollow tubes often (65%) because they were the biggest factor to
decrease cost.
7
- Thicker tubes were used for
top chords otherwise tubes were made as thin as possible without sacrificing safety to reduce cost.
SLIDE 8 The Results Phase 2: Structural Efficiency
8
Warren Truss
0.1781Ibs
66Ibs
371 Structural efficiency was the 3rd highest, higher than class average of 338. Truss failed in breakage in bottom chord of prototype due to shear stress at a glued joint between sticks. Reasons for failure:
Both constructed with 60 popsicle sticks (4x4.5x13.5 in) and held together with Elmer’s glue and water mixture to help with glue absorption into wood 26 sticks were used for each truss; 8 sticks were used for floor beams and struts. Warren Truss Bridge Prototype Failure after Load Testing
- Was only supported at two sticks instead of 3 at place where shear stress
was high
- Sticks were not properly glued at bottom chord and the shear stress could
have been distributed unevenly
Howe Truss
0.1825Ibs
66 Ibs
362 Structural efficiency was the 3rd highest, higher than class average of 294. Truss failed at the popsicle glued in the center of the bottom chord (location of most tension based on simulation). Reasons for failure:
- More support to sustain high
tension in middle.
- Glue needing additional cure time.
8
Both constructed with 60 popsicle sticks (4x4.5x13.5 in) and held together with Elmer’s glue and water mixture to help with glue absorption into wood 26 sticks were used for each truss; 8 sticks were used for floor beams and struts. Howe Truss Bridge Prototype Failure after Load Testing
SLIDE 9 The Best Solution
For the Howe Truss, Strengthening Middle Bottom cord through
- Adding more sticks to the bottom chord
- Adding more glue to strengthen the bonds between the fibers of the
sticks. For the Warren Truss,
- Adding more sticks to places where the shear stress is high
- Also give more time for curing the bottom chord since lot of sticks were
glued to construct it. We recommend the Warren Truss Bridge design.
9
SLIDE 10
Our Conclusions
The objective of the project was to design a vehicle bridge that is cost and structurally efficient to replace the original bridge that resided over Spring Creek in response to the flood emergency. Our bridges were comparatively cost efficient and the structure designed sustained quite a load. For the Howe Truss, Cost: 212,698.18 Efficiency: 362 For the Warren Truss, Cost: 187,333.72 Efficiency: 371 This project was important because you learn that when you design a structure, you are not only thinking of how to make the structure strong, but also the cost to build the structure.
10
SLIDE 11 Our Recommendations
To advance to the final bridge design, we should be able:
- Strengthen parts with high tension
- Tweak designs to lower cost
We need a more detailed investigations on the bottom chord since they face the highest tension from all the bridge parts. Some course of action to take would be:
- Review your bridge for weak sticks
- Glue parts of your bridge if they are loose
- Allow more curing time
11
SLIDE 12
In Closing
We would like to thank PennDot for giving the chance to show what we were capable of and sponsoring this project. Paula Scher once said “It’s through mistakes that you actually can grow. You have to get bad in order to get good.”