SLIDE 1
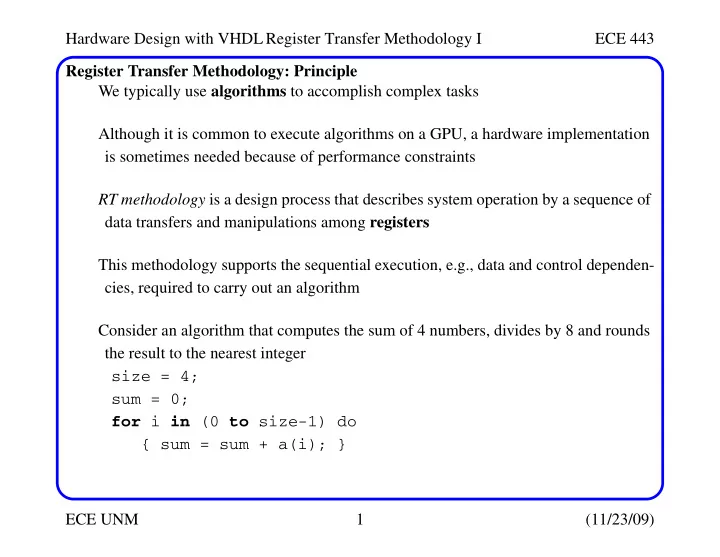
Hardware Design with VHDL Register Transfer Methodology I ECE 443 ECE UNM 1 (11/23/09) Register Transfer Methodology: Principle We typically use algorithms to accomplish complex tasks Although it is common to execute algorithms on a GPU, a hardware implementation is sometimes needed because of performance constraints RT methodology is a design process that describes system operation by a sequence of data transfers and manipulations among registers This methodology supports the sequential execution, e.g., data and control dependen- cies, required to carry out an algorithm Consider an algorithm that computes the sum of 4 numbers, divides by 8 and rounds the result to the nearest integer size = 4; sum = 0; for i in (0 to size-1) do { sum = sum + a(i); }
SLIDE 2 Hardware Design with VHDL Register Transfer Methodology I ECE 443 ECE UNM 2 (11/23/09) Register Transfer Methodology: Principle q = sum/8; r = sum rem 8; if (r > 3) { q = q + 1; }
Algorithm characteristics:
- Algorithms use variables, memory locations with a symbolic addresses
Variables can be used to store intermediate results
- Algorithms are executed sequentially and the order of the steps is important
As we know, variables and sequential execution are supported as a special case and are encapsulated inside a process However, variables are NOT treated as symbolic names for memory locations! We also note that the sequential semantics of an algorithm are very different from the concurrent model of hardware
SLIDE 3 Hardware Design with VHDL Register Transfer Methodology I ECE 443 ECE UNM 3 (11/23/09) Register Transfer Methodology: Principle What we have learned so far is how to transfer sequential execution into a struc- tural data flow, where the sequence is embedded in the ’flow of data’ This is accomplished by mapping an algorithm into a system of cascading hard- ware blocks, where each block represents a statement in the algorithm The previous algorithm can be unrolled into a data flow diagram sum <= 0; sum0 <= a(0); sum1 <= sum0 + a(1); sum2 <= sum1 + a(2); sum3 <= sum2 + a(3); q <= "000" & sum3(8 downto 3); r <= "00000" & sum3(2 downto 0);
- utp <= q + 1 when (r > 3) else
q; Note that this is very different from the algorithm -- the circuit is a pure combina- tional (and parallel) logic circuit with NO memory elements
SLIDE 4 Hardware Design with VHDL Register Transfer Methodology I ECE 443 ECE UNM 4 (11/23/09) Register Transfer Methodology: Principle Block diagram The problem is the structural data flow implementation is that it can only be applied to trivial problems and is not flexible (is specific to an array of 4 values) A better implementation is to share one adder in a time-multiplexed manner (as is done on a GPU) Register Transfer Methodology introduces hardware that matches the variable and sequential execution model
- Registers are used to store intermediate data (model symbolic variables)
- A datapath is used to implement the operations
- A control path (FSM) is used to specify the order of register operations
SLIDE 5 Hardware Design with VHDL Register Transfer Methodology I ECE 443 ECE UNM 5 (11/23/09) FSMD The control, data path and registers are implemented as an FSMD (FSM with a data- path) FSMDs are key to realizing RT methodology The basic action in RT methodology is the register transfer operation: The destination register is shown on the left while the source registers are listed on the right The function f uses the contents of the source registers, plus external outputs in some cases Difference between an algorithm and an RT register is the implicit embedding of clk
- At the rising edge of the clock, the output of registers rsrc1, rsrc2 become available
- The output are passed to a combinational circuit that represents f( )
- At the next rising edge of the clock, the result is stored into rdest
rdest f rsrc1 rsrc2 … rsrc3 , , , ( ) ←
SLIDE 6
Hardware Design with VHDL Register Transfer Methodology I ECE 443 ECE UNM 6 (11/23/09) FSMD The function f() can be any expression that is representable by a combinational circuit Note that we will continue to use the notation _reg and _next for the current output and next input of a register The notation is translated as r1_next <= r1_reg + r2_reg; r1_reg <= r1_next; -- on the next rising edge of clk Block diagram and timing diagram are shown below r 1 ← r r ← r0 r1 ← n n 1 – ← y a b c d ⊕ ⊕ ⊕ ← s a2 b2 + ← r1 r1 r2 + ←
SLIDE 7
Hardware Design with VHDL Register Transfer Methodology I ECE 443 ECE UNM 7 (11/23/09) FSMD Be sure to study this carefully because it is heavily used in digital systems Multiple RT operations An algorithm consists of many steps and a destination register my be loaded with different values over time, e.g., initialized to 0, stores result of addition, etc. r r1 r2 + ←
SLIDE 8
Hardware Design with VHDL Register Transfer Methodology I ECE 443 ECE UNM 8 (11/23/09) FSMD Consider the following sequence of operations Since r1 is the destination of multiple operations, we need a MUX to route the proper value to its input An FSM is used to drive the control signals so that the sequence of operations are carried out in the order given The FSM can also implement conditional execution based, e.g., on external signals r1 1 ← r1 r1 r2 + ← r1 r1 1 + ← r1 r1 ←
SLIDE 9 Hardware Design with VHDL Register Transfer Methodology I ECE 443 ECE UNM 9 (11/23/09) FSMD Note that the state transitions take place on the rising edge of clk -- the same instant that the RT registers are updated So we can embed the RT operations within the state boxes/arcs of the FSM An extended ASM chart known as ASMD (ASM with datapath) chart can be used to represent the FSMD ** ** IMPORTANT: the new value of r1 is only available when the FSM exits the s1 state delayed store
SLIDE 10
Hardware Design with VHDL Register Transfer Methodology I ECE 443 ECE UNM 10 (11/23/09) FSMD NOTE: When a register is NOT being updated with a new value, it is assumed that it maintains its current value, i.e., Conceptual block diagram of an FSMD r1 r1 ← These actions are NOT shown in the ASMD/state chart Data Path Control Path Regular sequential circuit Random sequential circuit Study and become familiar with the input/output signals of both modules
SLIDE 11
Hardware Design with VHDL Register Transfer Methodology I ECE 443 ECE UNM 11 (11/23/09) FSMD Design Examples Repetitive addition multiplier We built a combinational multiplier earlier which used multiple adders in a data- flow configuration It’s also possible to build it using one adder and a sequential algorithm Basic algorithm: 7*5 = 7+7+7+7+7 if (a_in=0 or b_in=0) then { r = 0; } else { a = a_in; n = b_in; r = 0; while (n != 0) { r = r + a;
SLIDE 12 Hardware Design with VHDL Register Transfer Methodology I ECE 443 ECE UNM 12 (11/23/09) FSMD Design Examples n = n - 1; } } return(r); This code is a better match to an ASMD because ASMD does not have a loop con- struct if (a_in = 0 or b_in = 0) then { r = 0; } else { a = a_in; n = b_in; r = 0;
n = n - 1; if (n = 0) then { goto stop; }
SLIDE 13 Hardware Design with VHDL Register Transfer Methodology I ECE 443 ECE UNM 13 (11/23/09) FSMD Design Examples else { goto op; } } stop: return(r); To implement this in hardware, we must first define the I/O signals
- a_in, b_in: 8-bit unsigned input
- clk, reset: 1-bit input
- start: 1-bit command input
- r: 16-bit unsigned output
- ready: 1-bit status output -- asserted when unit has completed and is ready again
The start and ready signals are added to support sequential operation When this unit is embedded in a larger design, and the main system wants to perform multiplication
- It checks ready
- If ’1’, it places inputs on a_in and b_in and asserts the start signal
SLIDE 14
Hardware Design with VHDL Register Transfer Methodology I ECE 443 ECE UNM 14 (11/23/09) FSMD Design Examples The ASMD uses n, a and r data registers to emulate the three variables Decision boxes are used to implement the if stmts One difference between the pseudo code and the ASMD is the parallelism available in the latter scheduled in the same state When RT operations are they execute in parallel in that clock cycle, e.g., op state scheduled in the same state Multiple operations can be if enough hardware resources are available and there are no data dependencies
SLIDE 15 Hardware Design with VHDL Register Transfer Methodology I ECE 443 ECE UNM 15 (11/23/09) FSMD Design Examples With the ASMD chart available, we can refine the original block diagram We first divide the system into a data path and a control path For the control path, the input signals are start, a_is_0, b_is_0 and count_0 -- the first is an external signal, the latter three are status signals from the data path These signals constitute the inputs to the FSM and are used in the decision boxes The output of the control path are ready and control signals that specify the RT oper- ations of the data path In this example, we use the state register as the output control signals Construction of the data path is easier if it is handled as follows:
- List all RT operations
- Group RT operation according to the destination register
- Add combinational circuit/mux
- Add status circuits
SLIDE 16 Hardware Design with VHDL Register Transfer Methodology I ECE 443 ECE UNM 16 (11/23/09) FSMD Design Examples For example
- RT operation with the r register
- RT operations with the n register
- RT operations with the a register
Note that the default operations MUST be included to build the proper data path r r (in the idle state) ← r 0 (in the load and op states) ← r r a (in the op state) + ← n n (in the idle state) ← n b_in (in the load and ab0 state) ← n n 1 (in the op state) – ← a a (in the idle and op states) ← a a_in (in the load and ab0 states) ←
SLIDE 17
Hardware Design with VHDL Register Transfer Methodology I ECE 443 ECE UNM 17 (11/23/09) FSMD Design Examples Let’s consider the circuit associated with the r register The three possible sources, 0, r and r+a are selected using a MUX The select signals are labeled symbolically with the state names The routing specified matches that given on the previous slide We can repeat this process for the other two registers and combine them The status signals are implemented using three comparators
SLIDE 18
Hardware Design with VHDL Register Transfer Methodology I ECE 443 ECE UNM 18 (11/23/09) FSMD Design Examples The entire control and data path Note that some elements are more complicated than necessary For example, the a_next signal can be replaced with a register with an enable signal Don’t worry, the synthesis tool will optimize this design
SLIDE 19 Hardware Design with VHDL Register Transfer Methodology I ECE 443 ECE UNM 19 (11/23/09) FSMD Design Examples The VHDL code follows the block diagram and is divided into seven blocks
- Control path state registers
- Control path next-state logic
- Control path output logic
- Data path data registers
- Data path functional units
- Data path routing network
- Data path status circuit
library ieee; use ieee.std_logic_1164.all; use ieee.numeric_std.all; entity seq_mult is port( clk, reset: in std_logic; start: in std_logic; a_in, b_in: in std_logic_vector(7 downto 0);
SLIDE 20
Hardware Design with VHDL Register Transfer Methodology I ECE 443 ECE UNM 20 (11/23/09) FSMD Design Examples ready: out std_logic; r: out std_logic_vector(15 downto 0) ); end seq_mult; architecture mult_seg_arch of seq_mult is constant WIDTH: integer:=8; type state_type is (idle, ab0, load, op); signal state_reg, state_next: state_type; signal a_is_0, b_is_0, count_0: std_logic; signal a_reg, a_next: unsigned(WIDTH-1 downto 0); signal n_reg, n_next: unsigned(WIDTH-1 downto 0); signal r_reg, r_next: unsigned(2*WIDTH-1 downto 0); signal adder_out: unsigned(2*WIDTH-1 downto 0); signal sub_out: unsigned(WIDTH-1 downto 0); begin
SLIDE 21 Hardware Design with VHDL Register Transfer Methodology I ECE 443 ECE UNM 21 (11/23/09) FSMD Design Examples
- - control path: state register
process(clk, reset) begin if (reset = ’1’) then state_reg <= idle; elsif (clk’event and clk = ’1’) then state_reg <= state_next; end if; end process;
- - control path: next-state/output logic
process(state_reg, start, a_is_0, b_is_0, count_0) begin case state_reg is when idle => if (start = ’1’) then if (a_is_0 = ’1’ or b_is_0 = ’1’) then state_next <= ab0;
SLIDE 22
Hardware Design with VHDL Register Transfer Methodology I ECE 443 ECE UNM 22 (11/23/09) FSMD Design Examples else state_next <= load; end if; else state_next <= idle; end if; when ab0 => state_next <= idle; when load => state_next <= op; when op => if (count_0 = ’1’) then state_next <= idle; else state_next <= op; end if; end case; end process;
SLIDE 23 Hardware Design with VHDL Register Transfer Methodology I ECE 443 ECE UNM 23 (11/23/09) FSMD Design Examples
- - control path: output logic
ready <= ’1’ when state_reg=idle else ’0’;
- - data path: data register
process(clk, reset) begin if (reset = ’1’) then a_reg <= (others=>’0’); n_reg <= (others=>’0’); r_reg <= (others=>’0’); elsif (clk’event and clk=’1’) then a_reg <= a_next; n_reg <= n_next; r_reg <= r_next; end if; end process;
SLIDE 24 Hardware Design with VHDL Register Transfer Methodology I ECE 443 ECE UNM 24 (11/23/09) FSMD Design Examples
- - data path: routing multiplexer
process(state_reg, a_reg, n_reg, r_reg, a_in, b_in, adder_out, sub_out) begin case state_reg is when idle => a_next <= a_reg; n_next <= n_reg; r_next <= r_reg; when ab0 => a_next <= unsigned(a_in); n_next <= unsigned(b_in); r_next <= (others => ’0’); when load => a_next <= unsigned(a_in); n_next <= unsigned(b_in); r_next <= (others => ’0’); when op =>
SLIDE 25 Hardware Design with VHDL Register Transfer Methodology I ECE 443 ECE UNM 25 (11/23/09) FSMD Design Examples a_next <= a_reg; n_next <= sub_out; r_next <= adder_out; end case; end process;
- - data path: functional units
adder_out <= ("00000000" & a_reg) + r_reg; sub_out <= n_reg - 1;
a_is_0 <= ’1’ when a_in = "00000000" else ’0’; b_is_0 <= ’1’ when b_in = "00000000" else ’0’; count_0 <= ’1’ when n_next = "00000000" else ’0’;
r <= std_logic_vector(r_reg); end mult_seg_arch;
SLIDE 26
Hardware Design with VHDL Register Transfer Methodology I ECE 443 ECE UNM 26 (11/23/09) Use of a Register Value in a Decision Box Most of the translation process is straightforward One caveat is using a register in a Boolean expression of a decision box This was avoided in our example by using a_is_0, b_is_0 and count_0 status signals inside the decision boxes A more descriptive way is to use registers and input signals in the Boolean exprs. For example, instead of a_is_0 = 1, we could use a_in = 0 A second example is to (try to) use the n register in the loop termination decision box Unfortunately, we need to be careful here because the new value of n is not available until we exit the block Therefore, the ASMD must differ from the pseudo-code shown earlier n = n -1; if ( n = 0) then ...
SLIDE 27
Hardware Design with VHDL Register Transfer Methodology I ECE 443 ECE UNM 27 (11/23/09) Use of a Register Value in a Decision Box In the ASMD, the old value of n would be used in the decision box and one extra iteration would occur (which is INcorrect) One way to fix this problem is to use the condition of the previous iteration, e.g., n = 1 to terminate the loop (see below Fix 1) Unfortunately, it is less clear what the intention is Fix 2 adds a wait state -- this fixes the problem but is clumsy and inefficient WRONG Fix 1 Fix 2 Fix 3
SLIDE 28
Hardware Design with VHDL Register Transfer Methodology I ECE 443 ECE UNM 28 (11/23/09) Use of a Register Value in a Decision Box The best fix (Fix 3) is to use the next value in the Boolean expression Since the next value is calculated during the op state, it is available at the end of the clock cycle and can be used in the decision box Note that the VHDL code given actually uses the n_next signal count_0 <= ’1’ when n_next = 0 else ’0’; To express this in the ASMD chart, we have to split the RT operation into two parts Here, the first part indicates that the next value of the r register is calculated and updated within the current clk cycle See Fix 3 for an example using the n_next signal This is best b/c it is consistent with the pseudo-code and has no performance penalty r f (.) ← r r_next; ← r_next <= f(.)
SLIDE 29 Hardware Design with VHDL Register Transfer Methodology I ECE 443 ECE UNM 29 (11/23/09) Two Segment VHDL Descriptions of FSMDs The previous 7 segment coding style can be easily reduced to two segments architecture two_seg_arch of seq_mult is constant WIDTH: integer := 8; type state_type is (idle, ab0, load, op); signal state_reg, state_next: state_type; signal a_reg, a_next: unsigned(WIDTH-1 downto 0); signal n_reg, n_next: unsigned(WIDTH-1 downto 0); signal r_reg, r_next: unsigned(2*WIDTH-1 downto 0); begin
- - state and data register
process(clk, reset) begin if (reset = ’1’) then state_reg <= idle; a_reg <= (others => ’0’); n_reg <= (others => ’0’); r_reg <= (others => ’0’);
SLIDE 30 Hardware Design with VHDL Register Transfer Methodology I ECE 443 ECE UNM 30 (11/23/09) Two Segment VHDL Descriptions of FSMDs elsif (clk’event and clk = ’1’) then state_reg <= state_next; a_reg <= a_next; n_reg <= n_next; r_reg <= r_next; end if; end process;
process(start, state_reg, a_reg, n_reg, r_reg, a_in, b_in, n_next) begin
a_next <= a_reg; n_next <= n_reg; r_next <= r_reg; ready <=’0’;
SLIDE 31
Hardware Design with VHDL Register Transfer Methodology I ECE 443 ECE UNM 31 (11/23/09) Two Segment VHDL Descriptions of FSMDs case state_reg is when idle => if (start = ’1’) then if (a_in = "00000000" or b_in = "00000000") then state_next <= ab0; else state_next <= load; end if; else state_next <= idle; end if; ready <= ’1’; when ab0 => a_next <= unsigned(a_in); n_next <= unsigned(b_in); r_next <= (others => ’0’); state_next <= idle;
SLIDE 32
Hardware Design with VHDL Register Transfer Methodology I ECE 443 ECE UNM 32 (11/23/09) Two Segment VHDL Descriptions of FSMDs when load => a_next <= unsigned(a_in); n_next <= unsigned(b_in); r_next <= (others => ’0’); state_next <= op; when op => n_next <= n_reg - 1; r_next <= ("00000000" & a_reg) + r_reg; if (n_next = "00000000") then state_next <= idle; else state_next <= op; end if; end case; end process; r <= std_logic_vector(r_reg); end two_seg_arch;
SLIDE 33
Hardware Design with VHDL Register Transfer Methodology I ECE 443 ECE UNM 33 (11/23/09) One Segment VHDL Descriptions of FSMDs Although possible, combining everything into one segment may introduce subtle problems and is not recommended architecture one_seg_arch of seq_mult is constant WIDTH: integer := 8; type state_type is (idle, ab0, load, op); signal state_reg: state_type; signal a_reg, n_reg: unsigned(WIDTH-1 downto 0); signal r_reg: unsigned(2*WIDTH-1 downto 0); begin process(clk, reset) variable n_next: unsigned(WIDTH-1 downto 0); begin if (reset = ’1’) then state_reg <= idle; a_reg <= (others => ’0’); n_reg <= (others => ’0’); r_reg <= (others => ’0’);
SLIDE 34
Hardware Design with VHDL Register Transfer Methodology I ECE 443 ECE UNM 34 (11/23/09) One Segment VHDL Descriptions of FSMDs elsif (clk’event and clk = ’1’) then case state_reg is when idle => if (start = ’1’) then if (a_in = "00000000" or b_in = "00000000") then state_reg <= ab0; else state_reg <= load; end if; end if; when ab0 => a_reg <= unsigned(a_in); n_reg <= unsigned(b_in); r_reg <= (others => ’0’); state_reg <= idle; when load => a_reg <= unsigned(a_in);
SLIDE 35
Hardware Design with VHDL Register Transfer Methodology I ECE 443 ECE UNM 35 (11/23/09) One Segment VHDL Descriptions of FSMDs n_reg <= unsigned(b_in); r_reg <= (others => ’0’); state_reg <= op; when op => n_next := n_reg - 1; n_reg <= n_next; r_reg <= ("00000000" & a_reg) + r_reg; if (n_next = "00000000") then state_reg <= idle; end if; end case; end if; end process; ready <= ’1’ when (state_reg = idle) else ’0’; r <= std_logic_vector(r_reg); end one_seg_arch;
SLIDE 36 Hardware Design with VHDL Register Transfer Methodology I ECE 443 ECE UNM 36 (11/23/09) One Segment VHDL Descriptions of FSMDs There are several subtle problems
- Since a register is inferred for ANY signal within the clause
elsif (clk’event and clk = ’1’) then the next value of a data register CANNOT be referred by a signal To overcome this, we must define n_next as a variable for immediate assign- ment
- To avoid the unnecessary output buffer, the ready output signal has to be moved out-
side the process and be coded as a separate segment Alternative Design of a Repetitive-Addition Multiplier We discussed combinational resource sharing earlier Since FSMD allows RT operations to be scheduled, sharing can be achieved in a time-multiplexing fashion by assigning the same functional unit in different states In the repetitive addition multiplier example, the addition and decrement operation can share a functional unit if they are placed in different states
SLIDE 37
Hardware Design with VHDL Register Transfer Methodology I ECE 443 ECE UNM 37 (11/23/09) Alternative Design of a Repetitive-Addition Multiplier This requires the op state to be split into op1 and op2 as shown below
SLIDE 38
Hardware Design with VHDL Register Transfer Methodology I ECE 443 ECE UNM 38 (11/23/09) Alternative Design of a Repetitive-Addition Multiplier The revised data path uses an additional multiplexer
SLIDE 39 Hardware Design with VHDL Register Transfer Methodology I ECE 443 ECE UNM 39 (11/23/09) Alternative Design of a Repetitive-Addition Multiplier The following code makes explicit the sharing of the functional unit, given the limita- tions of RT-level optimization within synthesis tools architecture sharing_arch of seq_mult is constant WIDTH: integer := 8; type state_type is (idle, ab0, load, op1, op2); signal state_reg, state_next: state_type; signal a_reg, a_next: unsigned(WIDTH-1 downto 0); signal n_reg, n_next: unsigned(WIDTH-1 downto 0); signal r_reg, r_next: unsigned(2*WIDTH-1 downto 0); signal adder_src1,adder_src2: unsigned(2*WIDTH-1 downto 0); signal adder_out: unsigned(2*WIDTH-1 downto 0); begin
- - state and data registers
process(clk, reset) begin
SLIDE 40 Hardware Design with VHDL Register Transfer Methodology I ECE 443 ECE UNM 40 (11/23/09) Alternative Design of a Repetitive-Addition Multiplier if (reset = ’1’) then state_reg <= idle; a_reg <= (others => ’0’); n_reg <= (others => ’0’); r_reg <= (others => ’0’); elsif (clk’event and clk = ’1’) then state_reg <= state_next; a_reg <= a_next; n_reg <= n_next; r_reg <= r_next; end if; end process;
- - next-state logic/ouput logic and data path routing
process(start, state_reg, a_reg, n_reg, r_reg, a_in, b_in, adder_out, n_next)
SLIDE 41 Hardware Design with VHDL Register Transfer Methodology I ECE 443 ECE UNM 41 (11/23/09) Alternative Design of a Repetitive-Addition Multiplier begin
a_next <= a_reg; n_next <= n_reg; r_next <= r_reg; ready <=’0’; case state_reg is when idle => if (start = ’1’) then if (a_in = "00000000" or b_in="00000000") then state_next <= ab0; else state_next <= load; end if; else state_next <= idle; end if;
SLIDE 42
Hardware Design with VHDL Register Transfer Methodology I ECE 443 ECE UNM 42 (11/23/09) Alternative Design of a Repetitive-Addition Multiplier\ ready <=’1’; when ab0 => a_next <= unsigned(a_in); n_next <= unsigned(b_in); r_next <= (others => ’0’); state_next <= idle; when load => a_next <= unsigned(a_in); n_next <= unsigned(b_in); r_next <= (others => ’0’); state_next <= op1; when op1 => r_next <= adder_out; state_next <= op2; when op2 => n_next <= adder_out(WIDTH-1 downto 0); if (n_next = "00000000") then state_next <= idle;
SLIDE 43 Hardware Design with VHDL Register Transfer Methodology I ECE 443 ECE UNM 43 (11/23/09) Alternative Design of a Repetitive-Addition Multiplier else state_next <= op1; end if; end case; end process;
- - data path input routing and functional units
- - Note the n register is only 8-bits wide
process(state_reg, r_reg, a_reg, n_reg) begin if (state_reg = op1) then adder_src1 <= r_reg; adder_src2 <= "00000000" & a_reg; else -- for op2 state adder_src1 <= "00000000" & n_reg; adder_src2 <= (others => ’1’); end if; end process;
SLIDE 44 Hardware Design with VHDL Register Transfer Methodology I ECE 443 ECE UNM 44 (11/23/09) Alternative Design of a Repetitive-Addition Multiplier adder_out <= adder_src1 + adder_src2;
r <= std_logic_vector(r_reg); end sharing_arch; Mealy-Controlled RT Operation The control signals connected to the data path are edge-sensitive, and therefore Mealy outputs can be used (they are faster and require fewer states)
SLIDE 45
Hardware Design with VHDL Register Transfer Methodology I ECE 443 ECE UNM 45 (11/23/09) Mealy-Controlled RT Operation As shown, RT operations can appear in the conditional output box of an ASMD chart Note that this result is computed in parallel with the Moore output (r1) and the com- parison a > b However, for the Moore output, there is only one possible outcome (r1 is assigned r1 + 1) For the Mealy output, a MUX is added to select r2 or r3 + r4 to store in r2 For the original ASMD chart for the multiplier, the a_in and b_in signals are used in both the idle state (for comparison) and the load and ab0 states for loading This requires the external system that ’calls’ the multiplier to hold the a_in and b_in signals for two clock cycles The following modification to the ASMD uses Mealy-controlled RT operations to eliminate the two clock cycle requirement by merging ab0 and load states to idle r2 r3 r4 + ←
SLIDE 46
Hardware Design with VHDL Register Transfer Methodology I ECE 443 ECE UNM 46 (11/23/09) Mealy-Controlled RT Operation The RT operations are moved into a conditional output box Note that this change reduces the number of states from 4 to 2 and improves the per- formance
SLIDE 47 Hardware Design with VHDL Register Transfer Methodology I ECE 443 ECE UNM 47 (11/23/09) Mealy-Controlled RT Operation architecture mealy_arch of seq_mult is constant WIDTH: integer := 8; type state_type is (idle, op); signal state_reg, state_next: state_type; signal a_reg, a_next: unsigned(WIDTH-1 downto 0); signal n_reg, n_next: unsigned(WIDTH-1 downto 0); signal r_reg, r_next: unsigned(2*WIDTH-1 downto 0); begin
- - state and data registers
process(clk, reset) begin if (reset = ’1’) then state_reg <= idle; a_reg <= (others => ’0’); n_reg <= (others => ’0’); r_reg <= (others => ’0’);
SLIDE 48 Hardware Design with VHDL Register Transfer Methodology I ECE 443 ECE UNM 48 (11/23/09) Mealy-Controlled RT Operation elsif (clk’event and clk = ’1’) then state_reg <= state_next; a_reg <= a_next; n_reg <= n_next; r_reg <= r_next; end if; end process;
process(start, state_reg, a_reg, n_reg, r_reg, a_in, b_in, n_next) begin a_next <= a_reg; n_next <= n_reg; r_next <= r_reg; ready <=’0’;
SLIDE 49
Hardware Design with VHDL Register Transfer Methodology I ECE 443 ECE UNM 49 (11/23/09) Mealy-Controlled RT Operation case state_reg is when idle => if (start = ’1’) then a_next <= unsigned(a_in); n_next <= unsigned(b_in); r_next <= (others => ’0’); if (a_in = "00000000" or b_in = "00000000") then state_next <= idle; else state_next <= op; end if; else state_next <= idle; end if; ready <=’1’;
SLIDE 50
Hardware Design with VHDL Register Transfer Methodology I ECE 443 ECE UNM 50 (11/23/09) Mealy-Controlled RT Operation when op => n_next <= n_reg - 1; r_next <= ("00000000" & a_reg) + r_reg; if (n_next = "00000000") then state_next <= idle; else state_next <= op; end if; end case; end process; r <= std_logic_vector(r_reg); end mealy_arch; Clock Rate and Performance of FSMD The maximum clk rate of an FSMD is bounded by the setup time constraint, as it was in our earlier analysis
SLIDE 51 Hardware Design with VHDL Register Transfer Methodology I ECE 443 ECE UNM 51 (11/23/09) Clock Rate and Performance of FSMD Unfortunately, an FSMD is more difficult to analyze because of the interaction between the control and data path loops The interaction occurs by virtue of the control signals that control the data path, and the status signals generated by the data path The exact value depends on where the control signals are needed and where the sta- tus signals are generated Although software is needed to determine the exact maximum clock rate, it is possi- ble, however, to establish a bound by considering best and worst case scenarios The timing parameters for the control path are the same as those discussed earlier for an FSM
- Tcq(state)
- Tsetup(state)
- Tnext (max delay of next state logic)
- Toutput (max delay of output logic)
SLIDE 52 Hardware Design with VHDL Register Transfer Methodology I ECE 443 ECE UNM 52 (11/23/09) Clock Rate and Performance of FSMD The timing parameters for the data path are as follows
- Tcq(data)
- Tsetup(data)
- Tfunc (max delay of functional units -- likely to be the largest)
- Troute (max delay of routing MUXes)
- Tdp (max delay of combo logic in data path -- sum of Tfunc and 2*Troute
Tc is use for the clock period In the best-case scenario, the control signals are needed at late stage in a data path
- peration and the status signals are generated in an early stage
SLIDE 53
Hardware Design with VHDL Register Transfer Methodology I ECE 443 ECE UNM 53 (11/23/09) Clock Rate and Performance of FSMD The time line under the best case scenario The minimum clk period of the FSMD is the same as the clk period of the data path Tc = Tcq(data) + Tdp + Tsetup(data)
SLIDE 54
Hardware Design with VHDL Register Transfer Methodology I ECE 443 ECE UNM 54 (11/23/09) Clock Rate and Performance of FSMD The worst-case scenario occurs when the control signals are needed at early stage and the status signals available at late stage Here, the data path MUST wait for the FSM to generate the output signals And the control path MUST wait for the status signals to generate the next-state value Except for the registers, there is no overlap between the control path and data path (see next slide) The minimum clk period is the delay of all combinational components
SLIDE 55
Hardware Design with VHDL Register Transfer Methodology I ECE 443 ECE UNM 55 (11/23/09) Clock Rate and Performance of FSMD Time line of worst case scenario Worst case timing Tc = Tcq(state) + Toutput + Tdp + Tnext + Tsetup(state)
SLIDE 56
Hardware Design with VHDL Register Transfer Methodology I ECE 443 ECE UNM 56 (11/23/09) Clock Rate and Performance of FSMD From these two extreme scenarios, we can establish the timing bounds (assuming the state register and data register have similar timing characteristics) Tcq + Tdp + Tsetup <= Tc <= Tcq + Toutput + Tdp + Tnext + Tsetup Bounds on the maximum clk frequency are given by 1/(Tcq + Toutput + Tdp + Tnext + Tsetup) <= f <= 1/(Tcq + Tdp + Tsetup) For a design with a complex data path, Tdp will be much larger than Tnext and Toutput and therefore the difference between the min and max bound is small For a design with a complex control path, we need to minimize Tnext and Toutput to maximize performance, and therefore, we need to isolate and optimize the FSM
SLIDE 57
Hardware Design with VHDL Register Transfer Methodology I ECE 443 ECE UNM 57 (11/23/09) Performance of FSMD The computation performed by an FSMD usually takes many clk cycles (K) to com- plete, and is given by Total time = K * Tc The value K is determined by the algorithm, input patterns etc. There are usually trade-offs associated with K and Tc For example, it is usually possible to merge computation steps, reducing the number of states but increasing Tc because of the larger Tdp On the other hand, it is also possible to divide an operation into smaller steps, reducing Tc but increasing K (the number of steps) Consider the multiplier, where b_in is an 8-bit input Best case: b_in = 0 => K = 2 Worst case: b_in = 255 => K = 257 For an n-bit input: Worst: K = 2 + (2n-1) (2 is for the idle and load states)
SLIDE 58 Hardware Design with VHDL Register Transfer Methodology I ECE 443 ECE UNM 58 (11/23/09) Sequential Add-and-Shift Multiplier The fact that this multiplication algorithm is proportional to 2n makes it impractical A better algorithm: sequential add-and-shift multiplier The algorithm involves three tasks:
- Multiply the digits of the multiplier (b3, b2, b1 and b0) by the multiplicand (A) one
at a time to obtain b3*A, b2 *A, b1*A and b0*A. The bi*A operation is bitwise, and defined as biA a3 bi
bi a1 bi a0 bi
( ) =
SLIDE 59 Hardware Design with VHDL Register Transfer Methodology I ECE 443 ECE UNM 59 (11/23/09) Sequential Add-and-Shift Multiplier
- Shift bi*A to the left by i positions according to the position of digits bi
- Add the shifted bi*A to obtain the final product
n = 0; p = 0; while (n != 8) { if (b_in(n) = 1) then { p = p + (a_in << n); } n = n + 1; } return(p); In hardware, it is expensive to do indexing, i.e., b_in(n) and to build a generic shifter, i.e., a_in << n Instead, we can carry out an equivalent operation by shifting a_in and b_in by one position in each iteration
SLIDE 60
Hardware Design with VHDL Register Transfer Methodology I ECE 443 ECE UNM 60 (11/23/09) Sequential Add-and-Shift Multiplier We also count have n count down to remove the constant dependency and allow for a generic operand width a = a_in; b = b_in; n = 8; p = 0; while (n != 0) { if (b(0) = 1 ) { p = p + a; } a = a << 1; b = b >> 1; n = n - 1; } return(p);
SLIDE 61 Hardware Design with VHDL Register Transfer Methodology I ECE 443 ECE UNM 61 (11/23/09) Sequential Add-and-Shift Multiplier Last, we convert the while loop to an if and goto stmt a = a_in; b = b_in; n = 8; p = 0;
{ p = p + a; } a = a << 1; b = b >> 1; n = n - 1; if (n != 0) then { goto op; } return(p);
SLIDE 62
Hardware Design with VHDL Register Transfer Methodology I ECE 443 ECE UNM 62 (11/23/09) Sequential Add-and-Shift Multiplier The ASMD chart
SLIDE 63 Hardware Design with VHDL Register Transfer Methodology I ECE 443 ECE UNM 63 (11/23/09) Sequential Add-and-Shift Multiplier Since the two shift operations and the counter decrementing operation are indepen- dent, they are scheduled in the same state (performed in parallel) Also, due to the delayed store of the RT operations, we use the next values, i.e., b_next(0) and n_next, of the registers in the decision boxes Last, the two shift operations, a << 1 and b >> 1, can use the concatenation operation and require no logic architecture shift_add_raw_arch of seq_mult is constant WIDTH: integer := 8;
constant C_WIDTH: integer := 4; constant C_INIT: unsigned(C_WIDTH-1 downto 0) := "1000"; type state_type is (idle, add, shift); signal state_reg, state_next: state_type; signal b_reg, b_next: unsigned(WIDTH-1 downto 0);
SLIDE 64 Hardware Design with VHDL Register Transfer Methodology I ECE 443 ECE UNM 64 (11/23/09) Sequential Add-and-Shift Multiplier signal a_reg, a_next: unsigned(2*WIDTH-1 downto 0); signal n_reg, n_next: unsigned(C_WIDTH-1 downto 0); signal p_reg, p_next: unsigned(2*WIDTH-1 downto 0); begin
- - state and data registers
process(clk, reset) begin if (reset = ’1’) then state_reg <= idle; b_reg <= (others => ’0’); a_reg <= (others => ’0’); n_reg <= (others => ’0’); p_reg <= (others => ’0’); elsif (clk’event and clk = ’1’) then state_reg <= state_next; b_reg <= b_next; a_reg <= a_next;
SLIDE 65 Hardware Design with VHDL Register Transfer Methodology I ECE 443 ECE UNM 65 (11/23/09) Sequential Add-and-Shift Multiplier n_reg <= n_next; p_reg <= p_next; end if; end process;
process(start, state_reg, b_reg, a_reg, n_reg, p_reg, b_in, a_in, n_next, a_next) begin b_next <= b_reg; a_next <= a_reg; n_next <= n_reg; p_next <= p_reg; ready <=’0’; case state_reg is when idle => if (start = ’1’) then b_next <= unsigned(b_in);
SLIDE 66
Hardware Design with VHDL Register Transfer Methodology I ECE 443 ECE UNM 66 (11/23/09) Sequential Add-and-Shift Multiplier a_next <= "00000000" & unsigned(a_in); n_next <= C_INIT; p_next <= (others => ’0’); if (b_in(0) = ’1’) then state_next <= add; else state_next <= shift; end if; else state_next <= idle; end if; ready <=’1’; when add => p_next <= p_reg + a_reg; state_next <= shift; when shift => n_next <= n_reg - 1; b_next <= ’0’ & b_reg (WIDTH-1 downto 1);
SLIDE 67
Hardware Design with VHDL Register Transfer Methodology I ECE 443 ECE UNM 67 (11/23/09) Sequential Add-and-Shift Multiplier a_next <= a_reg(2*WIDTH-2 downto 0) & ’0’; if (n_next /= "0000") then if (a_next(0) = ’1’) then state_next <= add; else state_next <= shift; end if; else state_next <= idle; end if; end case; end process; r <= std_logic_vector(p_reg); end shift_add_raw_arch;
SLIDE 68 Hardware Design with VHDL Register Transfer Methodology I ECE 443 ECE UNM 68 (11/23/09) Sequential Add-and-Shift Multiplier For an 8-bit input Best case: b = 0 => K = 1 + 8 (shift only) Worst case: b = 255 => K = 1 + 8*2 (add and shift) For an n-bit input: Worst case: K = 2*n + 1 There are several opportunities for improvement
- The operations in the add and shift states are independent and therefore, these two
states can be merged A conditional output box is used to implement the p <- p + a operation
- In the data path, when a is added to the partial products, only the eight leftmost bits
are involved and the remaining (trailing) bits are kept unchanged We can reduce the 16-bit adder to a 9-bit adder (8-bit operand and 1-bit carry) by shifting the partial product to the right one position in each iteration This also eliminates the need to shift multiplier A and reduces the width of the a register by half
SLIDE 69
Hardware Design with VHDL Register Transfer Methodology I ECE 443 ECE UNM 69 (11/23/09) Sequential Add-and-Shift Multiplier Part (b) shows the improvements
SLIDE 70 Hardware Design with VHDL Register Transfer Methodology I ECE 443 ECE UNM 70 (11/23/09) Sequential Add-and-Shift Multiplier The last improvement involves using the unused portion of the p register for operand b Only the left portion of the p register contains valid data initially The valid portion expands to the right one position in each iteration when the shift- right operation is performed On the other hand, the b register has 8 valid bits initially and shrinks when the shift
- peration removes the LSB on each iteration
SLIDE 71
Hardware Design with VHDL Register Transfer Methodology I ECE 443 ECE UNM 71 (11/23/09) Sequential Add-and-Shift Multiplier Final ASMD
SLIDE 72 Hardware Design with VHDL Register Transfer Methodology I ECE 443 ECE UNM 72 (11/23/09) Sequential Add-and-Shift Multiplier architecture shift_add_better_arch of seq_mult is constant WIDTH: integer := 8;
constant C_WIDTH: integer := 4; constant C_INIT: unsigned(C_WIDTH-1 downto 0) := "1000"; type state_type is (idle, add_shft); signal state_reg, state_next: state_type; signal a_reg, a_next: unsigned(WIDTH-1 downto 0); signal n_reg, n_next: unsigned(C_WIDTH-1 downto 0); signal p_reg, p_next: unsigned(2*WIDTH downto 0);
- - alias for the upper part and lower parts of p_reg
alias pu_next: unsigned(WIDTH downto 0) is p_next(2*WIDTH downto WIDTH); alias pu_reg: unsigned(WIDTH downto 0) is p_reg(2*WIDTH downto WIDTH);
SLIDE 73 Hardware Design with VHDL Register Transfer Methodology I ECE 443 ECE UNM 73 (11/23/09) Sequential Add-and-Shift Multiplier alias pl_reg: unsigned(WIDTH-1 downto 0) is p_reg(WIDTH-1 downto 0); begin
- - state and data registers
process(clk, reset) begin if (reset = ’1’) then state_reg <= idle; a_reg <= (others => ’0’); n_reg <= (others => ’0’); p_reg <= (others => ’0’); elsif (clk’event and clk = ’1’) then state_reg <= state_next; a_reg <= a_next; n_reg <= n_next; p_reg <= p_next; end if; end process;
SLIDE 74 Hardware Design with VHDL Register Transfer Methodology I ECE 443 ECE UNM 74 (11/23/09) Sequential Add-and-Shift Multiplier
process(start, state_reg, a_reg, n_reg, p_reg, a_in, b_in, n_next, p_next) begin a_next <= a_reg; n_next <= n_reg; p_next <= p_reg; ready <=’0’; case state_reg is when idle => if (start = ’1’) then p_next <= "000000000" & unsigned(b_in); a_next <= unsigned(a_in); n_next <= C_INIT; state_next <= add_shft; else state_next <= idle; end if;
SLIDE 75 Hardware Design with VHDL Register Transfer Methodology I ECE 443 ECE UNM 75 (11/23/09) Sequential Add-and-Shift Multiplier ready <=’1’; when add_shft => n_next <= n_reg - 1;
- - add if multiplier bit is ’1’
if (p_reg(0) = ’1’) then pu_next <= pu_reg + (’0’ & a_reg); else pu_next <= pu_reg; end if;
p_next <= ’0’ & pu_next & pl_reg(WIDTH-1 downto 1); if (n_next /= "0000") then state_next <= add_shft;
SLIDE 76
Hardware Design with VHDL Register Transfer Methodology I ECE 443 ECE UNM 76 (11/23/09) Sequential Add-and-Shift Multiplier else state_next <= idle; end if; end case; end process; r <= std_logic_vector(p_reg(2*WIDTH-1 downto 0)); end shift_add_better_arch; Comparison of three designs