SLIDE 1 Git Setup Help using Terminal (CSE 154)
Introduction:
Git enables keeping track of different versions of files as we keep editing them. To make sure we understand git properly, here are some terms you’ll see being used quite often:
- 1. Repositories: Just a fancy way of saying a collection of files/folders
- 2. Branch: Since large projects can have multiple people working on the same set of files, a
branch is basically a way in which users can keep uploading and saving their work
- individually. A branch is essentially a way to keep different portions of a project
separate from each other so they can be combined together later.
- 3. Master Branch: This is the main branch that git creates for you and saves all your code
to (unless you specifically want it to go to another branch). There are other terms that git uses that we’ll talk about below:
Step 1: Getting git on your machine (INSTALLING GIT)
NOTE: DO THIS ON A MACHINE YOU OWN OR HAVE ACCESS TO THROUGH THE REST OF THE QUARTER. If you already have git on your machine, you can check by:
On Mac:
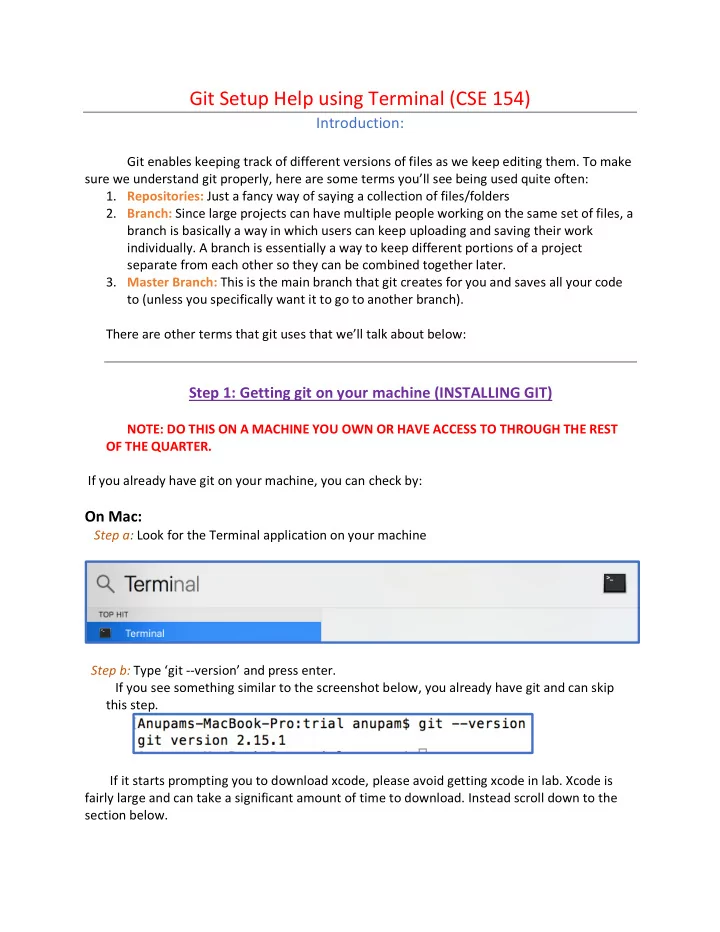
Step a: Look for the Terminal application on your machine Step b: Type ‘git --version’ and press enter. If you see something similar to the screenshot below, you already have git and can skip this step. If it starts prompting you to download xcode, please avoid getting xcode in lab. Xcode is fairly large and can take a significant amount of time to download. Instead scroll down to the section below.
SLIDE 2 On Windows:
Step a: Look for the terminal application or the Git Bash application Step b: Type ‘git --version' and press enter. If you see a version of git already shows up you’re good to go and can skip to the next step. If you’re on Mac, we do not recommend downloading xcode while in lab, instead use https://git-scm.com/download/mac to download git onto your mac. If you’re on Windows, we recommend downloading GIT BASH from here: https://gitforwindows.org/. (This downloads both Git and Git Bash so you don’t need to download git again). Once you’ve downloaded this, you should have an application called Git bash that you can search for and open up. This should open an application that has a black screen and that you can type on. Awesome! You now have git installed on your machine! Once you’re past this point, you should be able to effectively type ‘git --version’ either on your Terminal (Mac) or on GIT BASH(Windows) and get a response that states the version of git you’re running.
Small caveat (Mac users): If when running git commands, you see the message: 'The "git" command requires the command line developer
- tools. Would you like to install the tools now?"
type : “sudo mv /usr/bin/git /usr/bin/git-system” and hit enter and things should work fine.
If you’re stuck here, please call for your TA and we’ll come help you out.
Step 2: Setting up Gitlab
Step 2.a: Go onto Gitlab: https://gitlab.cs.washington.edu/users/sign_in Step 2.b: Click on ‘Sign in with UW Net ID’ or ‘CSE ID’ (if you have one). Fill out your information and you should now have a Gitlab account! Step 2.c: Once you have your account, sign out of Gitlab. You can do this by clicking on the drop down list on your profile (top right of the website). Step 2.d: Once you’re logged out, you should now be on the page you started out with before in Step 2.a
SLIDE 3
Step 2.e: Instead of signing on, click on ‘Https push requires a local gitlab password.’ shown here in the pink box In the window that opens, enter the email you used to create your Gitlab account. Click on ‘Reset password’ and it should tell you it will send you a link on your email to reset your password. Follow the steps to set a password THAT YOU WILL REMEMBER. OR NOTE IT DOWN. You will use this email and password every time you want to get a new homework or submit your homework! Once you’ve finished this and set a ‘local password’ you are now ready to start lab 1.
Step 3: Accepting the assignment
Step 3.a: Go onto https://oxford.cs.washington.edu/gitgrade/student/assignment/3 and log into your Gitlab account. Step 3.b: Once you’re logged in, you should see something similar to this: Step 3.c: Click on Accept Assignment and you should see something similar to this:
SLIDE 4
Step 3.d: Click on ‘Visit your Gitlab repository’ and that should lead you directly to the repository created for you! You should now see something similar to this:
Step 4: Now we’re ready to get files onto our local computer.
Step 4.a: Click on the dropdown option shown in pink in the previous screenshot and click on the HTTPS option. Step 4.b: Now copy the link shown onto your clipboard using the option shown in pink below:
SLIDE 5 Step 5: Moving onto your local desktop now!
Step 5.a: If you’re on a Mac computer, open up Terminal or GIT BASH on Windows. Step 5.b: Here is a list of commands you need to know to operate your way around your folder/file structure to get to where we want to download the files from gitlab.
- 1. cd *folder_name* - This helps us move into the folder_name specified. ( NOTE: You can
‘cd ~ ‘ to go to the user’s home directory and ‘cd ..’ to exit the folder you are in and go to it’s parent folder)
- 2. ls – This (LS) helps us show which folders/files are present inside the folder we’re in.
Here’s an example: If I execute the ‘ls’ command, I can see what folders/files I have present in the folder I’m in: If I want to go into the trial_folder folder, I can ‘cd’ into it. Now I’m inside the trial_folder folder and suppose I want to see what folders are present inside this folder, I can ‘ls’ into it as well.
Step 6: Ready to get files from Gitlab.
Step 6.a: Once you’re ready to download files from Gitlab (i.e. you’re in the correct folder you want to be, preferably somewhere on the desktop)
SLIDE 6
Step 6.b: Type the command ‘git clone’ followed by the URL you copied from Gitlab in Step 4.b Step 6.c: If prompted for a username/password enter the email and password you created in Step 2.e. Step 6.d: If all goes well, you should now have all the files that you saw online in the folder you are in. If you see a message like this, everything’s good to go!
Step 7: You can now go onto the files and make the changes you want to make to the files (You don’t have to do this using the terminal. Just find the folder you were in and you should see the files).
Step 7.a: Once you can see the files that were in your repository locally, you should be able to edit them. For this lab, we just need to edit the aboutme.html page to fill in
information about ourselves (Please read the Readme.md). To facilitate this, you could
use any text editor you like. We recommend using Atom which can be downloaded and installed as specified here: https://atom.io/. Remember to save your files when you’re editing them locally using your text editor.
Step 8: Once you are ready to submit your assignment or made a change that you think is ready to go, you are ready to git add, git commit and git push! Here’s how you do it.
Step 8.a: Suppose I made a change to the file index.html, when I type the command ‘git status’, I should see something similar to this:
SLIDE 7
This means that you modified the file – aboutme.html and that’s a change that’s different from what is present in your repository online. Step 8.b: git add the files that you wish to push for your submission. For example, I want to submit the file aboutme.html so I would type in ‘git add aboutme.html’ and click enter. (You can also type ‘git add .’ to add all files you see in git status automatically). NOTE THAT IF AN ASSIGNMENT SAYS THAT SOME FILES SHOULD NOT BE CHANGED BY YOU EXPLICITLY, YOU DON’T WANT TO ADD THEM IN THIS STEP. You only want to add files that you should be changing. You can add, commit and push many times so you’re more than welcome to push incomplete code on files that you should be changing. However, you shouldn’t stage files that you changed locally but you were asked not to change. Although this is reversible, this can often be a lengthy, pain staking process. Now when you try the ‘git status’ command again, you should see something similar to this: Step 8.c: Ready to commit! Now we need to git commit with a message to tell git that this package of files I’ve added are ready to be sent to the repository together now. It’s always recommended to have a descriptive commit message. The way we do this is by typing in ‘git commit -m “Your message here”’. If we try git status once again after this,
SLIDE 8
we should see something similar to this. (Note : The -m is important to make sure you don’t have to enter the comment in a text editor). Hit enter. Step 8.d: Now we can simply ‘git push origin master’ and the files we have locally should be pushed up to our repository for the graders to grade. Step 8.e: You can check that all your changes have been pushed by going to your repository on Gitlab (same as the screenshot for step 3.d) and you should now see your commit message and changes (shown in pink)!
Step 9: Now that we’re all done, we just need to turn in the assignment to indicate we’ve finished what we wanted to do. NOTE: ONLY DO THIS WHEN YOU’RE READY TO TURN IN (You can also turn in multiple times so no need to worry). YOU DON’T NEED TO DO THIS EVERY TIME YOU PUSH. To do this, we go to the turn in link: https://oxford.cs.washington.edu/gitgrade/student/assignment/3/turnin And accept that we’ve turned in the assignment and we should be good to go!