
SLIDE 1
g We take care of it. 4 Battery Replacement REG- D Contents 1. - - PDF document
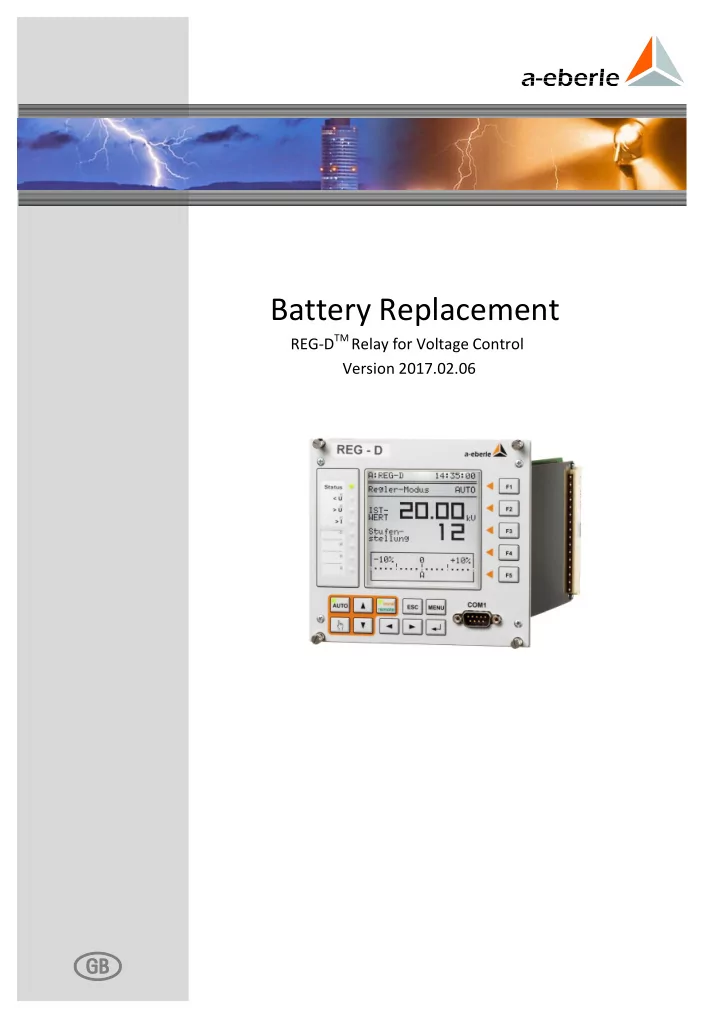
Battery Replacement REG-D TM Relay for Voltage Control Version 2017.02.06 g We take care of it. 4 Battery Replacement REG- D Contents 1. User guidance
We take care of it. 4 Battery Replacement REG-D™
5 Battery Replacement REG-D™
1. User guidance ................................................................................................................ 6 Target group ............................................................................................................................. 6 1.1 Warnings ................................................................................................................................... 6 1.2 Tips ............................................................................................................................................ 6 1.3 Other symbols .......................................................................................................................... 7 1.4 Applicable documentation....................................................................................................... 7 1.5 Storage ...................................................................................................................................... 7 1.6 2. Safety instructions .......................................................................................................... 8 3. Battery replacement ....................................................................................................... 9 4. RAM-Backup ................................................................................................................ 16 5. Disposal ....................................................................................................................... 21 6. Index ............................................................................................................................ 22 7. Contact ........................................................................................................................ 22
We take care of it. 6 Battery Replacement REG-D™
This user manual contains a summary of the information needed for installation, commissioning and operation. Read the user manual entirely and do not use the product unless you have understood its content.
The user manual is intended for skilled technicians and trained and certified operating personnel. The contents of this user manual must be accessible to people tasked with the installation and operation of the system.
Structure of the warnings Warnings are structured as follows:
SIGNAL WORD! Nature and source of the danger.
Consequences if instructions are not obeyed.
Actions to avoid the danger.
Types of warnings Warnings are distinguished by the type of danger they are warning against:
DANGER!
Warns of an immediately impending danger that can result in death
WARNING!
Warns of a potentially dangerous situation that can result in death or serious injuries when not avoided.
CAUTION!
Warns of a potentially dangerous situation that can result in fairly serious or light injuries when not avoided. NOTICE! Warns of a potentially dangerous situation that results in material or environmental damage when not avoided.
Tips on the appropriate use of the device and recommendations.
7 Battery Replacement REG-D™
Instructions Structure of the instructions: Instructions for an action.
Indication of an outcome, if necessary.
Lists Structure of unnumbered lists:
0 List level 1 – List level 2
Structure of numbered lists: 1) List level 1 2) List level 1
For the safe and correct use of the installation, observe the additional documentation that is delivered with the system, as well as the relevant standards and laws.
Store the user manual, including the supplied documentation, readily accessible near the system.
We take care of it. 8 Battery Replacement REG-D™
Follow the operating instructions. Keep the operating instructions with the device. Regularly instruct staff in all relevant issues regarding occupational safety, the
Ensure that the device is only operated if in perfect condition. Never use a damaged
device (physically damaged or malfunctioning).
Ensure the device is only operated by qualified personnel. Connect and use the device only as specified. Operate the device only with the recommended accessories. Ensure that the device is operated only in its original condition. Ensure that the device is only operated within the permissible rated data (see technical
specifications in the appendix, chapter 21).
Do not install or operate the device in environments where explosive gases, dust or
vapours may be present, i.e. that generally do not meet the requirements mentioned in the technical datasheet.
Clean the device only with cleaning products that comply with the manufacturer's
specifications.
Use only spare parts and auxiliary materials that have been approved by the
manufacturer.
Maintenance and repair of an open REG-D™ Relay for Voltage Control & Transformer
Monitoring (plug-in module without housing) must only be carried out by authorised, qualified personnel and must satisfy EMC Directives.
No supply or control voltage should be applied to a disassembled plug-in module, e.g.
electrical parts carrying dangerously high voltages could be encountered.
9 Battery Replacement REG-D™
In REG-D™ three variants of buffer batteries are used. Depending on the version and year of manufacture of the device, the batteries are used for different purposes (see case in this chapter). If the device is supplied with auxiliary voltage, the battery is not actively used. The battery serves as a back-up, in the event of auxiliary voltage failure. In general, the battery voltage is monitored and an alarm (status relay or status/operation LED) or message (output function for weak batteries with firmware version 2.24/3.24 or later (devices with characteristic S2)) is issued if the battery has low remaining capacity. This means that regular replacement of the battery is not necessary. Battery replacement may also be event-based. The delivery time-frames below are approximate. Due to repairs, for example, old devices can require a new CPU circuit board. Please check the battery type in the device. Regardless of the type of battery incorporated, in the event of a battery failure, the parameters should be saved as soon as possible, and always before the device is separated from the supply voltage. In devices fitted with MRAM, this is not necessary, but it is
RAM-Backup, from page 16 onwards, or in the document "Backup and restore parameters
DANGER!
Danger of electric shock! Injury or death
When replacing the battery, disconnect the device from all power
supplies (auxiliary voltage, control voltages). To replace the battery, first remove the plastic protective cover on the CPU board. Loosen the four screws and remove the cover. Once the battery has been changed, put the cover back on.
We take care of it. 10 Battery Replacement REG-D™ REG-D™ devices with MRAM (devices with the feature S2 from 09/2013, all others from 05/2014) These devices have a button cell battery to buffer the real-time clock. This means that no data are lost when the battery is removed. The time may have to be adjusted when the new battery is installed. Required battery: Lithium button cell 3 V Type CR1632 (order no. 570.0005) Service life: when the REG-D™ is in storage (no auxiliary voltage) > 6 years in duty cycle operation > 50% > 6 years The battery is installed on the outside of the CPU board in a suitable mount. To replace the battery, remove the existing battery from the mount and insert a new one. If you use tools to remove the battery, be careful not to damage the printed circuit board. NOTICE! Do not use pointed or sharp tools to remove the button cell! Avoid damage to the CPU circuit board
Remove the button cell with your fingers and not with a tool. If you have to use a tool, do not use a screwdriver or similar
pointed or sharp object. Remove the button cell Insert the button cell
11 Battery Replacement REG-D™ REG-D™ devices with SDRAM and plug-in batteries (feature S0 /S1 from 05/2009) In these devices, the battery acts as a buffer for the SDRAM and the real-time clock. Parameters are lost when the battery is removed. The devices therefore have a dual connection for the buffer battery. This means that the new battery can be connected before the used one is removed. For safety reasons, it is recommended to make a backup of the parameters for these devices. Required battery: Lithium 3V or 3.6V Type CR14250 1/2AA with cable and connector (order no. 570.0003.00) Service life: when the REG-D™ is in storage (no auxiliary voltage) > 6 years in duty cycle operation > 50% > 10 years Parameters are lost on removal of the battery!
Connect the new battery before removing the used one. Before replacing the battery, make a backup of the parameters (see chapter 4
RAM-Backup, from page 16 onwards). There are two battery connection points on the reverse side of the circuit board. To prevent any loss of parameters in the interim, you can place the replacement battery in the empty connection position. Take out the battery that needs to be replaced and remove carefully from the metal cover. Then you can push the new battery into the metal cover. Connection positions and metal cover on the outside of the printed circuit board Parallel arranged batteries
We take care of it. 12 Battery Replacement REG-D™ REG-D™ devices with SDRAM and soldering battery (feature S0/S1 before 05/2009 and feature S2 before 09/2013) In these devices, the battery acts as a buffer for the SDRAM and the real-time clock. Parameters are lost when the battery is removed. Therefore, before replacing the battery in these devices, a backup of the parameters must be made. Parameters are lost on removal of the battery!
Before replacing the battery, make a backup of the parameters (see chapter 4
RAM-Backup, from page 16 onwards). Required battery: Lithium 3V or 3.6V Type CR14250 1/2AA with soldering lugs (order no. 570.0001) Service life: when the REG-D™ is in storage (no auxiliary voltage) > 6 years in duty cycle operation > 50% > 10 years NOTICE! Mechanical/thermal damage to the CPU circuit board! Destruction of the conductor paths and/or the soldering pads
It is recommended to have the battery changed in the factory. If the battery has to be replaced on-site, this must only be done
by trained and qualified personnel, and in compliance with EMC Directives.
13 Battery Replacement REG-D™ The following describes in detail how to replace a soldered battery with three soldering lugs with a battery with two soldering lugs. When using a soldering iron, it is imperative to comply with general safety rules. Ensure the work is carried out with the utmost care and by trained personnel only. Turn the device so that the three soldering joints are in front of you. Unsolder the three soldering pins on the battery using a soldering iron. We recommend using unsoldering tape to remove the solder from the pins. Often, a little bit of tin solder on the top side of the suction tape helps to suck up the tin solder from the soldering joint. It is not advised to use a unsoldering suction pump as it can damage the soldering pads on the circuit board. Soldering battery with three soldering lugs CPU circuit board with soldering battery – plan view The soldering battery's soldering joints with three soldering lugs Unsoldering with unsoldering tape
We take care of it. 14 Battery Replacement REG-D™ To unsolder a soldered battery with two soldering lugs, the middle soldering point, which is between the two soldering lugs which have already been unsoldered, must be freed from
soldering pads on both the right and left side must be free of tin solder. Put the battery with two soldering lugs on the top side, in the central soldering pads, and ensure that the polarity of the battery is correct. On the underside of the CPU circuit board, the soldering pins must stand out from the middle of both soldering pads. Unsoldering the missing soldering pads for soldering batteries with two soldering lugs Soldering joints prepared for soldering battery with two soldering lugs Soldered battery with two soldering lugs – Check the polarity of the battery! Inserted soldered battery with two soldering lugs
15 Battery Replacement REG-D™ Solder the pins of the batteries again with the circuit board and check that the battery is properly supported. Finally, secure the plastic cover back in place on the CPU circuit board. Soldering the soldering battery with two soldering lugs
We take care of it. 16 Battery Replacement REG-D™
General The parameters of the Relay for Voltage Control & Transformer Monitoring REG-D™ are kept in the memory (RAM) by an internal battery, and are thus available unchanged after any interruption of the supply voltage. If the battery life is exhausted, the RAM loses data after any interruption of the supply voltage and the regulator will start with default parameters. To save the parameters independently of the regulator battery, since bootloader firmware version V2.12 it is possible to perform a RAM-Backup of the regulator. Hereby, parameters from the volatile memory (RAM) are secured in the non-volatile memory (flash) of the regulator. If, in addition, a REG-D™ firmware newer than V2.22 is used, the RAM-Backup is automatically restored in the RAM in case of loss of the parameters, and hence the parameters are restored too. In addition to automatic restoration, there is always the
Data backup It is recommended to carry out a RAM-Backup at the end of commissioning so that the parameters are saved on the spot in case of failure of the internal battery. REG-D™ devices with MRAM (as of 05/2014 or with the feature S2 as of 09/2013) In REG-D™ Relays for Voltage Control & Transformer Monitoring manufactured since 05/2014 (with feature S2 from 09/2013) a non-volatile RAM (MRAM) is used. In these devices no RAM-Backup is necessary, and for devices with the feature S2 this is not available in the bootloader. Performing a RAM-Backup The RAM-Backup can easily be performed on the regulator. For a manual RAM-Backup, the bootloader first needs to be started by pressing the key in the status menu for 5 seconds.
WARNING!
Control function While the regulator is in bootloader mode, all functions including the control functions of the REG-D™ are inoperative.
SETUP -6- Status (1) Bootloader (press F1 for 5s) RAM BACKUP
17 Battery Replacement REG-D™ By pressing the key one gets into the RAM-Backup menu. If the REG-D™ has a second flash memory, the screen will appear as shown on the left in the following picture. If the REG-D™ has no second flash memory (or the device already has an MRAM), the screen appears as shown in the following screen on the right. In the latter case, a backup of REG-D™ parameters using the bootloader is not possible. Press to start "RAM-BACKUP to FLASH", i.e., to save the parameters. Confirm with "YES" ( ) on the next screen that you wish to perform a backup, and wait until the screen shows the message "RAM-BACKUP: OK“. The current RAM-BACKUP is displayed with a UTC time stamp under . To exit the bootloader mode, press "back" ( ) and then "RESET" .
Loader v2.14 09:03:41 ĢĢĢĢĢĢĢĢĢĢĢĢĢĢĢĢĢĢĢĢĢ > > ĐĐĐĐĐĐĐĐĐĐĐĐĐĐĐĐĐĐĐĐĐ COM1 : 8/1/P- H/S : RTS/CTS Baudrate : 115200 ĐĐĐĐĐĐĐ RESET ĐĐĐĐĐĐĐĐĐĐċ ĐĐĐĐĐĐĐ <MENU> ¦ RAM Backup¦ BREAK ĐĐĐĐĐĐĐĐĐĐ·ĐĐĐĐĐĐĐĐĐĐ Loader v2.14 09:03:41 ĢĢĢĢĢĢĢĢĢĢĢĢĢĢĢĢĢĢĢĢĢ ĐĐĐĐĐĐĐĐĐĐĐĐ RAM BACKUP to FLASH ĐĐĐĐĐĐĐĐĐĐĐĐ ĐĐĐĐĐĐĐĐĐĐĐĐ RAM INIT == MASTER-RESET ĐĐĐĐĐĐĐĐĐĐĐĐ back ĐĐĐĐĐĐĐĐĐĐĐĐĐĐĐĐĐĐĐĐĐ Loader v2.14 09:03:41 ĢĢĢĢĢĢĢĢĢĢĢĢĢĢĢĢĢĢĢĢĢ ĐĐĐĐĐĐĐĐĐĐĐĐ ĐĐĐĐĐĐĐĐĐĐĐĐ ĐĐĐĐĐĐĐĐĐĐĐĐ RAM INIT == MASTER-RESET ĐĐĐĐĐĐĐĐĐĐĐĐ back ĐĐĐĐĐĐĐĐĐĐĐĐĐĐĐĐĐĐĐĐĐ Loader v2.14 09:03:42 ĢĢĢĢĢĢĢĢĢĢĢĢĢĢĢĢĢĢĢĢĢ RAM BACKUP? YES ĐĐĐĐĐĐĐĐĐĐĐĐ NO ĐĐĐĐĐĐĐĐĐĐĐĐ ĐĐĐĐĐĐĐĐĐĐĐĐ ĐĐĐĐĐĐĐĐĐĐĐĐ back ĐĐĐĐĐĐĐĐĐĐĐĐĐĐĐĐĐĐĐĐĐ Loader v2.14 09:03:42 ĢĢĢĢĢĢĢĢĢĢĢĢĢĢĢĢĢĢĢĢĢ RAM BACKUP: OK ĐĐĐĐĐĐĐĐĐĐĐĐ RAM BACKUP to FLASH ĐĐĐĐĐĐĐĐĐĐĐĐ 09:03:47 RAM RESTORE 2015-07-23 from FLASH
RAM INIT == MASTER-RESET ĐĐĐĐĐĐĐĐĐĐĐĐ back ĐĐĐĐĐĐĐĐĐĐĐĐĐĐĐĐĐĐĐĐĐ
We take care of it. 18 Battery Replacement REG-D™ Restoring RAM-Backup The Restoration of a RAM-Backup can easily be done on the regulator. For manual restoration of a RAM-Backup, the bootloader needs to be started first by pressing the key for 5 seconds in the status menu. NOTICE! Control function While the regulator is in bootloader mode, all functions including the control functions of the REG-D™ are inoperative. In addition, by restoring the RAM-Backup all parameter changes made since the last RAM-Backup are irretrievably deleted. By pressing the key one gets into the RAM-Backup menu. The backup of the RAM is shown at the level of the key including the backup time (in UTC time). The restoring of the parameters is triggered via the key "RAM RESTORE from FLASH" and confirmed with the
"RAM RESTORE: OK“ appears at the level of the key, the RAM-Backup has been successfully restored.
Loader v2.14 09:05:01 ĢĢĢĢĢĢĢĢĢĢĢĢĢĢĢĢĢĢĢĢĢ ĐĐĐĐĐĐĐĐĐĐĐĐ RAM BACKUP to FLASH ĐĐĐĐĐĐĐĐĐĐĐĐ 09:03:47 RAM RESTORE 2015-07-23 from FLASH
RAM INIT == MASTER-RESET ĐĐĐĐĐĐĐĐĐĐĐĐ back ĐĐĐĐĐĐĐĐĐĐĐĐĐĐĐĐĐĐĐĐĐ Loader v2.14 09:03:42 ĢĢĢĢĢĢĢĢĢĢĢĢĢĢĢĢĢĢĢĢĢ RAM RESTORE? YES ĐĐĐĐĐĐĐĐĐĐĐĐ NO ĐĐĐĐĐĐĐĐĐĐĐĐ ĐĐĐĐĐĐĐĐĐĐĐĐ ĐĐĐĐĐĐĐĐĐĐĐĐ back ĐĐĐĐĐĐĐĐĐĐĐĐĐĐĐĐĐĐĐĐĐ Loader v2.14 09:03:42 ĢĢĢĢĢĢĢĢĢĢĢĢĢĢĢĢĢĢĢĢĢ RAM RESTORE: OK ĐĐĐĐĐĐĐĐĐĐĐĐ RAM BACKUP to FLASH ĐĐĐĐĐĐĐĐĐĐĐĐ 09:03:47 RAM RESTORE 2015-07-23 from FLASH
RAM INIT == MASTER-RESET ĐĐĐĐĐĐĐĐĐĐĐĐ back ĐĐĐĐĐĐĐĐĐĐĐĐĐĐĐĐĐĐĐĐĐ
SETUP -6- Status Bootloader RAM -Backup
19 Battery Replacement REG-D™ The parameters are now fully restored. To exit the bootloader mode, press "back" ( ) and then "RESET" . Checking the time setting If the restoration of a RAM-Backup is performed due to an empty buffer battery, it will be necessary to check the time setting of the Relay for Voltage Control & Transformer Monitoring REG-D™, and to correct it if necessary. Deleting an existing backup file If an existing backup file is to be deleted completely and not only overwritten, the following steps needs be taken. In bootloader mode, switch to the RAM-Backup menu with the key. After a renewed "BACKUP RAM to FLASH" via the key has been triggered, the indicator "BUSY ..." appears in the panel of the regulator. If the RAM-Backup using the key is cancelled, the current RAM-BACKUP is deleted and is then no longer visible.
Loader v2.14 09:03:42 ĢĢĢĢĢĢĢĢĢĢĢĢĢĢĢĢĢĢĢĢĢ ĐĐĐĐĐĐĐĐĐĐĐĐ RAM BACKUP to FLASH ĐĐĐĐĐĐĐĐĐĐĐĐ 09:03:47 RAM RESTORE 2015-07-23 from FLASH
RAM INIT == MASTER-RESET ĐĐĐĐĐĐĐĐĐĐĐĐ back ĐĐĐĐĐĐĐĐĐĐĐĐĐĐĐĐĐĐĐĐĐ Loader v2.14 09:03:42 ĢĢĢĢĢĢĢĢĢĢĢĢĢĢĢĢĢĢĢĢĢ BUSY...... ĐĐĐĐĐĐĐĐĐĐĐĐ Cancel ĐĐĐĐĐĐĐĐĐĐĐĐĐĐĐĐĐĐĐĐĐ Loader v2.14 09:03:42 ĢĢĢĢĢĢĢĢĢĢĢĢĢĢĢĢĢĢĢĢĢ RAM BACKUP: cancelled ĐĐĐĐĐĐĐĐĐĐĐĐ RAM BACKUP ins FLASH ĐĐĐĐĐĐĐĐĐĐĐĐ ĐĐĐĐĐĐĐĐĐĐĐĐ RAM INIT == MASTER-RESET ĐĐĐĐĐĐĐĐĐĐĐĐ back ĐĐĐĐĐĐĐĐĐĐĐĐĐĐĐĐĐĐĐĐĐ
We take care of it. 20 Battery Replacement REG-D™ Resetting all parameters via the bootloader 1.) IMPORTANT: If a RAM INIT is performed, all parameters are reset to default. Any existing backup is not removed thereby. 2.) To reset all parameters, a master reset can be performed using the bootloader. Start the bootloader, press MENU and then "RAM INIT == MASTER-RESET" (F4). The master reset using the bootloader is equivalent to the REG-L command "sysreset = 590". 1.) After confirming RAM-INIT with "YES" (F1), a successful reset of the master is confirmed with RAM INIT: OK.
Loader v2.14 09:03:41 ĢĢĢĢĢĢĢĢĢĢĢĢĢĢĢĢĢĢĢĢĢ > > ĐĐĐĐĐĐĐĐĐĐĐĐĐĐĐĐĐĐĐĐĐ COM1 : 8/1/P- H/S : RTS/CTS Baudrate : 115200 ĐĐĐĐĐĐĐ RESET ĐĐĐĐĐĐĐĐĐĐċ ĐĐĐĐĐĐĐ <MENU> ¦ RAM Backup¦ Cancel ĐĐĐĐĐĐĐĐĐĐ·ĐĐĐĐĐĐĐĐĐĐ Loader v2.14 09:03:42 ĢĢĢĢĢĢĢĢĢĢĢĢĢĢĢĢĢĢĢĢĢ ĐĐĐĐĐĐĐĐĐĐĐĐ RAM BACKUP to FLASH ĐĐĐĐĐĐĐĐĐĐĐĐ 09:03:47 RAM RESTORE 2015-07-23 from FLASH
RAM INIT == MASTER-RESET ĐĐĐĐĐĐĐĐĐĐĐĐ back ĐĐĐĐĐĐĐĐĐĐĐĐĐĐĐĐĐĐĐĐĐ Loader v2.14 09:03:42 ĢĢĢĢĢĢĢĢĢĢĢĢĢĢĢĢĢĢĢĢĢ RAM INIT? YES ĐĐĐĐĐĐĐĐĐĐĐĐ NO ĐĐĐĐĐĐĐĐĐĐĐĐ ĐĐĐĐĐĐĐĐĐĐĐĐ ĐĐĐĐĐĐĐĐĐĐĐĐ back ĐĐĐĐĐĐĐĐĐĐĐĐĐĐĐĐĐĐĐĐĐ Loader v2.14 09:03:42 ĢĢĢĢĢĢĢĢĢĢĢĢĢĢĢĢĢĢĢĢĢ RAM INIT: OK ĐĐĐĐĐĐĐĐĐĐĐĐ RAM BACKUP to FLASH ĐĐĐĐĐĐĐĐĐĐĐĐ 09:03:47 RAM RESTORE 2015-07-23 from FLASH
RAM INIT == MASTER-RESET ĐĐĐĐĐĐĐĐĐĐĐĐ back ĐĐĐĐĐĐĐĐĐĐĐĐĐĐĐĐĐĐĐĐĐ
21 Battery Replacement REG-D™
Disposal note for EU member states To preserve and protect the environment, prevent pollution, and improve the recycling of raw materials, the European Commission issued a directive according to which manufacturers take back electrical and electronic devices so they can be properly disposed of or recycled. The devices with this symbol are not allowed to be disposed along with normal solid household within the European Union. Special note for customers in Germany The electronic devices manufactured by A. Eberle are intended for commercial use. These devices may not be disposed of at municipal recycling centres for electrical devices, but are taken back by A. Eberle. If you have question, please contact us by phone or email: +49(0)911-628 108-0 info@a-eberle.de If the device is not operated within the European Union, the national waste-disposal regulations in the respective country must be respected.
We take care of it. 22 Battery Replacement REG-D™
Auxiliary voltage ................................................ 9 Battery ............................................................. 16 Battery replacement .......................................... 9 Disposal ........................................................... 21 Master reset .................................................... 20 RAM-Backup .............................................. 16, 18 Safety instructions ............................................ 8
For questions, please contact the A. Eberle REGSys support team: A.Eberle GmbH & Co.KG
D-90461 Nuremberg E-mail: regsys-support@a-eberle.de Phone: +49 911 / 62 81 08 -101 Fax: +49 911 / 62 81 08 -96 Homepage: http://www.a-eberle.de