prep x assembly 05 wire harness
play

#prep X Assembly 05: Wire Harness It is HIGHLY recommended to watch - PDF document

#prep X Assembly 05: Wire Harness It is HIGHLY recommended to watch the video for this part. It's a better learning experience; the images can't easily convey how the wire slack should feel and what are the wire paths. PS: In the videos, we are


  1. #prep X Assembly 05: Wire Harness It is HIGHLY recommended to watch the video for this part. It's a better learning experience; the images can't easily convey how the wire slack should feel and what are the wire paths. PS: In the videos, we are assembling the dual fan version of JellyBOX. No worries, the wire harness is exactly the same for a single fan JellyBOX. Overview of JellyBOX Electronics 
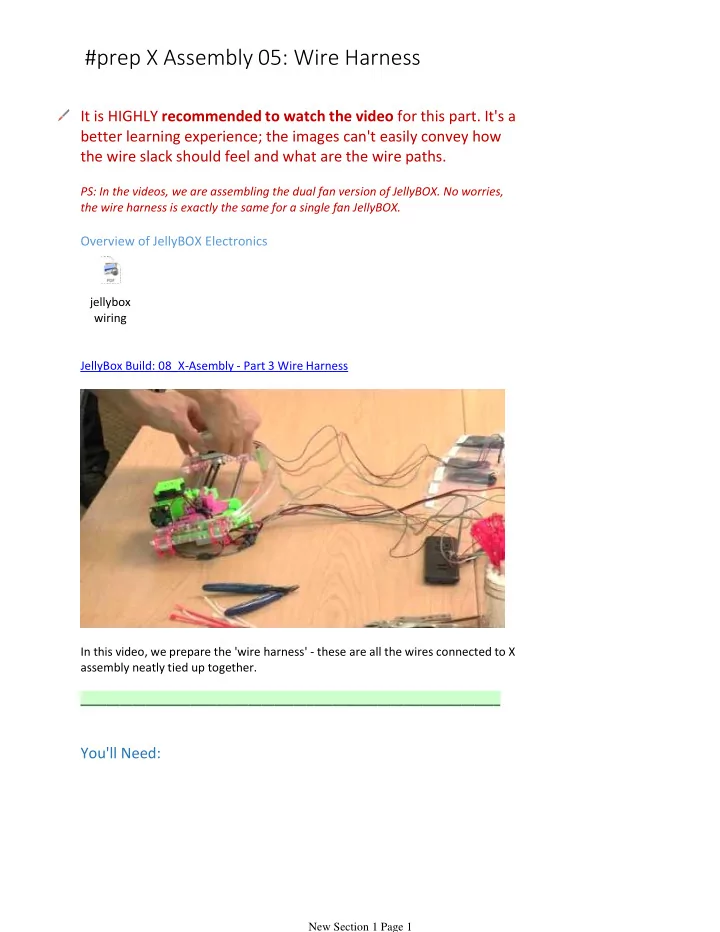
jellybox wiring JellyBox Build: 08_X-Asembly - Part 3 Wire Harness In this video, we prepare the 'wire harness' - these are all the wires connected to X assembly neatly tied up together. _________________________________________________________________ You'll Need: New Section 1 Page 1

  2. X assembly and Extruder Bags with wires 4" zip ties and 6" zip ties M2x16 bolts (2) M2 regular nuts (2) M2 regular washers (2) Long Spiral Wrap and Short Spiral Wrap Title: Preparations New Section 1 Page 2

  3. Pre-install a 4" zip tie with a head out on the right side of the X carriage. Title: Insert the Extruder New Section 1 Page 3

  4. Note: this is a common procedure. Why else have quick release extruder? Loosen the quick release clamp and insert the extruder. Make sure the hotend wires pass under the X carriage and especially under the fan wires. Tighten the quick release clamp to hold the extruder in place. Title: More Zip Ties New Section 1 Page 4

  5. Form two 5" zip tie loops. Place the loops on the two stand-offs with the tails pointing and bending towards the hotend. (Tooth side facing towards the bottom of the assembly.) Snip of about 1'' from each zip tie (2.5cm) New Section 1 Page 5

  6. Then, thread one 4" zip tie inside each 5" loop. Title: The Wiring Really, just watch the video for this part. It's a better learning experience; the images can't easily convey how the wire slack should feel and what are the wire paths. JellyBox Build: 08_X-Asembly - Part 3 Wire Harness If you insist, here's some text: New Section 1 Page 6

  7. Title: Connect the Hot End Wire Attach the hot end wire. Leave the proximity sensor disconnected for now. Title: Connect the Fan Wires Connect the two fan wires. The left fan connects to the end of the wire. The other connector attaches to the right fan. New Section 1 Page 7

  8. Title: Zip Tie the Wires to the X Carriage Use the zip tie in the side of the carriage to hold the wires in place. After tightening the tie, snip off the end. Title: Connect the Heat Block and Thermistor Connect the heat block and thermistor wire. New Section 1 Page 8

  9. Title: Attach the Extruder Motor Wire Connect the wire for the extruder motor to the header on top of the motor. Title: Connect the Proximity Sensor Connect the proximity sensor to the wire you left hanging earlier. New Section 1 Page 9

  10. Title: Attach the Wires to the X Carriage Spacer Use the 4" zip tie on the spacer to hold the wires. Keep it loose so you can adjust the wires. Make sure all the wires have enough slack and are not being pulled. When you're happy with how the wires sit, tighten the zip tie and snip the end. Title: Attach the X Motor Wire Attach the X motor wire to the header on top of the motor. New Section 1 Page 10

  11. Title: Thread the Wire Through the Frame Above the X motor is a hole in the frame. Thread the x motor wire through it. New Section 1 Page 11

  12. Title: Zip Tie the X Motor Wire Use a 4" zip tie to secure the X motor wire. Make sure there's plenty of slack in the wire. This will result in a cute wave as the X motor wire goes up first and then curls down. Title: Bolt the X Axis End Stop in Position Place two M2 washers onto two M2x16 bolts. Use the bolts and two M2 nuts to secure the end stop in place. New Section 1 Page 12

  13. Title: Secure the Wires to the Post Use the 4" zip tie attached earlier to form a loose loop around the wires. All the wires must enter the loop from the same direction (from the right in the picture); including the X end stop and X motor wires. Title: Tighten the Zip Ties Adjust the cables so they form a gentle curve with plenty of slack. Slack Slack Slack. Don't leave wires hanging, but they need their space. Tighten the zip tie and snip off the tail. Make sure the X carriage is at the end of its run. Make sure none of the connections are being pulled on. New Section 1 Page 13

  14. Title: Zip Tie the Brace Use two more 4" zip ties to bring the tails of the two 6" ties into the bundle. Title: Spiral Wrap the Wire Bundle Use the shorter piece of spiral wrap to cover the wire bundle. Snip off any excess length. Leave the spiral wrap loose so it can fold smoothly. New Section 1 Page 14

  15. Title: Wrap the Rest of the Wires Use the longer piece of spiral wrap on the rest of the wires. If you're building with a friend this is a good place for a race who can wrap the remainder faster. New Section 1 Page 15

Download Presentation
Download Policy: The content available on the website is offered to you 'AS IS' for your personal information and use only. It cannot be commercialized, licensed, or distributed on other websites without prior consent from the author. To download a presentation, simply click this link. If you encounter any difficulties during the download process, it's possible that the publisher has removed the file from their server.

Recommend


More recommend