Ornament Presentation Box by Kris McIntosh, www.stampingwithkris.com Page 1
Ornament Presentation Box Stampin Up! Supplies Delicate Doilies - - PDF document
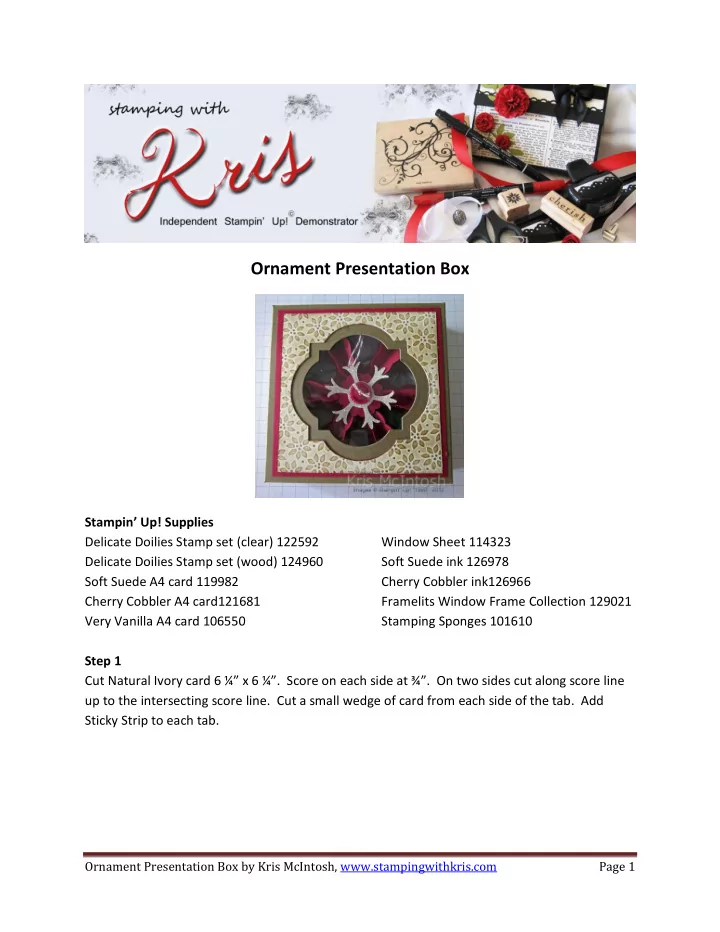
Ornament Presentation Box Stampin Up! Supplies Delicate Doilies Stamp set (clear) 122592 Window Sheet 114323 Delicate Doilies Stamp set (wood) 124960 Soft Suede ink 126978 Soft Suede A4 card 119982 Cherry Cobbler ink126966 Cherry Cobbler
Ornament Presentation Box by Kris McIntosh, www.stampingwithkris.com Page 2
Step 1 Step 2 Remove red liner and assemble box. This is the box base. Step 2 Step 3 Emboss Very Vanilla card 4 ¼” x 4 ¼” using the Petals-A-Plenty Embossing Folder. Step 3 Step 4 Sponge edges and all over the embossed card using Soft Suede ink.
Ornament Presentation Box by Kris McIntosh, www.stampingwithkris.com Page 3
Step 4 Step 5 Attach the embossed Very Vanilla card to Cherry Cobbler card 4 ½” x 4 ½”. Step 5 Step 6 Cut Window Framelit No. 4 (number Framelits from the smallest to the largest) from the centre
- f the card layers.
Step 6 Step 7 Cut Soft Suede card 6 ¼” x 6 ¼” and score on each side at ¾”. I use a Box Making Shim which Connie Stewart shared on her blog. This allows you to cut the base and lid of the box using the same dimensions, score the same width and yet the lid is just slightly bigger. You need to watch this video to use these dimensions and get a perfect box. Create tabs as in Step 1 and attach Sticky Strip.
Ornament Presentation Box by Kris McIntosh, www.stampingwithkris.com Page 4
Step 7 Step 8 Use the 1” Circle Punch to punch ½ a circle on two sides of the box lid. Step 8 Step 9 Attach the piece from Step 6 inside the score lines on the Soft Suede card. Step 9 Step 10 Cut Window Framelit No. 3 (number Framelits from the smallest to the largest) from the Soft Suede card.
Ornament Presentation Box by Kris McIntosh, www.stampingwithkris.com Page 5
Step 10 Step 11 Attach window sheet 4 ½” x 4 ½” behind the opening using Mini Glue Dots. Step 11 Step 12 Remove red liner from Sticky Strip and assemble box lid. Step 12 Step 13 Stamp tissue paper with one of the images from the Delicate Doilies stamp set using Cherry Cobbler ink.
Ornament Presentation Box by Kris McIntosh, www.stampingwithkris.com Page 6
Step 13 Step 14 Scrunch paper and place into the bottom of the box add ornament. Step 14 Step 15 Place the lid on the box. Step 15
Ornament Presentation Box by Kris McIntosh, www.stampingwithkris.com Page 7
Hope you enjoy this tutorial. Please see my Free Tutorial Page for the instructions to make the
- rnament.
Kris
Kristine McIntosh Independent Stampin' Up! Demonstrator Brisbane, Australia Blog: www.stampingwithkris.com Web: www.krismcintosh.stampinup.net Challenges: www.sunnychallenges.blogspot.com Facebook: http://www.facebook.com/pages/Stamping-With-Kris/187579114586591 I love sharing my ideas and projects in tutorial form with you, however, I do ask that you please respect the following:- While I would love for you to show and share my projects but I do request that you do not forward, rewrite, copy
- r hand out my tutorials. Please direct your family and friends to my website where they can download this
tutorial for themselves.