
SLIDE 1
Christmas Ornament & Presentation Box, All Day Class November 2018 by Kris McIntosh, www.stampingwithkris.com Page 1
Christmas Ornament and Presentation Box
I used a tutorial that I found online (https://kocreationscards.blogspot.com/2018/08/home-decor-blog-hop- su-style.html) as my basis for creating this ornament. This ornament is created using the large and small leaf dies as well as the large and small leaf embossing dies from the Natures Roots Framelits Dies.
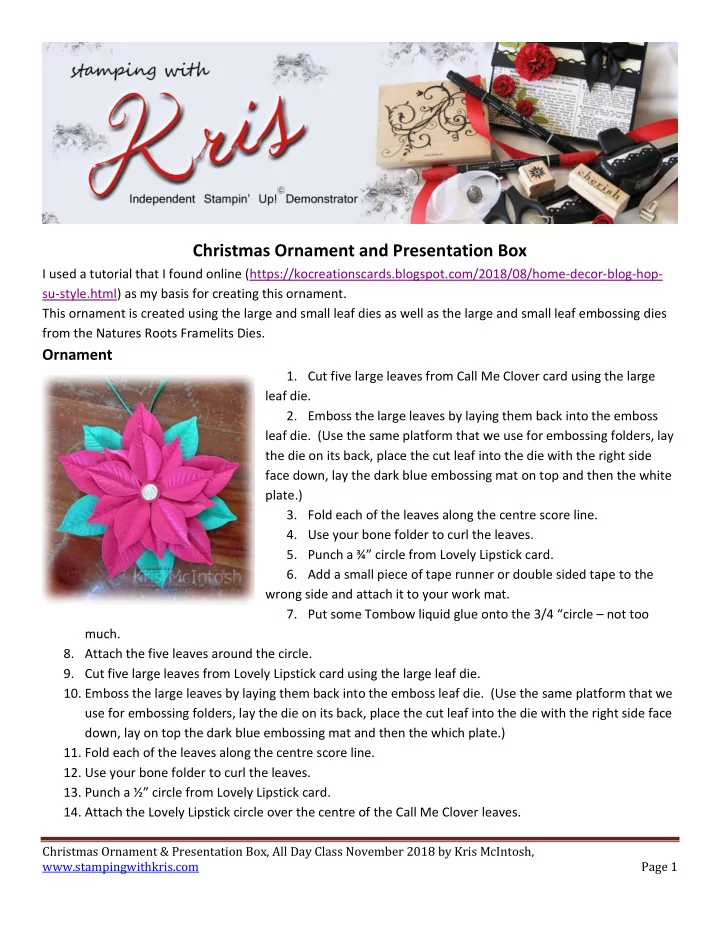
Ornament
- 1. Cut five large leaves from Call Me Clover card using the large
leaf die.
- 2. Emboss the large leaves by laying them back into the emboss
leaf die. (Use the same platform that we use for embossing folders, lay the die on its back, place the cut leaf into the die with the right side face down, lay the dark blue embossing mat on top and then the white plate.)
- 3. Fold each of the leaves along the centre score line.
- 4. Use your bone folder to curl the leaves.
- 5. Punch a ¾” circle from Lovely Lipstick card.
- 6. Add a small piece of tape runner or double sided tape to the
wrong side and attach it to your work mat.
- 7. Put some Tombow liquid glue onto the 3/4 “circle – not too
much.
- 8. Attach the five leaves around the circle.
- 9. Cut five large leaves from Lovely Lipstick card using the large leaf die.
- 10. Emboss the large leaves by laying them back into the emboss leaf die. (Use the same platform that we
use for embossing folders, lay the die on its back, place the cut leaf into the die with the right side face down, lay on top the dark blue embossing mat and then the which plate.)
- 11. Fold each of the leaves along the centre score line.
- 12. Use your bone folder to curl the leaves.
- 13. Punch a ½” circle from Lovely Lipstick card.
- 14. Attach the Lovely Lipstick circle over the centre of the Call Me Clover leaves.