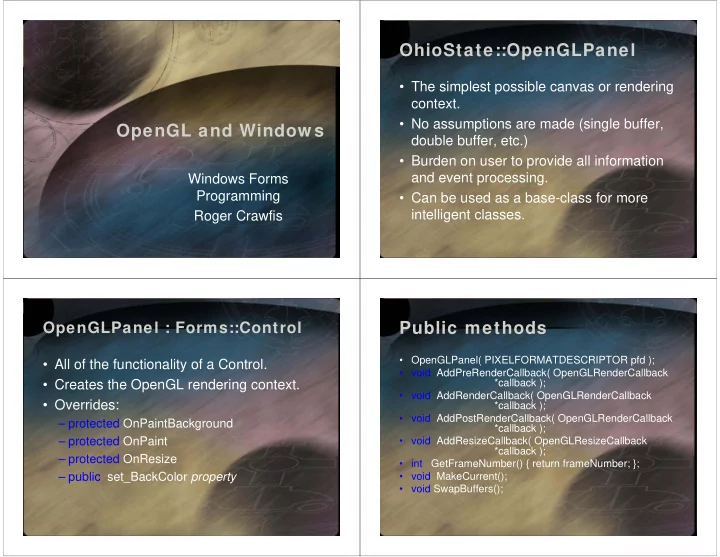
ohiostate openglpanel
play

OhioState::OpenGLPanel The simplest possible canvas or rendering - PowerPoint PPT Presentation

OhioState::OpenGLPanel The simplest possible canvas or rendering context. No assumptions are made (single buffer, OpenGL and Window s double buffer, etc.) Burden on user to provide all information and event processing. Windows


  1. OhioState::OpenGLPanel • The simplest possible canvas or rendering context. • No assumptions are made (single buffer, OpenGL and Window s double buffer, etc.) • Burden on user to provide all information and event processing. Windows Forms Programming • Can be used as a base-class for more intelligent classes. Roger Crawfis Public methods OpenGLPanel : Forms::Control • OpenGLPanel( PIXELFORMATDESCRIPTOR pfd ); • All of the functionality of a Control. • void AddPreRenderCallback( OpenGLRenderCallback • Creates the OpenGL rendering context. *callback ); • void AddRenderCallback( OpenGLRenderCallback • Overrides: *callback ); • void AddPostRenderCallback( OpenGLRenderCallback – protected OnPaintBackground *callback ); – protected OnPaint • void AddResizeCallback( OpenGLResizeCallback *callback ); – protected OnResize • int GetFrameNumber() { return frameNumber; }; – public set_BackColor property • void MakeCurrent(); • void SwapBuffers();

  2. The Constructor Callbacks • The OpenGLPanel is structured around • No assumptions, so the user passes in the registered callbacks. These are pointers to a PIXELFORMATDESCRIPTOR which function, or delegates. indicates the number of color bits, stencil • Two publicly defined Delegate types : bits, etc. – public __delegate void OpenGLRenderCallback( • Make sure the dwflag entry includes const int frameNumber ); – public __delegate void OpenGLResizeCallback( const PFD_SUPPORT_OPENGL. int width, const int height ); • See the sample and the MSDN help for • These are really type definitions: – A pointer to a function that returns void and takes one parameter more information. of type const int . Callbacks Using OpenGLPanel • Like any other type, you create and • Checklist: instance: – Create a Forms::Panel (in the designer). thank-you garbage collection glPanel->AddRenderCallback( new – In the Form1 constructor: OhioState::OpenGLRenderCallback( this, DrawScene ) ); • Create an OpenGLPanel and add it to the panel • DrawScene is a public method of this , or (call this glPanel). Form1 here. • Put all of your drawing code into a method that returns void and takes a single const int. • Can also use static methods, in which • Create a callback instance and add it to glPanel. case, this would be replaced with the class • Create a resize function, wrap it in a callback and type. add it to glPanel.

  3. Creating a nice GUI Create a new Project • The next several slides will walk you thru a • Start Visual Studio .NET particular design that I like for my applications. • The order can be a little finicky, so if you mess up, delete all files and start over!!! • The design consists of a GUI panel on the left and a view panel on the right, with a status bar and a main menu. Create a new Project Add your GUI elements • Select a C++ Windows Forms Application • Resize the Form to be about 800 by 600, or whatever you like. • In this order, add the following elements from the Toolbox->Windows Forms. – StatusBar – Panel – Splitter – Panel

  4. GUI design GUI Design • In the Properties window you can make changes • Build (Build->Build Solution) and run to the content and appearance of these controls. (Debug->Start without Debugging) your application. It should look something like this: – Change the BackColor of the splitter. – Change the Dock property of panel1 to Left. – Change the Dock property of panel2 to Fill (the center icon). – Click on the Collections property of the statusBar and add three tabs. Type in some text. – On the StatusBar properties, set ShowPanels to true. GUI Design GUI Design • In the GUI panel, let’s make one large tabbed • Your program should now look like this. dialogue. New Title added • Drag a tabControl over to the GUI panel. Background • Set its dock to Fill. image added • In the properties select the Collection button and add four tab panels. – Lab1 – Extra – Grading – Readme

  5. Examine the code InitializeComponents • Okay. We have the basic lay-out. Notice we • There is a tree view structure in the code views have not done any programming yet. with Visual Studio. You can collapse a method, class or region of code to hide the details as you • Right-click the Form1.h file in the Solution panel work on other parts of the code. and select Edit Code. We have: • The InitializeComponents method is collapsed – A public constructor by default. This is automatically generated by – A protected Dispose the Designer Window. It has all of the nitty – A private InitializeComponents details on setting up the controls. • What is this! The source code is in the .h file? • Uncollapse it and examine the code. • Look at the Form1.cpp file. Lab1 Lab1 Controls • Okay, we have the basic lay-out, now we • Selecting an image file. need to embed the business logic. – Possible Options: 1. Add a text box and have the user type the path / • What are the lab requirements? filename into the textbox. (umm Yuck!!!) • More specifically, what controls do we 2. Pre-load a set of image files and have the user need? select from this set. (lacks flexibility). 3. Bring up a dialog asking the user to select an – Specifying the number of lines / points. image. Limit the selection to only the proper type – Reading in (selecting) an image file. of files. – Specifying the line-width or point size. • How do we bring up the dialog? • What do we have to do to show the dialog? – Specify two color values.

  6. Image file Dialogue Image file Dialogue • Adjust the Button’s properties: • This is why you use a higher-level API. 1. Change the text to “Load Texture” • With windows forms and .Net 1.1 this is • Adjust the OpenFileDialog’s properties really trivial. Follow these simple steps: 1. Change the Title to “Select an image file for the texture” 2. In the Filter property add a string to aid in the right file type 1. Drag an OpenFileDialog control to anywhere selection. Something like this: “All files (*.*)|*.*|Jpeg (*.jpg)|*.jpg|Png (*.png)|*.png”. on your Form. Notice that it places it in a Each pair here has the format (Text string to display | regular special window pane below your design. expression). Note that adding a space before the asterisk results in a different regular expression. 2. Drag a Button control to the Lab1 tab panel. 3. Set the Filter index to 2, such that jpeg is the default format. This will be used to bring up the dialog. 4. Set the AddExtension to False. 5. Make sure the Multiselect property is False. Image file Dialogue Image file Dialogue • Okay, we have now defined everything, such • Run and test the program. Clicking on the that the constructor is called and the properties button should bring up the openFileDialog. are set. Nothing will happen though, we need to add some logic. • Double click the “Load Texture” button. This adds some template code and brings up the source code window (Form1.h). • It also added this line inside the InitializeComponents: this->button1->Click += new System::EventHandler(this, button1_Click); • Add the following line in button1_Click: this->openFileDialog1->ShowDialog();

  7. Image file Dialogue Lab1 Controls • Number of primitives • Note that the dialog simply selects the file, it does not open it or perform any logic yet. – There are several choices here. • Textbox (you would need to validate that it only • We will address actually opening the file, contained numbers). reading in the image and creating a • Numeric Up/Down control (it has two speeds, both of which you can configure in the Properties page). texture map from it later. • Trackbar or slider control (you may need to provide a text label that indicates the current value). – The reference lab uses both a numericUpDown and a Trackbar tightly coupled together. Accessibility Trackbar • Let’s use the trackbar. • Most controls have accessibility features built into them. • Drag a trackBar control to the Lab1 tab panel. • In the Properties page: • This allows for a mouse free control. – Set the Maximum value to 100,000 (or higher) • You can hit the tab key to reach the – Set the (initial or current) Value to 10,000 NumericUpDown and Trackbar controls – Set the LargeChange to 5,000 and then use the arrow keys to change – Set the SmallChange to 1,000 their values. – Set the Tick Frequency to 10,000 • Holding down the key accelerates the • Also add a Label control (static text) above the change. trackBar to describe its purpose.

Download Presentation
Download Policy: The content available on the website is offered to you 'AS IS' for your personal information and use only. It cannot be commercialized, licensed, or distributed on other websites without prior consent from the author. To download a presentation, simply click this link. If you encounter any difficulties during the download process, it's possible that the publisher has removed the file from their server.

Recommend


More recommend