
SLIDE 1
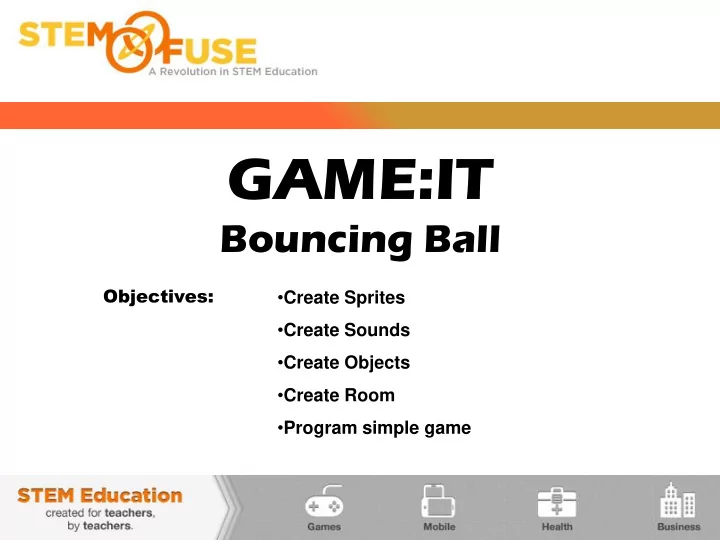
GAME:IT
Bouncing Ball
Objectives:
- Create Sprites
- Create Sounds
- Create Objects
- Create Room
- Program simple game
GAME:IT Bouncing Ball Objectives: Create Sprites Create Sounds - - PowerPoint PPT Presentation
GAME:IT Bouncing Ball Objectives: Create Sprites Create Sounds Create Objects Create Room Program simple game All games need sprites (which are just pictures) that, in of themselves, do nothing. They are the elements that
Objectives:
All games need sprites (which are just pictures) that, in of themselves, do nothing. They are the elements that make up the game parts. The sprites are later turned into objects (which can be programmed). Backgrounds are just that—they are what you see in the background. Backgrounds are colors, or textures, or even pictures. The backgrounds are later used as part of the rooms. Sounds are files (usually .wav files) that add another dimension to the
Rooms are the “playing fields” for the games. If you want to change the “playing field”, you change the room. Rooms can be changed to different sizes and detail.
When starting a new game, typically you create the sprites & backgrounds first.
The objects are then created from the sprites. Objects are important because they can be programmed to do things (sprites cannot). Rooms are created next because objects and backgrounds are needed to create the rooms. When the room is set up, programming the events and actions of the objects can take place and be tested for errors.
Creating a New Game Where do I start?
If you know what sounds you are using, they can be created before programming starts or added later to enhance the game.
Your first game will demonstrate a few of the elements of Game Maker. The game will involve a ball bouncing around the room and making a sound when it hits the wall.
Your finished game will have (1) a smiley faced ball, (2) a red border, and (3) a lime green background.
The first step is to create your wall and ball “sprites”
this game, you are going to load a pre-existing sprite, so click the Load Sprite button.
IT IS IMPORTANT TO NAME THINGS AS INSTRUCTED
image and click Open. ***GET THIS FILE PATH FROM YOUR TEACHER***
Next you are going to create a sound 7. Click on the Create a Sound icon 8. Name the sound snd_beep 9. Click the Browse Folder icon to load the beep.wav file from the Game 1 Resources folder
to save
Why is it important to carefully label sprites, sound, backgrounds, rooms, and objects?
It’s just GOOD programming—it saves time later in searching for mistakes or making changes to your game. It only takes a few seconds to type in something that could cause minutes/hours of frustration. NAME EVERYTHING EXACTLY AS INSTRUCTED IN OUR LESSONS What are good examples? Spr_ball, spr_wall, snd_beep, bckgd_desert, obj_plane
What are BAD examples?
Spr01, sound1, background, plane (is it a sprite or object?)
Next, you will create objects.
But I don’t understand—we created sprites -- they look the same?
The difference is sprites are just pictures, but objects can be programmed in Game Maker. How to create objects:
11. Select the Create an Object icon 12. Name the Object
13. You need to assign a sprite to the object. Do this by clicking the list icon, and select spr_ball from the list of available sprites
The objects have additional attributes that need to be discussed – visible & solid
What is visible?
Most items in your games will be visible but
invisible (like walls and floors). Even though an
for other objects to collide with for points or to bounce off of. You will learn more about this as we go through the lessons
What is solid?
Solid means you can collide with or bounce off
14. Make sure both Visible and Solid are
the ball object. 15. Follow the same steps to create the wall object – name it obj_wall and assign it the spr_wall.
Next—we create our first “room”
16. Click the Create a Room icon 17. Select the Backgrounds tab 18. Select a color by clicking in the color area to select the background color from the pop-up menu. 19. Click OK to save that color
To add objects to the room:
place the ball somewhere in the middle of the room by clicking your left mouse where you wish to place the ball.
23. Next, click the List Icon again and select the obj_wall. Click into each square around the perimeter of the room to add the wall. Left mouse adds (or moves) the object. HINT: Click the Left Mouse and drag while hold down the Shift + Ctrl keys can add multiple objects quickly. *Just be very careful where you drag.* NOTE: There is a visual that shows which object will be placed when clicking into the room
If you place something in the wrong spot, right click on that object and select delete from the menu that appears.
Time to Program!
The actual programming occurs in the OBJECTS we have created:
With the room set up and the objects in the room, what do we want the ball to do? A) Bounce off the walls B) Make a “beep” when it hits the wall. In this case, all the programming takes place in the obj_ball.
double clicking it in the side menu.
Create Event
This event happens when an instance of the object is first created, and is the very first thing that happens within an instance placed in the room. This event is the ideal place to initialize variables, start Timelines, set paths etc... and do anything else that generally only needs to be done once or only when an instance first appears in the room.
Destroy Event:
This event is the very last event to be executed when an instance is destroyed. It is often overlooked when adding behaviors to objects, but it can be very useful, for example by creating explosion or particle effects when an enemy is killed, or for re-spawning a new instance of the object in another part of the room, or even for adding points onto a score.
Events are discreet moments in the game loop where things are made to happen based on what you have programmed for them. Here is a description of the different events:
Alarm(s):
The alarm event is split into 12 sub events, one for each of the possible alarms that can be set in an instance. But what is an alarm? It’s a special event that does nothing unless the alarm has been previously set, and then it will wait until that alarm has counted down to 0 before running the actions or code that you have added into it. Example: Object changes direction every 30 steps. FYI: An Action must reset the alarm.
Step Event:
GameMaker:Studio splits time into steps with the room speed defining how many of these steps happen per second. A step is basically the loop that runs constantly with all the events being checked and triggered as necessary while the game runs, so the Step Event is an event that is checked every single step of the game while the instance exists. For most things the standard step event will be fine to use, but sometimes you want a bit more control over what code runs and at what time, so for that you are provided with the begin and end step events.
Collision Event:
When 2 objects collide, you want these actions to occur. Example: When bomb collides with plane— create an explosion sprite.
Keyboard Event:
When a player presses a certain key on the keyboard, the actions will occur. You get the action in every step as long as the key is depressed. There is a <no key> event and an <any key> event.
Mouse Event:
This would occur when the mouse cursor touches the object. You can select left, right or middle buttons.
Other Events:
Miscellaneous collection of “special” purpose events. Check the Help Documents for an description of each of them.
Draw Event:
This event is the one that governs what you see on the screen when you run your game, and is split into three separate "sub-events" - the Draw Event, the Draw GUI and Resize Event.
Key Press:
Only happens once at key press (not continuously).
Key Release:
Only happens once at key release (not continuously).
For more info on all Events, check out the Help Documentation included with Game Maker: Studio.
drag it into the Actions panel. This will open the Move Fixed window and allow you to set the following variables:
corners of the directions
speed.
button unchecked. 28. Click “OK” to save.
selecting it from the pop-up menu.
bounce off the wall, so select the Bounce action and drag it into the action section.
variables
from submenu)
(select from submenu)
and drag it to the Actions panel.
Now it’s time to test your game!
If your game was programmed correctly, the game will run successfully. If not, you will see error messages that will help you make corrections.
Assignments:
mouse on the ball, the ball disappears. Save it as Game1A_yourname
mouse on the ball, the ball changes direction and increases speed (hint: relative button). Save it as Game1B_yourname
mouse on the ball, the ball changes direction and increases speed and if you right click on the ball, it will change direction and slow down. Save it as Game1C_yourname