SLIDE 1
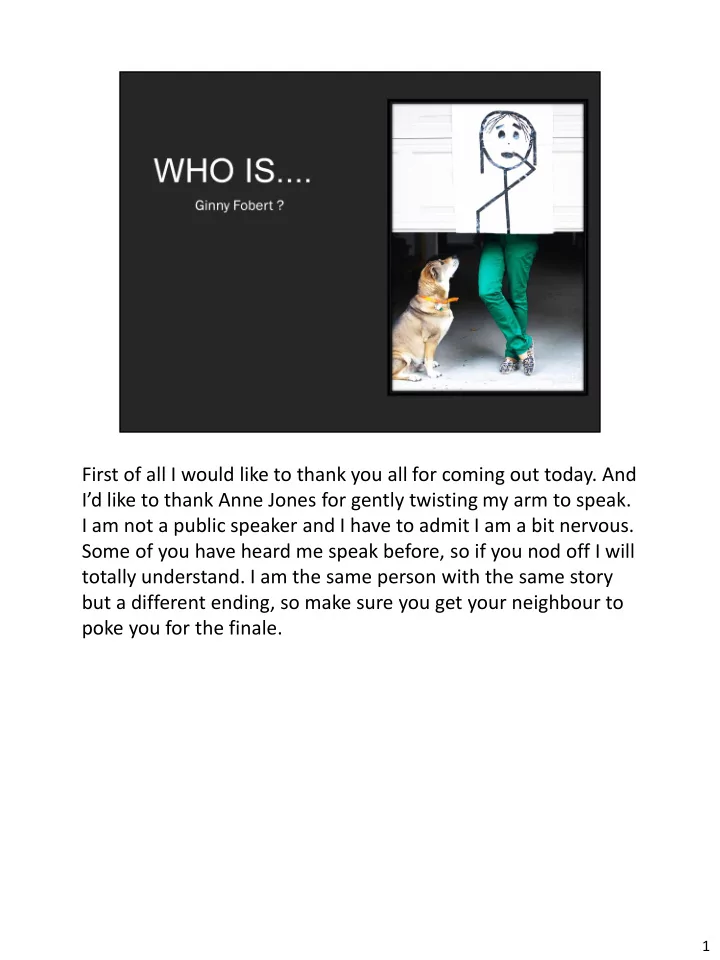
First of all I would like to thank you all for coming out today. And I’d like to thank Anne Jones for gently twisting my arm to speak. I am not a public speaker and I have to admit I am a bit nervous. Some of you have heard me speak before, so if you nod off I will totally understand. I am the same person with the same story but a different ending, so make sure you get your neighbour to poke you for the finale.
1
SLIDE 2 A newspaper article once described me as a renowned Ottawa photographer. They didn’t interview me for the
- article. I could have corrected them. Really, I’m a little
nobody from West Carleton. I am a member of the Kanata Civic Art Gallery, former member of the Foyer Gallery in Nepean. I have been involved in numerous studio tours and art shows, and have had solo shows at Alice’s in Carp, the Atrium Gallery at Centrepointe, The Shenkman Arts Centre, and have shown a number of times at the Buckhorn Fine Arts Festival near Peterborough, and the New Art Festival in the Glebe. For anyone who is interested, I have a solo show coming up in January at the Archives 112 Gallery in Nepean, and September at Shenkman.
2
SLIDE 3 I’m going to speak to you today about my journey as a
- photographer. …. from not owning a camera just a few
short years ago to what and how I photograph today. I hope that you find something interesting in my presentation and I do hope you go away with some new incentives.
2
SLIDE 4 It all began in August 2010. I accidentally received an email at work saying how much $ the company would save if they ‘let Ginny and her assistant go’. And then a second email came indicating that we would be let go right after the annual conference. Well, my job as program director was to organize all the special events and a huge international annual conference which was to be held mid October. We had already dropped from 32 full-time staff to 9 part-time in less than three years, so rather than being fired, at the end of September, I walked away from my job. I no longer had a pay cheque, I was over qualified, too expensive, and at age 54 apparently too old to be hired anywhere. I moped for awhile – and then I made a list of everything I could possibly do and crossed off everything I did not want to
- do. I made another list of all the things I would like to do,
and out of that list crossed off what wasn’t feasible for
- ne reason or another. I had a background in real estate,
3
SLIDE 5 I had been a writer and editor at Alcatel back in the day before all the high tech layoffs, and I also had an interior design background, I decided I would open a real estate photography, marketing and staging business. There was just one problem. I didn’t have any photography
- background. I didn’t even own more than a pocket
camera.
3
SLIDE 6
But I had always wanted to be a photographer. I had spent 15 years jumping in and out of contracts, taking on jobs that I knew nothing about, so I thought I could also do this. So in April, 2011, I ventured out and purchased the most affordable camera I could. At that time it was a Canon 60D. I purchased an 18-200 lens, a wide angle lens, a tripod, a flash, a camera bag and the Dummies Book for my camera. I read everything I could about using the camera and how to take real estate photos and I started pushing the shutter button. At the same time there was a government entrepreneurship program that offered to pay employment insurance for a year while building a new business, as long as I agreed to attend classes every day for 10 weeks. I chose a business name – MYND’S i – and
4
SLIDE 7
wrote an extensive business plan and presented it to a mini Dragon’s Den and was accepted into the program. When I arrived to class I realized that they had been mandated to accept 1/3 of the program with over 45 year olds, so my age was a benefit. We had to write a business statement. Not wanting to limit myself to just real estate photos and not knowing where I was going with all of this, I put this down and thought it sounded good.
4
SLIDE 8
I began my journey taking Real Estate photos. Right away, I knew that if I didn’t do something different than everyone else, I would not get very much business. I purchased a very large boater’s search light. I would light up the houses at dusk and take long exposure photos and stack them. I was light painting and light stacking and didn’t know that was a thing. Agents hired me just for what I called ‘twilight photos’ and it became my bread and butter for several years.
5
SLIDE 9
I did commercial, fashion and event photography.
6
SLIDE 10 I also did some newborn photography. I did well until the real estate market began to fizzle out and large companies appeared on the market to do real estate
- photography. They hired photography students at
$35/house to take 100 photos in forty-five minutes, upload them and send them overseas to be post processed overnight for for a high cost of $99. In addition, I also moved farther out of the city, downsized and lost my studio space. I had some extra time on my hands, so I decided to take some courses and really learn how to use my camera. I registered in the Algonquin College Digital Photography Techniques evening program. It was a 4-year program and I took three courses at a time and zipped through it in nineteen months. It was a good program but it literally just touched on a a bit of everything. How to turn on my
7
SLIDE 11 camera and use some of the features and get out of
- automatic. The funny thing is, that I didn’t know how to
use any of the auto functions. I shot fully manual until my professor challenged me to set the camera at Aperture Value for an entire week. There was a media course, two photoshop courses which were invaluable, and a composition and design course, a studio lighting course.……. We spent a day photographing glass, a day doing night photography. A couple of days doing
- portraits. A day on the street. A day doing still life. By
this time I had purchased the 24-70 and nifty 50 lenses.
7
SLIDE 12
…..Still life. Again, I wasn’t satisfied with the norm, so I purchased some reflective acrylic in black and white and came up with these. I incorporated the bird’s nest into a retirement magazine cover.
8
SLIDE 13
We had an assignment to restore old photos. I went beyond the requirement and researched and filled in the exact colour of my in-laws’ 1950’s car. I just didn’t do anything the normal way.
9
SLIDE 14
…… My final course at the college was called ‘Portfolio’. One of the things we had to do for the class was to put together a website, so I went back to my original logo and statement and added to it.
10
SLIDE 15
11
SLIDE 16 At the time, I had no clue what I was doing, but I have kept this as my mission statement for a few years. I really believe it to be true and I have grown into it. On the first day of class, the professor instructed us to choose three to five themes to focus on for the duration
- f the course. He did not want to see what we did at the
time but what we would like to do in the future. Each week we were to bring in ten to fifteen photos and the class would, in his words, ‘rip them apart’! Oh AND we had to produce one self portrait each week. I was
- terrified. First of all I don’t do self portraits! Secondly, I
had to stand up in front of the class each week and
12
SLIDE 17
defend my work. Thirdly, I had already had this professor for another course and put it this way…..he wasn’t the easiest person to get along with. I already had an X beside my name because I had the wrong camera. Remember, I had a Canon…..not a Nikon.
12
SLIDE 18 People chose their themes – Dogs, Fall Colours, Water, Everything Square, Flowers, etc. I struggled with it for about a month. I had difficulty doing what anyone else had chosen, and I also thought I would get bored too
- easily. I finally chose ‘Fine Art’ because it left me wide
- pen and was non-committal, and ‘Experimental’ –
whatever that was, I really wanted to do night and street photography, but as a female, I wasn’t comfortable going into strange dark places alone, and I agreed to come up with a third theme as soon as possible.
13
SLIDE 19
So I played with the zoom on my lenses and did a lot of night photography.
14
SLIDE 20
Steel wool into a whisk, attached it to a dog leash, and lit it on fire and made my husband twirl it around. Notified all the neighbours and did these in the rain so no one would call the fire department. LED lights on broom handles
15
SLIDE 21 One day I was out biking and got caught in a huge rain
- storm. I had my camera with me, and while waiting for
the rain to stop, I lay on the ground and took pictures of rain drops in puddles. My class thought they were great, so I thought I would try water drops in a more controlled environment.
16
SLIDE 22
I set up a makeshift studio in the basement. I set up a tripod and flash. I attached a nose bulb and an eye dropper to a microphone stand. I didn’t have any fancy timers or filters, so I taped coloured plastic CD covers to my flash and stood with one hand on my shutter button and one hand on the droppers took pictures in the dark. I look back at these and realize with the knowledge I have now, I could do such a better job.
17
SLIDE 23
But to my surprise, my professor and class were both impressed.
18
SLIDE 24
I also played around with the features in Photoshop a fair bit.
19
SLIDE 25
Distorting colours to the extreme
20
SLIDE 26
I mentioned earlier that I don’t do self portraits. So I had to get very creative. The first self portrait I did was the one on my first slide with me behind the garage door. It’s really not that impressive, but it took forever for me to duck in behind the door and to get the dog to be still before the timer clicked the shutter…..because who knew that there was such a thing as a remote. He didn’t really approve of the underwater selfie either. Bottom right…….My professor did not approve. He said that was an advertisement for glasses, not a self-portrait. That being said, the class was impressed. I entered it into a ‘selfie’ competition and actually won.
21
SLIDE 27
I used filters on PS, reflections, multiple exposures, motion blur….anything but a pure self portrait.
22
SLIDE 28
I still hadn’t submitted my third theme. The day I found a clear marble was my lucky day, and began my experiments with orbs. I discovered that when you look through a glass ball, the background is refracted. So I began to take photos through first a tiny marble, then glass balls of different sizes, then eventually I purchased a clear crystal ball with no imperfections.
23
SLIDE 29 This posed a few problems. Not only do you have to compose and focus what you see in the ball, but also what is around it. And how do you hold the ball without your hand being in every photo? I rigged up a contraption on my tripod to steady the ball and then photoshopped it out. Remember, this was 2012 and no one was doing
- this. It wasn’t a ‘thing’ and you couldn’t purchase ‘photography balls’ like
you can now.
24
SLIDE 30 More often, I tried to find a place for it to rest on its
- wn. I took the orb everywhere for awhile. Again, my
class loved the pictures, and I my professor thought they were ‘intriguing’.
25
SLIDE 31
26
SLIDE 32 I even did orb selfies. None of what I was doing was pure straight normal
- photography. It was all very fun and challenging, and it
created quite a bit of attention and got me noticed in the photography fb world.
27
SLIDE 33
28
SLIDE 34 I used a 50mm lens. You begin with your lens out of focus, and twist it into focus just as the fireworks explode. You have no idea how these will turn out and you have little control, but with practice you can get some great
- results. Again, my professor didn’t know what to think.
29
SLIDE 35
30
SLIDE 36
31
SLIDE 37
This is my very first ‘artsy’ photo. One of my daughters had it printed and framed for me as a Christmas gift. Up to this point, I hadn’t considered printing any of my photos.
32
SLIDE 38
33
SLIDE 39
And I did birds and owls before the craze of owl photography and baiting took over.
34
SLIDE 40
Horses in the fog
35
SLIDE 41
36
SLIDE 42
landscapes
37
SLIDE 43
Reflections and iPhone photos
38
SLIDE 44
Sunflowers and snowstorms
39
SLIDE 45
Street
40
SLIDE 46
And I began experimenting with moving my camera when I took the photo. I discovered that the speed and direction of my camera movement, as well as the amount of time my shutter was open completely changed the outcome. I had no idea at the time that this was called Intentional Camera Movement. I thought that I had invented something new until I found it on the internet months later, but nobody that I knew was doing anything like this, so I continued. Horizontally and with moving objects and with people and did an entire series of trees.
41
SLIDE 47
This was my first attempt at Intentional Camera Movement.
42
SLIDE 48
This photo is in the same location as the previous one. Probably many of you have done ICM before so you know that it takes a few tries to get it right.
43
SLIDE 49 So I kept trying, and my professor asked me what kind of mushrooms I was on. He was a photo-journalist and thought that if there weren’t people in a photo, it was second rate. Very few of my photos contained people…..maybe because I live in the country and there is no one around to photograph and I don’t venture downtown very often. He was extremely hard on me. At
- ne point, he began making me present first to ‘see
what craziness I had come up with that week’. He brought me to tears after class one day, and when I questioned him about it, he said he was pushing my limits to see how far I would go. It wasn’t until after I had graduated that I was told by other students that my name and my photos came up regularly in class.
44
SLIDE 50
Students were told to go to find out what I was doing and were contacting me.
44
SLIDE 51
This was about a year after I had purchased my camera. I was attending the Red Trillium Studio Tour and met a photographer who tried to convince me to apply for the studio tour myself. I didn’t think I would get accepted but applied anyway. I applied for the November tour and to my surprise I was accepted but only if I agreed to participate in the May tour first because they needed to fill two spots.
45
SLIDE 52 I had never printed any of my work. It was March and I was in Florida when the acceptance came through. I had six weeks to pull something together. When I got back home, I spent an afternoon with this photographer, picking his brain about printing, paper and framing. I also contacted an old high school friend in Kingston who
- wns a framing business and gallery, for advice. I
determined it was too costly to outsource the printing, so I had to print my own. My buddy in Kingston agreed to frame my first set of pictures at a discounted price, and teach me how to frame in exchange for me printing for he and his clients.
46
SLIDE 53
So I bought an Epson R3000, struggled for two weeks to teach myself how to use it, and off I went to Kingston to mat and frame twenty-five pieces. After I finished my first show and had sold two pieces, and because I do things backwards sometimes, I thought maybe I should really learn how to print, so I enrolled in a Digital Photography Printing course at SPAO – School of Photographic Arts Ottawa. I was happy to find out that I had done a lot of things properly and I did pick up a few additional tips….mostly about the different types of paper.
47
SLIDE 54 I often print on Inkpress silver metallic paper which I find enhances some of the fine details in my photos. When everyone else was printing on canvas, I had my larger photos printed on aluminum (which I sent out to be done). Now aluminum has become very popular, so I’m currently not using it. The Intentional Camera Movement photos are not at all difficult with practice, but they are painterly and they did initiate some positive attention and people purchased them! So I applied to another show - the Expressions of Art and again, to my surprise, I was
- accepted. I didn’t have a lot of confidence in my
photography and when I saw all the other talented
48
SLIDE 55
artists setting up, I questioned whether or not I belonged there. I thought for sure the committee had made a mistake.
48
SLIDE 56 It was at this show that a fellow artist – a painter - came to my booth shaking his hands and said, ‘This…this…hurts my eyes. This is not art. It is
- photography. You photographers aren’t artists. You don’t
belong here. You should have your own show!’
- WOW. I was already doubting whether or not I belonged
there, and this really didn’t help. I very gently told him that I was sorry he felt that way, and perhaps he should speak to the committee about it, because I was juried in, just like he was…..and I went to the bathroom and cried. I was absolutely mortified to say the least and didn’t know what to do and wanted to pack up and go home. I DID however sell three of my pieces that day which was a boost of confidence, and being the quiet rebel that I
49
SLIDE 57
am, I decided rather than quit, I had to prove him wrong and try to bring my photos more into the art world. This was a turning point in my photography…..and I think this is when I actually became a photographer.
49
SLIDE 58
I am not a painter, but I could get my computer to paint, thinking this would help. PS CS4 had a plug in called ‘oil paint’ that allowed you to choose the shape, size, and texture of your brush and enhance the existing texture that is already in the photo. A lot of you are probably familiar with it.
50
SLIDE 59
This was the first photo that I oil painted. What better way to make a photo more like art than to ‘paint’ it.
51
SLIDE 60 It’s a very simple technique to use but very effective. Rather than just push the button and have the same texture on the entire photo, I would often layer the picture and apply different brushes to separate areas. And to be totally different, I printed them on 36 “ silver
- aluminum. Anything that is white on silver aluminum
comes through as silver.
52
SLIDE 61
Some were printed on white aluminum and the true colours come through.
53
SLIDE 62
I oil painted an entire series and people liked them…..because they looked like paintings!
54
SLIDE 63
All these ‘non-purist gimicky’ things I did, as some people refer to them as, served one major purpose…..they got me noticed and people remembered my work. And they got me into other shows and galleries because they were different and painterly. About a year and a half after I purchased my Canon 60D, I decided to sell it and I bought a Canon 5D MkIII, all new top of the line lenses a new Dummies book, and I had to re learn how to use a camera.
55
SLIDE 64
As interesting as these were to the art onlookers, to me they were a little boring to produce. About a year and a half after I purchased my Canon 60D, I decided to sell it and I bought a Canon 5D MkIII, all new top of the line lenses a new Dummies book, and I had to re learn how to use a camera.
56
SLIDE 65
And since I don’t have one particular focus, one day I froze flowers. I strategically placed flowers into containers of the purist distilled water I could find put them in the freezer. Flowers float….so they had to be weighted down and wired in place.
57
SLIDE 66
As the water freezes, it squeezes the oxygen out of the flowers and the bubbles trails freeze. I then took the ice blocks out of the containers and photographed each block 10-15 times through the ice, focus stacking them, and then blended the photos together.
58
SLIDE 67
The size, shape, depth of the container, as well as the type of flower, type of water, and how fast the water freezes, all play a part in the final outcome. If they freeze too fast, they are a blurry cloud or just crack.
59
SLIDE 68 This one, I placed in my stainless steel sink and used a
- flash. The stainless was reflected back into the bubbles.
These were a big hit and I continue to sell a lot of them.
60
SLIDE 69
I experimented with taking photos of the reflections of broken mirrors. This was challenging. First of all I cannot control how many breaks are in the mirror. Secondly, how do you keep yourself out of the reflection, and thirdly, the first time I stood the mirror up, little pieces of glass started to fall out.
61
SLIDE 70
And I did a series of broken mirror photos for an exhibit.
62
SLIDE 71
63
SLIDE 72
In 2017 I started experimenting with multiple exposures……trying to find new things that would appeal to the public and to the art world. You know all those travel photos that you take for your memories…..
64
SLIDE 73
Well, I started layering them on top of each other. These are not done in camera, but are processed on the computer where I could control the outcome. Sometimes I use the same photo multiple times. Sometimes I even did multiple exposures in camera.
65
SLIDE 74
This picture has seven different photos layered together.
66
SLIDE 75
67
SLIDE 76
Tate Modern in London
68
SLIDE 77
I have done it with night photos.
69
SLIDE 78
I photographed the snow geese in flight. I tried to portray the craziness of it all by making a composite of fifteen images.
70
SLIDE 79
Whenever I am a bit bored, I go back into the archives and process a few more of the travel photos.
71
SLIDE 80
72
SLIDE 81
I guess my claim to fame if there is one, would be my time-lapsed stacked photos. This tecnique I cannot take credit for myself. I saw it online. I emailed a couple of photographers and asked if they would mind if I tried it. I was given some hints on how to do it, but of course they left out a few important steps that I had to figure out myself. I take anywhere from 80 to 1200 photos, four seconds to six seconds apart, over a period of an hour/hour and a half, and instead of processing them into a time-lapse video, I process them one on top each other. The first several that I did were done fully manually. I pushed the shutter, counted to four, pushed the shutter, counted to four…. In Photoshop, I brought in one photo at a time, layered, blended, and tweaked it, then brought in a second and a third, a fourth, etc.
73
SLIDE 82
Eventually, I purchased an intervolameter to click the shutter for me, and I did have a few action programs that worked with Photoshop to help out but unfortunately as PS expanded, they are no longer compatible, so I went back to manual. I made a rash decision last spring, to sell my Canon 5DMkiii and everything that went with it, and switch to a Fuji XT-2….The Fuji has a built in intervolameter, BUT Adobe CS6 did not read Fuji raw files. I was forced to switch to CC and so now I am back to the fully manual post processing method, which in the end gives me better control. It is just more labour intensive.
73
SLIDE 83 These are totally weather dependent. You never know what you are going to get until you start processing. For instance this image, which I think is beautiful on its
74
SLIDE 84
Is the first image used in this photo.
75
SLIDE 85
This was the first successful time-lapse stack that I did. There were ducks and people walking in front of my tripod, but as I processed, in this case, whatever was lighter on the photo underneath came through and whatever was darker disappeared. Since the ducks were darker than the water and stones, they disappeared.
76
SLIDE 86
If there is a lot of wind and a lot of small clouds with spaces in between, the outcome is quite wild and wonderful.
77
SLIDE 87
Often I will take over 1000 images and process several pieces out of them. This one has approximately 200 images in it.
78
SLIDE 88
This is the same location and same time with over 900 images processed.
79
SLIDE 89
400 – 500 is usually a good number depending on the skies.
80
SLIDE 90
If there isn’t a lot of movement the outcome is much softer and smooth, more like a long exposure.
81
SLIDE 91 And sometimes rather than lighten each photo, I darkened
- them. This process is very labour intensive and hard on an old
computer, so unfortunately I don’t do many of these particularly in the winter. I will continue to do time-lapsed stacked photos, as it hasn’t flooded the photography world yet.
82
SLIDE 92 As many artists do, if they see something they like they will give it a try and put their own slant on it. There are a lot of similar styles out there. If you remember, I mentioned that I am a bit of a non-conformist. Many people print on canvas so I don’t….I print on silver metallic paper, epson pearl lustre paper, and I used to print on aluminum. Aluminum has become popular with photographers, so I have switched out to something
- else. Many people are trying multiple exposures, so I
moved on again.
83
SLIDE 93
I did a series of rain photos
84
SLIDE 94
And some out-of-focus ICM photos.
85
SLIDE 95
Last November, I began a series of architectural photos, by flipping photos upside down in PS and layering them.
86
SLIDE 96
87
SLIDE 97 Believe it or not, I am not a fan of photo apps and
- presets. To me, that’s too easy and not very creative. To
let photoshop do all the work for me didn’t sit well with me.
88
SLIDE 98
So what if I tried to duplicate something like this in camera instead of in photoshop?
89
SLIDE 99
And I absolutely loved the outcome. My intention was to do a series of Ottawa buildings for my next exhibit….but I suffered from a severe concussion in June and couldn’t drive for 3 months. I had committed to 11 major art shows this year and a dozen other hangings, so it was going to have to something fast so be a landscape theme it was.
90
SLIDE 100
This was the first in-camera, inverted double exposure that I took around my house. I took a photo, turned my camera upside down, tilted it and moved it around, and took a second exposure on top of the first.
91
SLIDE 101 This was the second one. These photos come out of the camera very messy and very dark. Then I took the one piece into Photoshop, moved the levels and curves, desaturated and removed colours, played with the exposure and the shadows and
- highlights. And when I did that, all the ghosty shadows
started appearing.
92
SLIDE 102
93
SLIDE 103
94
SLIDE 104
95
SLIDE 105
A lot of shows require limited edition prints. I limit my editions now to 10. I have sold 7 of this piece since July.
96
SLIDE 106
And I got all kinds of interesting results.
97
SLIDE 107
Because I had a concussion, all the photos I took this year had to be within a walking distance or a ten minute drive so everything is trees. I have a long way to go to achieve the result I want. I initially printed six of these for a Show in April at Oh So Good to see what the reaction would be.
98
SLIDE 108
99
SLIDE 109
100
SLIDE 110 This has been an extremely popular series. So I returned to that memory of the artist telling me that photography was not art and rebranded to make a statement and…..everyone now thinks my name is Myndy. But since April I have done eleven shows with just this series and have sold 29 pieces ranging in price from $75 for this mini matted print, $235, $465 and $850. That being said, as much as these are ‘artsy’ and are appealing to the general public, it saddens me that photography is still am not accepted into very many ‘art’
- galleries. It’s difficult to take a really good pure
- photograph. It’s difficult to make a good picture on PS
101
SLIDE 111
and I think with all the apps and iPads, photography has gone downhill. And I think serious photographers should take the time to really ‘make’ their photo spectacular!
101
SLIDE 112
Throughout my short photography journey, I have concluded a few things..
102
SLIDE 113
103
SLIDE 114
104
SLIDE 115
105
SLIDE 116
What’s next? Who knows. I’m really just getting started. I will experiment because that is just me, and try to find new places that will accept photography as art. That concludes my presentation. I would like to invite you all to come and see my solo show in January. Called INSIDE OUT UPSIDE DOWN. I will have about forty pieces from my new series there. It’s at the City of Ottawa Archives 112 Gallery, 100 Tallwood Dr, at the corner of Woodroffe in Nepean. Friday January 11 to February 23. This gallery is a hidden gem and because it is in the Archives Building, they are not always open and you have to sign in. I would love if you flooded the Vernissage on Saturday, January 12 from 2:30 to 4:30.
106
SLIDE 117 Come and pick up an invitation and my card and please check in with me on social media and let me know that you are attending. THANK YOU so much for coming today and I am going to
QUESTIONS
106