
The Bu populat through step ins differen
Exhib
Visit the http://w
Prepa
Your pr
- Once yo
match t
Imag
- For a si
If you n
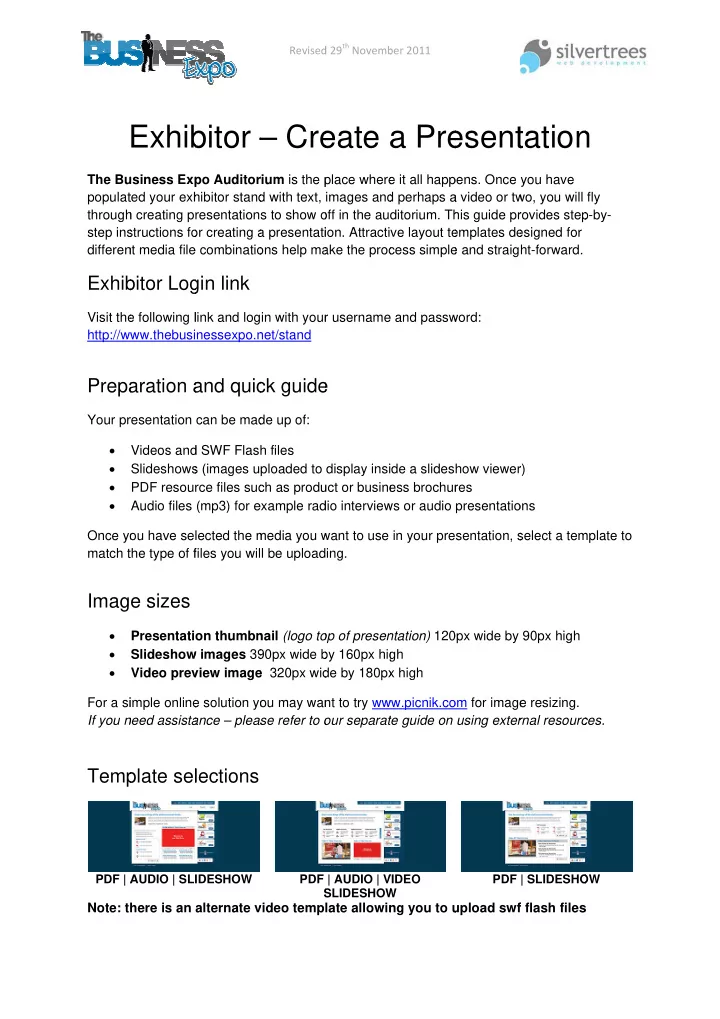
Temp
PDF | A
Note: t
Exhib
usiness Exp ted your exh h creating p structions fo nt media file
bitor Log
e following l ww.thebusi
aration a
resentation Videos and Slideshows PDF resou Audio files
- u have se
the type of f
e sizes
Presentati Slideshow Video prev imple online need assista
plate sel
AUDIO | SL
here is an
bitor –
po Auditor hibitor stand resentation
- r creating a
e combinatio
gin link
link and log nessexpo.n
and quic
can be mad d SWF Flas s (images u rce files suc (mp3) for e lected the m files you wil
- n thumbn
w images 39 view image e solution yo ance – pleas
lections
IDESHOW
alternate v
Revised
– Cre
rium is the p d with text, s to show o a presentati
- ns help ma
in with your net/stand
ck guide
de up of: h files ploaded to ch as produ example rad media you w l be upload nail (logo to 90px wide b e 320px wid
- u may wan
se refer to o
PDF S
video temp
d 29th Novemb
eate a
place where images and
- ff in the au
- ion. Attracti
ake the proc r username
e
display insi uct or busine dio interview want to use ing.
- p of presen
by 160px hig de by 180px nt to try ww
- ur separat
| AUDIO | V SLIDESHOW
late allowin
ber 2011
a Pre
e it all happ d perhaps a
- ditorium. Th
ve layout te cess simple e and passw de a slides ess brochur ws or audio in your pre ntation) 120 gh x high ww.picnik.co te guide on
VIDEO W
ng you to u
esent
- pens. Once
a video or tw his guide pr emplates de e and straig word: how viewer res presentatio sentation, s 0px wide by
- m for image
using exter
upload swf
tation
you have wo, you will rovides step esigned for ht-forward. r)
- ns
select a tem 90px high e resizing. rnal resourc
| SLIDESHO
f flash files
n
fly p-by- mplate to ces.
OW
s