
SLIDE 1
Eagleville Elementary School Facade Investigation
August 2019
Eagleville Elementary School Facade Investigation August 2019 - - PowerPoint PPT Presentation
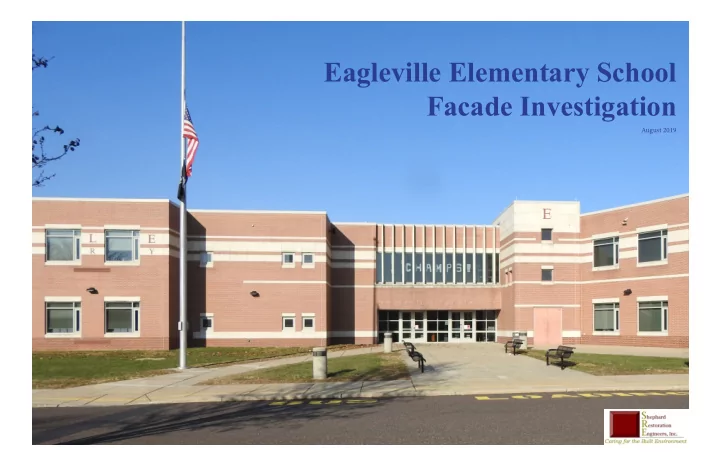
Eagleville Elementary School Facade Investigation August 2019 Introduction Intent Eagleville Elementary School Eagleville Elementary School was originally constructed in 2002 / It was designed by Breslin Ridyard Fadero Architects of
August 2019
2
Introduction
Intent
Eagleville Elementary School was originally constructed in 2002 / It was designed by Breslin Ridyard Fadero Architects of Allentown, PA, and constructed by E /R / Stuebner Construction, Inc / of Reading, PA / It is primarily a two-story brick faced building with cast stone elements / The north side of the building includes the gymnasium/cafeteria, kitchen, mechanical spaces and music room that was constructed of concrete masonry units (CMU) with brick veneer / The south side
steel studs with insulation, sheathing and brick veneer / According to the Facilities stafg for Methacton School District (MSD), water infjltration has been an issue in the building for some time. Investigation reports were completed in 2016 and again in 2017 by others to determine possible water infjltration points. Insect infjltration, specifjcally bees, has also been an issue in the classrooms. Bees have been seen in the building; however, no nests are observed around the building perimeter / Reportedly, roofjng work has been completed within the last fjve years to address roof leaks identifjed by others. It is believed that these issues have been addressed and water infjltration through the roof has been remediated. Additionally, it was found by others that the gaskets around the windows were installed too short, creating areas of potential water infjltration. The gaskets were replaced in 2018 and water infjltration at these locations is believed to have ceased / Shephard Restoration Engineers, Inc / (SRE) was engaged to build on the previous reports and further investigate their fjndings. The intent of the investigation was: X To determine if the fjndings from previous reports were localized at test locations or if they are consistent throughout the building / X To determine the location of insect infjltration. X To determine if any previous water infjltration has resulted in mold conditions within the building wall cavities / X To determine what steps need to be done to make the building water tight and insect free /
Methodology
Once the previous reports, original construction drawings, and interior/ exterior conditions were reviewed specifjc probe locations were identifjed by SRE where the existing brick veneer was to be removed to review the construction conditions beyond / These areas included window heads, sills, jambs, vents, fmoor levels, weep vents and coping conditions. Areas were chosen on all four sides of the building to confjrm the consistency of construction. A total of 43 probe locations were identifjed. MSD hired a mason in July of 2019 to cut the openings in the wall and infjll them with a metal panel once the existing conditions were reviewed by SRE / Openings were 16”x16” in order to salvage as much original brick as possible / The mason was requested to save as many bricks as possible so they could be re-installed during the repair program / A high reach was used to access the building facade above the fjrst fmoor level. The openings were cut using a wet saw to minimize the amount of dust potentially blowing into the building The openings were infjlled with painted metal panels with a fmange around all sides allowing for sealant to be installed on the inside of the brick instead of on the face / Rigid insulation was also installed behind the panels to prevent cold spots in the wall / The panels are estimated to remain in place for the next year / The following report documents our fjndings.
Summary
The extensive probe program revealed that the detailing of the existing wall construction throughout the building varied at each location evaluated / There was no consistency in construction detailing per wall or even in the same area / The only commonality between the probe locations is that no area met industry standards for veneer construction / The mortar is difgerent each side of the building. Flashing materials and detailing changed from location to location / Brick ties were inconsistent in spacing and their connection into the structural wall behind it / The CMU portion of the building does not sufger from the same poor installation of brick ties as the structural stud wall construction. However, the fmashing in the CMU wall construction at the windows, doors and fmoor levels does not allow for water to exit the wall construction / Open plastic weeps were used on both portions of the building / Many locations exhibited missing weeps that were seemingly never installed / The open weeps holes have allowed insects to enter the wall and make nests in the air-space cavity / Reportedly, live bees were often found in the classrooms during active teacher and student times / The greatest concern documented regarding the existing construction was the installation of the masonry ties at the stud wall construction portion of the building / Many of the ties were found only to be anchored into the sheathing
First Floor Plan showing construction areas /
CMU construction Structural stud wall construction
5
LEARNING LEA ARNING CARING PLAYING YING GROWING GROWING GROWING
4 5 6 8 10.4 10.4 11.3 11.3 14 14.8 14.8 15.2 15.2 17 18 19 15E A
LG
EV I L
AL E
E A G L E V I L L E E L E M E N T A R YE
1 2 3 4 6 7 8 9 9.3 10.4 11.3 12 13 14 14.8 15 15.2 16 17 B C D E F F.7 G G.7 H J E J.8 H.2 G.5 F.8 E.6 D.8 A.8 AI
Legend:
Probe Location Number Mortar found to be too hard for brick construction. Missing mortar net. Masonry tie not secured. Ineff ective fl ashing found.
1 6 6 27 25 24 40 5 4 19 20 21 22 23 17 18 41 36 35 3 15 16 14 13 12 11 10 1 2 37 38 9 34 33E 42 32 8 7 30 31 33N 39 29 43 26 28
West Elevation East Elevation South Elevation North Elevation
6
Existing Condition Observations
Brick
The bricks are a 16” long brick with a faux joint to make it appear as two bricks called a Roman brick / We expect this was done as a measure to increase productivity for laying the brick / With minimal exceptions, the brick is in good condition /
Mortar
On the south and east sides of the building, the mortar appears to be a mix that is typical of brick construction / It was softer than the brick and easy for the mason to cut with a grinder / On the west side of the building, the mortar was much harder / The mason said that as he was cutting the opening it was easier for him to chip out the brick than it was to chip out the mortar / Mortar is meant to be sacrifjcial to the brick so that all movement and moisture will happen in the joints rather than the bricks / Having a mortar harder than the bricks will eventually result in damage to the bricks /
Mortar Net
Mortar net was called out on the original construction drawings at all window heads, slab levels, above vents and louvers and at the base of the wall / In masonry cavity wall construction, mortar collection above the fmashing and weep hole levels is vital for proper masonry cavity wall performance and to prevent water damage. Mortar net suspends mortar droppings above the fmashing and weeps so they stay clear and unobstructed / The open mesh allows moisture to fmow to the weeps and air to move within the cavity to promote drying. On the east side of the building, dual level mortar net was observed at the window heads, sills and at the top of the mechanical vents / The mortar net was installed properly with no issues noted / On the west side of the building at the south end, a single level mortar net was installed / This mortar net was not as thick and did not fjll the cavity. As mortar droppings fell on the net during
causing it to bunch up at the bottom / The mortar net was nearly full of mortar in some spots making it inefgective. At Probe Location #21, bees had made a nest in the mortar net that was the entire height of the mortar net and approximately three feet long / Moving north along the west side of the building, the mortar net was not installed / Mortar net was found in some locations but not all in the CMU portion of the building / The installation of mortar net was not consistent in this section of the building /
Brick Veneer Ties
Adjustable dovetail brick ties were used to anchor the brick veneer to the back up wall in the stud wall construction section of the building / The ties were placed between 12” and 16” apart both horizontally and vertically. The ties are anchored with screws into the sheathing / It was found in some locations that the ties were anchored only into the sheathing and not into the stud behind / These ties could be pulled out of the sheathing with essentially no efgort. This condition was also inconsistent throughout the areas reviewed / It is impossible to determine the number of ties that are secured properly to the stud and how many are only superfjcially anchored to the sheathing. In order for the veneer to be properly supported, all ties must be anchored back into the structure of the back up wall / The existing ties showed no signs of corrosion / In the CMU portion of the building, the ties are integrated into the joint reinforcing of the CMU back up wall / Ladder type reinforcing was placed in the bed joints of the CMU with eyelets for the installation of the brick ties / All of the brick ties reviewed were secure and in good condition / The only inconsistency found in the brick ties was at the top of the wall / The CMU is in the same plane as the structural steel at the roof level / Without CMU at the steel level, there was no where to install the veneer ties / Ties at this location were either installed in the sheathing or missing /
Lintels
All of the lintels were galvanized steel. No deterioration was noted on any
to paint galvanized steel as the galvanization creates a bond breaker between the steel and the paint. Typically, galvanized steel is not painted. It was noted in a previous report that a lintel was found to be sloped backward potentially holding water / Due to the amount of mortar droppings and tangled mortar net, it could not be confjrmed if this condition was consistent throughout the construction /
Dual level mortar net / Single level mortar net / Masonry tie not secured into structural wall / Diagram showing how masonry ties are to be anchored /
7 Flashing
Vinyl fmashing has been found at most of the window heads, sills, vents and
layers of building paper was used in lieu of the vinyl fmashing. The height of the fmashing varies and is sometimes lower than the top of the cast stone headers. The vinyl is not adhered to the sheathing and rarely has any mechanical fasteners allowing the rubber to droop down and not perform properly as fmashing. At Probe location #25, muck was used to attempt to the glue the fmashing to the metal structure and then go thru the brick joint in the wall / Very little muck was used so it has become unglued and the fmashing is just laying in the joint not tied to the interior of the wall. At the top of the wall, the fmashing was installed inverted so that the interior leg of the fmashing is downward and doesn’t allow the water to be directed to the mortar joint / On the east side near the main entry, peel and stick fmashing was used. There is seemingly no reason for the change in fmashing types. Per industry standards, the cores in the brick are typically fjlled in below the fmashing course so water cannot get into the brick and travel through the wall. This was consistently not done. In many cases, the fmashing stopped short of the holes in the brick so water was directed into the brick instead of out / Water getting into the brick can lead to damage of the brick as the trapped water goes through freeze/ thaw cycles throughout the seasons. No proper end dams were found anywhere on the building / End dams are a vertical or near vertical upstand from the end of a fmashing or window sill, used to prevent water from fmowing horizontally ofg the end of the fmashing or sill. At a few window head and sill locations, the vinyl fmashing was folded at the ends in an attempt to create end dams; however, since the vinyl has no rigidity and was cut too short, they do not appear to be functioning properly / The original construction drawings call for additional fmashing at all lintels. Metal fmashing was found at lintels; however, the metal only turns up approximately 2” at the back and does not cover the whole lintel allowing for water to get between the lintel and fmashing. Water sitting between the lintel and fmashing will eventually deteriorate the metal / These conditions were seen at both the CMU sections and stud wall construction section of the building / The wall openings were cut with a wet saw, so it was impossible to determine if any standing water existed within the wall /
Weeps
Open plastic weeps were installed at window heads, sills, vents, fmoor level and top of wall / Many of these were observed to be broken / Since they are open, many bees and other insects have permeated the wall and made their home in the wall cavity. Stafg have observed bees and other insects in the classrooms. Weeps were found at locations closer to the ground; however, those located higher in the wall (where it cannot be easily observed), the weeps do not appear to have been installed and mortar was intentionally not installed in the head joint to give the appearance of an open weep /
Diagram of industry standard wall construction (image courtesy of International Masonry Inst /) Mortar left out of joint, but plastic weep not installed / Flashing loose laid in wall with anchoring at the top / Does not direct water out of wall / Diagram of existing fmashing conditions showing inverted fmashing and creating a pocket . Diagram of properly installed end dams / (Image courtesy of h-b /com)
8 Sheathing
Gypsum sheathing was observed on the stud construction part of the building / The sheathing is anchored with drywall screws presumably back into the stud beyond / Very few screws were observed / It could not be determined if enough screws were used to meet industry standards for sheathing installation / It was
the cuts were not made straight or even and the edges were battered / At Probe location #5 the sheathing did not extend all the way to the bottom stud leaving the batt insulation exposed / At two probe locations, water staining was observed
Building Paper
Building paper is installed on building sheathing as damproofjng to prevent moisture from entering the interior of the building while still allowing air to pass through the wall construction / It is important to make sure that air can freely fmow through the wall so mold will not grow within the wall. Building felt was installed over the sheathing of the stud construction section of the school / It is attached to the sheathing using staples / In a few locations, screws were found to attach the building felt to the sheathing; however, no washers or gaskets were used / Industry standard details dictate that the building felt should be attached every 12” o /c / in each direction / Staples were observed in various locations and did not appear to be in any pattern / Spacing of greater than 12” was observed in nearly every probe location / Where sheets of building felt meet, there is an approximate 2” overlap / Industry standard is a 4” overlap / In some locations, the building felt was tangled up within the cavity of the wall. This creates gaps in the damproofjng protection allowing for the potential of water infjltration as well as places for mortar droppings to accumulate / Insulation The batt insulation is installed in the stud construction portion of the building between the structural studs / The original construction drawings call out the insulation to have an R-value of 19 / Very little of the batt insulation could be reviewed as it was covered with the sheathing / There were some areas where the sheathing did not fully cover the insulation. At Probe Location #5, the sheathing didn’t extend completely down to the studs at the base of the wall / The insulation observed here was dry and showed no signs of mold / On the CMU portions of the building, spray foam insulation was applied to the CMU as per the original construction specifjcations. The drawings call for 2”
foam varies from 1/2” to 1-1/4” / Varying coverage makes it impossible for the spray foam to provide the intended added R-value to the wall / The spray foam was scraped from the CMU in one location to review the CMU behind it / The spray foam was applied without a vapor barrier / Neither the foam nor the CMU showed signs of water staining or mold /
Sealant
Vertical control joints have been provided in the brick veneer to allow for expansion and contraction / The existing sealant in these joints is beyond its serviceable life / The sealant is pulling away from the brick and allowing water to enter the building / The sealant should be replaced as part of any repair work completed on the building /
Biological Soiling
Biological soiling is black or green soiling on the masonry that is the result of biological (mold/ moss/ mildew) growth / Biological growth is typically found
which encourages biological growth / Biological growth was observed under some window sills / This indicates the possibility that the wall is holding water in these locations. This condition supports the observation that the fmashing does not direct the water out of the wall /
Dark biological staining under windows showing possible water infjltration areas. Insulation exposed because sheathing does not extend to bottom of wall / (Probe 5) Spray foam insulation less than 1/2” thick / (Probe 18) Failed sealant in expansion joint / (West wall)
9
Recommendations
Based upon our observations, we believe that the CMU portions of the building can be repaired / Even though the detailing is inconsistent, the masonry ties are sound and no defects were found in the CMU / The building and veneer are structurally sound / At a minimum, we recommend that the brick veneer at the window heads and sills at the roof deck level and the fjrst fmoor slab level be removed and the fmashings at these areas be corrected so they function appropriately / The CMU portions could also be re-clad if desired for aesthetic purposes; however, this is not required for building serviceability / The stud construction portion of the building has a greater level of inconsistency in construction. This is specifjcally related to the wall ties. Without knowing which or how many of the brick wall ties are securely anchored into the structural stud beyond, it is impossible to know where and how much of the wall can safely be disassembled to complete repair work / If the wall were to be opened up to repair the fmashings at the window heads and sills and the adjacent brick is not adequately attached to the structural wall, the veneer could fail and fall without warning / Typically, helical anchors can be installed through the veneer into the backup wall to support the brick during repairs; however, in this case, the helifjx anchors would need to be installed directly into the metal stud which cannot easily be located from the exterior / In addition, repair work completed adjacent to brick that is to remain in place may cause enough vibration and movement to loosen ties that are not securely fastened into the wall,creating a potentially dangerous situation for those performing the work / The repair contractor will typically not assume responsibility for the areas of the wall that they did not work on, so any warranty may not be actionable / We recommend that the stud construction portion of the building be completely re-clad in a new veneer material / This will mean that all of the brick veneer will be removed from the facades and a new veneer system installed / The removal
needed, a more consistent vapor barrier installed and all new fmashings to be installed to work properly / New masonry may be installed at the lower four feet
First Floor Plan showing construction areas /
CMU construction to be repaired at all fmashing areas. Structural stud wall construction to be completely re-clad /
10 Code Review
Montgomery County currently has adopted the 2015 International Building Code (IBC) / The level of conformance to the building code is dependent upon the extent of the work being done / Where work is limited to removing limited areas of bricks to repair fmashing, the work will qualify as “Repair”. Qualifying as a repair means no additional insulation will be required to be installed in the wall to meet the code requirements for energy conservation / Where large areas of brick veneer are removed and replaced with new cladding, the work will qualify as “Alteration.” Alterations require the new building envelope systems to meet the Energy Conservation Code / Existing unaltered building envelope systems are not required to be brought up to the current code / Per the 2015 Energy Conservation Code, metal framed building envelope systems must have R-13 + R-7 continuous insulation / The existing batt insulation between the structural steel studs would fulfjll the R13 requirements; however, an additional layer of R13 continuous insulation would need to be added to areas where new cladding is being installed / Continuous insulation is defjned as, “Insulating material that is continuous across all structural members without thermal bridges other than fasteners and service openings / It is installed on the interior of exterior or is integral to any opaque surface of the building envelope /” Approximately 1-1/2” of rigid insulation will need to be installed on top of the existing sheathing to meet this requirement for the metal framed portions of the building being re-clad / For mass walls (CMU construction), the code requires that R-9 /5 continuous insulation be included in the composition of the wall / The existing CMU walls have spray foam insulation applied directly to the CMU / However, since the spray foam thickness varies and is as little as 1/4” in some places, it does not meet the current energy code requirement / If any of the CMU construction portions of the building are to be re-clad, 2” of rigid foam insulation will need to be added to the exterior side of the CMU wall / Again, wall areas to remain intact are not required to be brought up to current code /
Additional work to be considered
The Facilities Department indicated that the mechanical system has also been an issue for the school / Leaking equipment and pipes have left stains on ceiling tiles and maintaining a consistent temperature and humidity have been an issue / During the re-cladding work, the exterior vents could be addressed to incorporate any new work into the design of the new cladding system / The design of the new cladding system could also address any aesthetic changes desired to the building to upgrade the visual presence of the building / Eagleville Elementary shares many of its design features with the surrounding elementary, middle and high schools in the area / Changes in color, texture and materials are ways that the building could be changed to create a new design aesthetic and identity for the Elementary School /
Re-cladding Material Options
Below are possible materials that can be used to re-clad the school / These can be used as entire building cladding systems or in conjunction with each other to create the desired design /
11 Metal Panel
Metal panels come in a variety of colors and sizes allowing for a great deal of design freedom / The panels are supported from bracket systems attached to the structural wall / These panels are powder coated metal on all sides giving the panel all around protection from the environment / The panels lock together preventing any water from reaching the interior / The panels can also be designed to have ribs and reveals to allow for further design possibilities / Metal panels have a higher initial cost but can be installed faster than masonry veneer systems / The panels can also be removed should maintenance to the wall behind ever be needed / New insulation and sheathing would be added to the existing wall prior to the bracket system being installed / There are also metal panel systems that incorporate the insulation into the panel itself eliminating the need for a separate insulation layer to be added /
Zinc Panels
Zinc panels work on a similar type of bracket system as the metal panels / The zinc has an even gray color and is typically laid out in a fjsh scale pattern. It provides a subtle texture to the facade / The panels overlap to prevent water from entering the building envelope /
Split face block
Split base block is a traditional material that can be used as a cladding system / It is a durable and economical material /
Brick
Brick could continue to be the veneer system for the school if it is desired to maintain the existing aesthetic. Colors, textures and glazes can be used to add interest to the brick facade as well as delineate specifjc areas. The new brick veneer system would be installed per industry standards with ties being anchored into the structural wall behind /
12 Rainscreen Systems
Rain screens are a way to integrate the sheathing, insulation and vapor barrier into a single system / The interlocking panels create a watertight surface that also provides an R-21 insulating value / This panels would be attached to the existing structural wall / The bracket system for the cladding would be anchored through the panels and a new veneer system hung from the brackets / This eliminates the need for multiple steps installing separate sheathing, insulation and vapor barrier / The cladding system can then be any of the following materials / Rainscreen Cladding materials: X Brick X Terra Cotta X Perforated metal panel X Ribbed metal panel X Wood slats
Next Steps
Acceptance of Recommendations
To move forward, SRE will need MSD to confjrm that th repair and re-cladding path forward is how they wish to proceed / It is important that all stakeholders understand the extent of the work required to address the water infjltration and veneer stabilization issues found at the school. All parties will need to be in complete agreement with how to proceed /
Material selection
It is also important that the ownership and design team work together to defjne the desired fjnal aesthetics of the building. The design team will need direction with regard to the types of materials and architectural styles that MSD prefers, Moving into the next phase of work, SRE will work with MSD to create a dialog and present options for materials and colors that they would like to see incorporated into the new design /
Renderings
Once material direction has been provided to the design team, SRE will develop
drawn and rendered in three dimensions to show the stakeholders possibilities / MSD can use these renderings to select a design aesthetic and provide feedback to the design team as well as show area residents and students how the school will look in the future /
Construction Documents
After the design has been selected, SRE will develop design documents that will identify the repair and re-cladding work so it can be bid to contractors / The design documents will include drawings and specifjcations for all work. These would then be issued to contractors for competitive bidding / /