
SLIDE 1
Creating Presentations using Nearpod To begin: If you haven’t already created an account, please do so. I recommend linking the account to your school e-mail so that you can receive reports directly. The Nearpod website (nearpod.com) will be your toolbox for creating presentation. You are able to upload PDF documents (such as slideshows) to form the backbone of your presentation, and then add different specialized slides to create a more interactive experience for you and your students. All of your design and editing must be done on the website. Once you have published your presentation, you then use the Nearpod app as your remote, while your students’ use the app as a viewing device, and interactive controller. Here’s how to create a presentation:
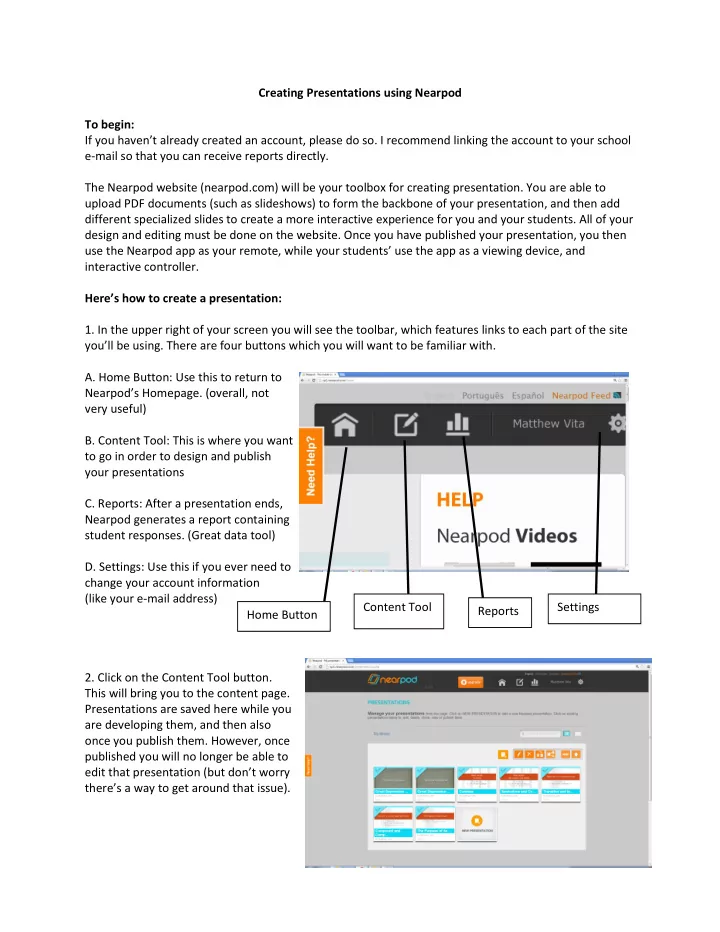
- 1. In the upper right of your screen you will see the toolbar, which features links to each part of the site
you’ll be using. There are four buttons which you will want to be familiar with.
- A. Home Button: Use this to return to
Nearpod’s Homepage. (overall, not very useful)
- B. Content Tool: This is where you want
to go in order to design and publish your presentations
- C. Reports: After a presentation ends,
Nearpod generates a report containing student responses. (Great data tool)
- D. Settings: Use this if you ever need to
change your account information (like your e-mail address)
- 2. Click on the Content Tool button.
This will bring you to the content page. Presentations are saved here while you are developing them, and then also
- nce you publish them. However, once