
SLIDE 1
Chapter – 8 PowerPoint – Creating Slides General Instructions:
- 1. Read the text thoroughly.
- 2. This chapter is for practical practice only.
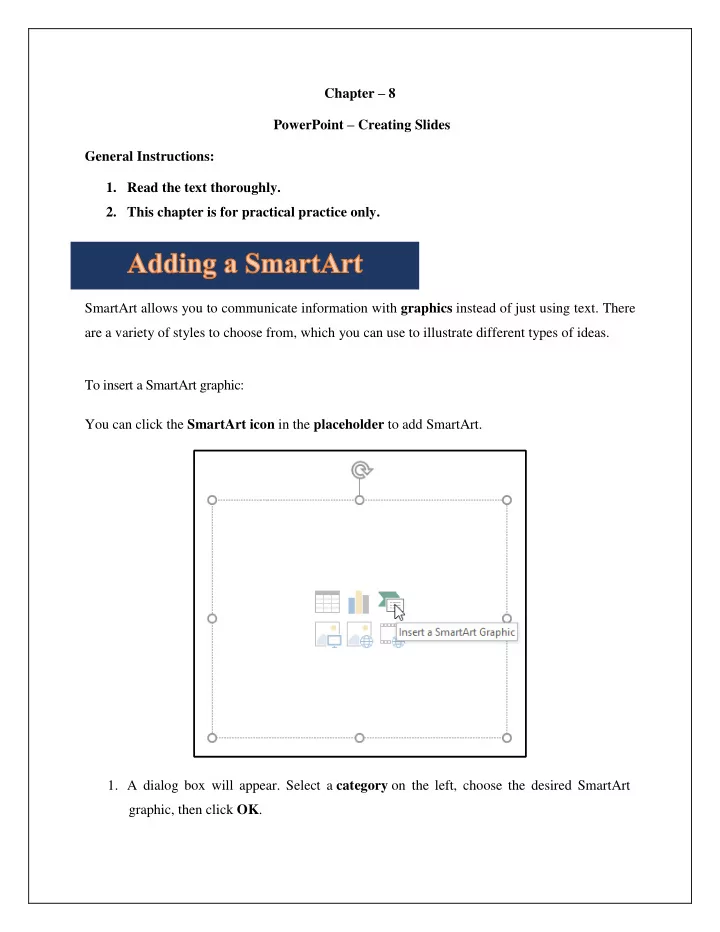
SmartArt allows you to communicate information with graphics instead of just using text. There are a variety of styles to choose from, which you can use to illustrate different types of ideas. To insert a SmartArt graphic: You can click the SmartArt icon in the placeholder to add SmartArt.
- 1. A dialog box will appear. Select a category on the left, choose the desired SmartArt