
SLIDE 1
Web Conferencing - Slides Module Uploading Presentations You can now - - PDF document
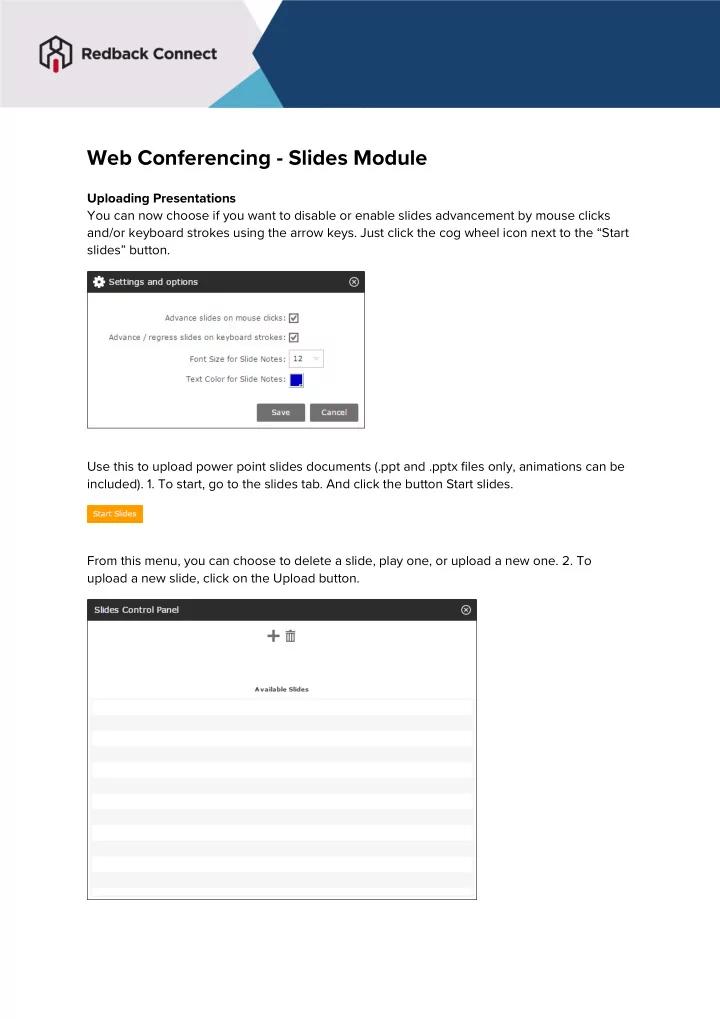
Web Conferencing - Slides Module Uploading Presentations You can now choose if you want to disable or enable slides advancement by mouse clicks and/or keyboard strokes using the arrow keys. Just click the cog wheel icon next to the Start