
SLIDE 1
Rethinking the Presentation with Prezi Guide to the Prezi Interface
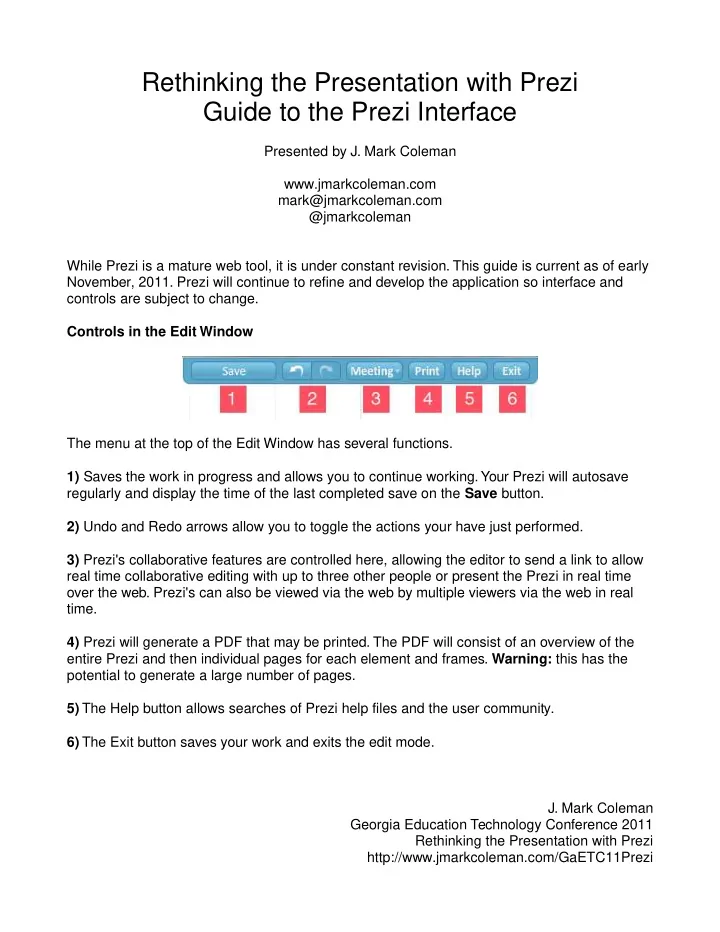
Presented by J. Mark Coleman www.jmarkcoleman.com mark@jmarkcoleman.com @jmarkcoleman While Prezi is a mature web tool, it is under constant revision. This guide is current as of early November, 2011. Prezi will continue to refine and develop the application so interface and controls are subject to change. Controls in the Edit Window The menu at the top of the Edit Window has several functions. 1) Saves the work in progress and allows you to continue working. Your Prezi will autosave regularly and display the time of the last completed save on the Save button. 2) Undo and Redo arrows allow you to toggle the actions your have just performed. 3) Prezi's collaborative features are controlled here, allowing the editor to send a link to allow real time collaborative editing with up to three other people or present the Prezi in real time
- ver the web. Prezi's can also be viewed via the web by multiple viewers via the web in real
time. 4) Prezi will generate a PDF that may be printed. The PDF will consist of an overview of the entire Prezi and then individual pages for each element and frames. Warning: this has the potential to generate a large number of pages. 5) The Help button allows searches of Prezi help files and the user community. 6) The Exit button saves your work and exits the edit mode.
- J. Mark Coleman