process capability analysis using experiments
play

Process Capability Analysis Using Experiments A designed experiment - PowerPoint PPT Presentation

ST 435/535 Statistical Methods for Quality and Productivity Improvement / Statistical Process Control Process Capability Analysis Using Experiments A designed experiment can aid in separating sources of variability in a quality characteristic.


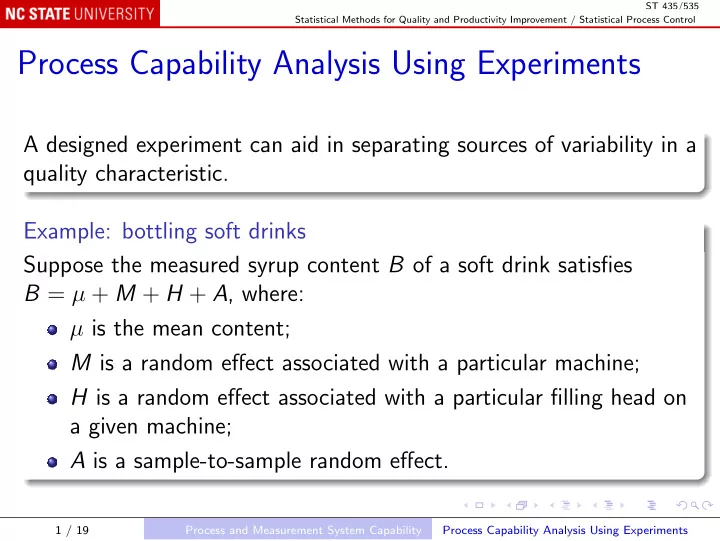
  1. ST 435/535 Statistical Methods for Quality and Productivity Improvement / Statistical Process Control Process Capability Analysis Using Experiments A designed experiment can aid in separating sources of variability in a quality characteristic. Example: bottling soft drinks Suppose the measured syrup content B of a soft drink satisfies B = µ + M + H + A , where: µ is the mean content; M is a random effect associated with a particular machine; H is a random effect associated with a particular filling head on a given machine; A is a sample-to-sample random effect. 1 / 19 Process and Measurement System Capability Process Capability Analysis Using Experiments
  2. ST 435/535 Statistical Methods for Quality and Productivity Improvement / Statistical Process Control Then σ 2 B = σ 2 M + σ 2 H + σ 2 A . If the overall variability σ B is unacceptably high, it could be reduced by focusing on any of the three components. The components can be estimated separately from the Analysis of Variance in a factorial designed experiment. Specific improvements could be made to reduce any large contibutor. 2 / 19 Process and Measurement System Capability Process Capability Analysis Using Experiments

  3. ST 435/535 Statistical Methods for Quality and Productivity Improvement / Statistical Process Control Gauge and Measurement System Capability Studies Basic concepts In order to monitor , analyze , or control a quality characteristic, we must be able to measure it. The generic measurement tool is a gauge (e.g. a tire pressure gauge, or a wire diameter gauge). Studies of measurement systems often refer to gauge capability . 3 / 19 Process and Measurement System Capability Gauge and Measurement System Capability Studies

  4. ST 435/535 Statistical Methods for Quality and Productivity Improvement / Statistical Process Control Gauge R & R Repeatability: Do we get the same observed value if we measure the same unit several times under identical conditions? Reproducibility: How much difference in observed values do we experience when units are measured under different conditions? 4 / 19 Process and Measurement System Capability Gauge and Measurement System Capability Studies

  5. ST 435/535 Statistical Methods for Quality and Productivity Improvement / Statistical Process Control Example: Using control chart tools Twenty parts are each measured twice ( m = 20 , n = 2). Is the gauge precise enough to distinguish part-to-part variability from within-part (measurement-to-measurement) variability? In R: gauge <- read.csv("Data/Table-08-06.csv") library(qcc) gaugeG <- with(gauge, qcc.groups(Measurement, Part)) summary(qcc(gaugeG, "R")) summary(qcc(gaugeG, "xbar")) 5 / 19 Process and Measurement System Capability Gauge and Measurement System Capability Studies

  6. ST 435/535 Statistical Methods for Quality and Productivity Improvement / Statistical Process Control The R chart shows within-part variability; it shows stable variation and is in control, with standard deviation ˆ σ Gauge = 0 . 887. The ¯ x chart has a different interpretation from the control context; the control limits are based on ˆ σ Gauge , and indicate how much variation in ¯ x can be attributed to measurement error. The several points outside the control limits illustrate the discriminating power of the gauge: the ability to separate the part-to-part variability from measurement error. 6 / 19 Process and Measurement System Capability Gauge and Measurement System Capability Studies

  7. ST 435/535 Statistical Methods for Quality and Productivity Improvement / Statistical Process Control Note The control chart is designed to distinguish between a process being in statistical control and being out of control, not to assess gauge capability. A more conventional way to compare within-sample variability and among-sample variability is using the Analysis of Variance: summary(aov(Measurement ~ Part, data = gauge)) Df Sum Sq Mean Sq F value Pr(>F) factor(Part) 19 377.4 19.86 26.48 3.16e-10 *** Residuals 20 15.0 0.75 7 / 19 Process and Measurement System Capability Gauge and Measurement System Capability Studies

  8. ST 435/535 Statistical Methods for Quality and Productivity Improvement / Statistical Process Control The F -value on the factor(Part) line tests the null hypothesis that there is no difference among parts. In the present context, we can interpret that as the null hypothesis that the differences among parts are too small to be detected using this gauge; that is, that the gauge capability is inadequate. Since the null hypothesis is soundly rejected ( P = 3 . 16 × 10 − 10 ), we infer that the gauge is indeed capable of separating the part-to-part variability from measurement error. 8 / 19 Process and Measurement System Capability Gauge and Measurement System Capability Studies

  9. ST 435/535 Statistical Methods for Quality and Productivity Improvement / Statistical Process Control Precision-to-tolerance ratio Gauge capability ˆ σ Gauge can be compared with the tolerance implied by specification limits: 6ˆ σ Gauge P / T = USL − LSL where the familiar constant 6 is sometimes replaced by 5 . 15. In the example, ˆ σ Gauge = 0 . 866, and the specification limits are USL = 60, LSL = 5, so P / T = 0 . 0945. As a rule of thumb, P / T ≤ 0 . 1 is often taken to mean adequate gauge capability, but this is only a rough guide. 9 / 19 Process and Measurement System Capability Gauge and Measurement System Capability Studies

  10. ST 435/535 Statistical Methods for Quality and Productivity Improvement / Statistical Process Control Variance components If we write a measurement as Y = X + ǫ, where X is the true value for a particular part, with standard deviation σ P , and ǫ is the measurement error, with standard deviation σ Gauge , then the standard deviation of Y is σ Total , where σ 2 Total = σ 2 P + σ 2 Gauge . We have an estimate of σ Gauge from the control chart, and we can estimate σ Total directly from the measurements, so we can estimate σ P by subtraction. 10 / 19 Process and Measurement System Capability Gauge and Measurement System Capability Studies

  11. ST 435/535 Statistical Methods for Quality and Productivity Improvement / Statistical Process Control In the example, ˆ σ Total = 3 . 172 and ˆ σ Gauge = 0 . 887, so √ 3 . 172 2 − 0 . 887 2 σ P = ˆ = 3 . 045 . 11 / 19 Process and Measurement System Capability Gauge and Measurement System Capability Studies

  12. ST 435/535 Statistical Methods for Quality and Productivity Improvement / Statistical Process Control These calculations are usually carried out using the Analysis of Variance: summary(aov(Measurement ~ factor(Part), data = gauge)) Expected mean squares are E(MS Residuals ) = σ 2 Gauge , E(MS Part ) = σ 2 Gauge + n σ 2 P where n = 2 is the sample size. 12 / 19 Process and Measurement System Capability Gauge and Measurement System Capability Studies

  13. ST 435/535 Statistical Methods for Quality and Productivity Improvement / Statistical Process Control We estimate σ P by � 1 ˆ σ P = n (MS Part − MS Residuals ) = 3 . 091 , essentially the same value as obtained from ¯ R . 13 / 19 Process and Measurement System Capability Gauge and Measurement System Capability Studies

  14. ST 435/535 Statistical Methods for Quality and Productivity Improvement / Statistical Process Control Note This way of estimating variance components works only for balanced data like these. It fails if, for instance, the sample sizes are not all equal. Tools for working with “mixed models” are needed for unbalanced data. In R: library(lme4) summary(lmer(Measurement ~ (1 | Part), data = gauge)) The output gives ˆ σ Part = 3 . 091, and ˆ σ Residual = 0 . 866, with no need for solving equations. 14 / 19 Process and Measurement System Capability Gauge and Measurement System Capability Studies

  15. ST 435/535 Statistical Methods for Quality and Productivity Improvement / Statistical Process Control Gauge R & R using ANOVA Example: p = 10 parts measured by o = 3 “operators” (inspectors), each making n = 3 measurements. Difference among measurements for a given inspector reflect repeatability . Difference among inspectors reflect reproducibility . Random effects statistical model: Y ijk = µ + P i + O j + ( PO ) ij + ǫ ijk , i = 1 , . . . , p , j = 1 , . . . , o , k = 1 , . . . , n . 15 / 19 Process and Measurement System Capability Gauge and Measurement System Capability Studies

  16. ST 435/535 Statistical Methods for Quality and Productivity Improvement / Statistical Process Control In R: thermal <- read.csv("Data/Table-08-07.csv") summary(aov(Impedance ~ factor(Part) * factor(Inspector), data = thermal)) Expected mean squares are E(MS Residuals ) = σ 2 , E(MS Part ) = σ 2 + n σ 2 PO + on σ 2 P E(MS Inspector ) = σ 2 + n σ 2 PO + pn σ 2 O E(MS Part:Inspector ) = σ 2 + n σ 2 PO 16 / 19 Process and Measurement System Capability Gauge and Measurement System Capability Studies

  17. ST 435/535 Statistical Methods for Quality and Productivity Improvement / Statistical Process Control Solve for estimates of the variance components: σ 2 = MS Residuals ˆ = 0 . 511 P = 1 σ 2 ˆ on (MS Part − MS Part:Inspector ) = 48 . 293 O = 1 σ 2 ˆ pn (MS Inspector − MS Part:Inspector ) = 0 . 565 PO = 1 σ 2 ˆ n (MS Part:Inspector − MS Residuals ) = 0 . 728 . 17 / 19 Process and Measurement System Capability Gauge and Measurement System Capability Studies

Download Presentation
Download Policy: The content available on the website is offered to you 'AS IS' for your personal information and use only. It cannot be commercialized, licensed, or distributed on other websites without prior consent from the author. To download a presentation, simply click this link. If you encounter any difficulties during the download process, it's possible that the publisher has removed the file from their server.

Recommend


More recommend