
GE Appliances & Lighting
Part Instruction
WE49X20697
GE Appliances & Lighting General Electric Company Louisville, KY 40225 GEAppliances.com
WH00X5630
Kit Includes
WE1M504 Drum Slides White -2 WE1M1067 Drum Slides Green -2 WE3M26 Top Bearing
- 1
WE12M29 Drive Belt
- 1
WE9M30 Drum Felt
- 1
WH00X5630 Instructions
- 1
Remove the Dryer Top Panel
The top panel is fastened at the front by 2
- screws. On some models it also may be
secured at the rear by 3 lock tabs that protrude from the bottom of the control panel.
To remove the top panel:
- 1. Remove 2 screws that secure the
top panel to the cabinet.
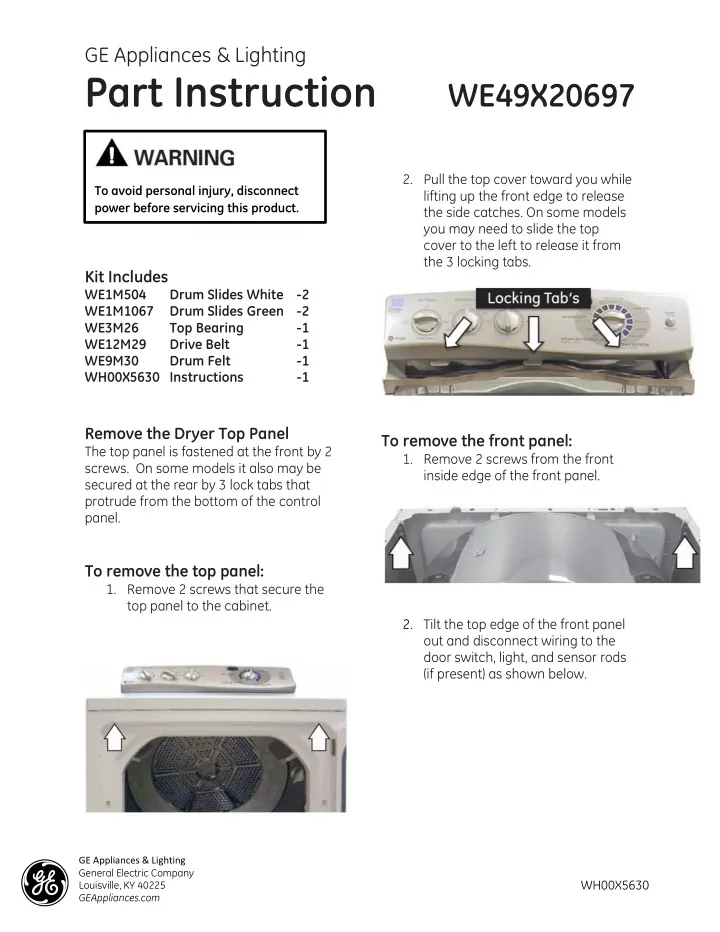
- 2. Pull the top cover toward you while
lifting up the front edge to release the side catches. On some models you may need to slide the top cover to the left to release it from the 3 locking tabs.
To remove the front panel:
- 1. Remove 2 screws from the front
inside edge of the front panel.
- 2. Tilt the top edge of the front panel
- ut and disconnect wiring to the
door switch, light, and sensor rods (if present) as shown below.
To avoid personal injury, disconnect power before servicing this product.