
SLIDE 1
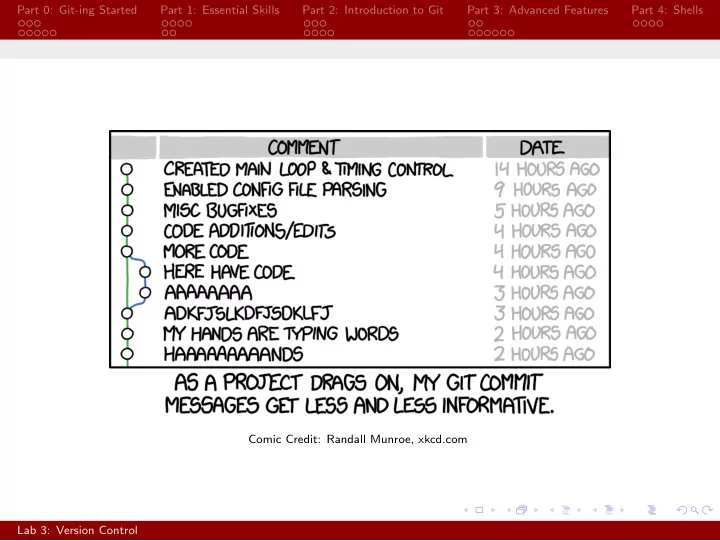
Part 0: Git-ing Started Part 1: Essential Skills Part 2: Introduction to Git Part 3: Advanced Features Part 4: Shells Comic Credit: Randall Munroe, xkcd.com Lab 3: Version Control
Part 0: Git-ing Started Part 1: Essential Skills Part 2: - - PowerPoint PPT Presentation
Part 0: Git-ing Started Part 1: Essential Skills Part 2: Introduction to Git Part 3: Advanced Features Part 4: Shells Comic Credit: Randall Munroe, xkcd.com Lab 3: Version Control Part 0: Git-ing Started Part 1: Essential Skills Part 2:
Part 0: Git-ing Started Part 1: Essential Skills Part 2: Introduction to Git Part 3: Advanced Features Part 4: Shells Comic Credit: Randall Munroe, xkcd.com Lab 3: Version Control
Part 0: Git-ing Started Part 1: Essential Skills Part 2: Introduction to Git Part 3: Advanced Features Part 4: Shells
Lab 3: Version Control
Part 0: Git-ing Started Part 1: Essential Skills Part 2: Introduction to Git Part 3: Advanced Features Part 4: Shells
Lab 3: Version Control
Part 0: Git-ing Started Part 1: Essential Skills Part 2: Introduction to Git Part 3: Advanced Features Part 4: Shells One-Time Setup
Lab 3: Version Control
Part 0: Git-ing Started Part 1: Essential Skills Part 2: Introduction to Git Part 3: Advanced Features Part 4: Shells One-Time Setup
1
2
Lab 3: Version Control
Part 0: Git-ing Started Part 1: Essential Skills Part 2: Introduction to Git Part 3: Advanced Features Part 4: Shells One-Time Setup
Lab 3: Version Control
Part 0: Git-ing Started Part 1: Essential Skills Part 2: Introduction to Git Part 3: Advanced Features Part 4: Shells Creating a Repository
Lab 3: Version Control
Part 0: Git-ing Started Part 1: Essential Skills Part 2: Introduction to Git Part 3: Advanced Features Part 4: Shells Creating a Repository
Lab 3: Version Control
Part 0: Git-ing Started Part 1: Essential Skills Part 2: Introduction to Git Part 3: Advanced Features Part 4: Shells Creating a Repository
Lab 3: Version Control
Part 0: Git-ing Started Part 1: Essential Skills Part 2: Introduction to Git Part 3: Advanced Features Part 4: Shells Creating a Repository
Lab 3: Version Control
Part 0: Git-ing Started Part 1: Essential Skills Part 2: Introduction to Git Part 3: Advanced Features Part 4: Shells Creating a Repository
Lab 3: Version Control
Part 0: Git-ing Started Part 1: Essential Skills Part 2: Introduction to Git Part 3: Advanced Features Part 4: Shells Workflow
Lab 3: Version Control
Part 0: Git-ing Started Part 1: Essential Skills Part 2: Introduction to Git Part 3: Advanced Features Part 4: Shells Workflow
Lab 3: Version Control
Part 0: Git-ing Started Part 1: Essential Skills Part 2: Introduction to Git Part 3: Advanced Features Part 4: Shells Workflow
Lab 3: Version Control
Part 0: Git-ing Started Part 1: Essential Skills Part 2: Introduction to Git Part 3: Advanced Features Part 4: Shells Workflow
Lab 3: Version Control
Part 0: Git-ing Started Part 1: Essential Skills Part 2: Introduction to Git Part 3: Advanced Features Part 4: Shells Merging Changes
Lab 3: Version Control
Part 0: Git-ing Started Part 1: Essential Skills Part 2: Introduction to Git Part 3: Advanced Features Part 4: Shells Merging Changes
1
2
3
4
5
Lab 3: Version Control
Part 0: Git-ing Started Part 1: Essential Skills Part 2: Introduction to Git Part 3: Advanced Features Part 4: Shells Version Control
Lab 3: Version Control
Part 0: Git-ing Started Part 1: Essential Skills Part 2: Introduction to Git Part 3: Advanced Features Part 4: Shells Version Control
Lab 3: Version Control
Part 0: Git-ing Started Part 1: Essential Skills Part 2: Introduction to Git Part 3: Advanced Features Part 4: Shells Version Control
Lab 3: Version Control
Part 0: Git-ing Started Part 1: Essential Skills Part 2: Introduction to Git Part 3: Advanced Features Part 4: Shells Useful Features
Lab 3: Version Control
Part 0: Git-ing Started Part 1: Essential Skills Part 2: Introduction to Git Part 3: Advanced Features Part 4: Shells Useful Features
Lab 3: Version Control
Part 0: Git-ing Started Part 1: Essential Skills Part 2: Introduction to Git Part 3: Advanced Features Part 4: Shells Useful Features
Lab 3: Version Control
Part 0: Git-ing Started Part 1: Essential Skills Part 2: Introduction to Git Part 3: Advanced Features Part 4: Shells Useful Features
◮ eg: IDE temporary files (.settings folder)
Lab 3: Version Control
Part 0: Git-ing Started Part 1: Essential Skills Part 2: Introduction to Git Part 3: Advanced Features Part 4: Shells Structure
Lab 3: Version Control
Part 0: Git-ing Started Part 1: Essential Skills Part 2: Introduction to Git Part 3: Advanced Features Part 4: Shells Structure
Lab 3: Version Control
Part 0: Git-ing Started Part 1: Essential Skills Part 2: Introduction to Git Part 3: Advanced Features Part 4: Shells Other Features
Lab 3: Version Control
Part 0: Git-ing Started Part 1: Essential Skills Part 2: Introduction to Git Part 3: Advanced Features Part 4: Shells Other Features
Lab 3: Version Control
Part 0: Git-ing Started Part 1: Essential Skills Part 2: Introduction to Git Part 3: Advanced Features Part 4: Shells Other Features
Lab 3: Version Control
Part 0: Git-ing Started Part 1: Essential Skills Part 2: Introduction to Git Part 3: Advanced Features Part 4: Shells Other Features
Lab 3: Version Control
Part 0: Git-ing Started Part 1: Essential Skills Part 2: Introduction to Git Part 3: Advanced Features Part 4: Shells Other Features
Lab 3: Version Control
Part 0: Git-ing Started Part 1: Essential Skills Part 2: Introduction to Git Part 3: Advanced Features Part 4: Shells Other Features
Lab 3: Version Control
Part 0: Git-ing Started Part 1: Essential Skills Part 2: Introduction to Git Part 3: Advanced Features Part 4: Shells
Lab 3: Version Control
Part 0: Git-ing Started Part 1: Essential Skills Part 2: Introduction to Git Part 3: Advanced Features Part 4: Shells The Shell
Lab 3: Version Control
Part 0: Git-ing Started Part 1: Essential Skills Part 2: Introduction to Git Part 3: Advanced Features Part 4: Shells The Shell
Lab 3: Version Control
Part 0: Git-ing Started Part 1: Essential Skills Part 2: Introduction to Git Part 3: Advanced Features Part 4: Shells The Shell
1The ShellShock vulnerability exploits a bug in how the ”bash” shell handles
Lab 3: Version Control
Part 0: Git-ing Started Part 1: Essential Skills Part 2: Introduction to Git Part 3: Advanced Features Part 4: Shells The Shell
◮ To go up a directory: ”cd ..” ◮ To go to the root directory: ”cd /” ◮ To list the current directory: ”ls .”, or just ”ls”. Lab 3: Version Control