
SLIDE 1
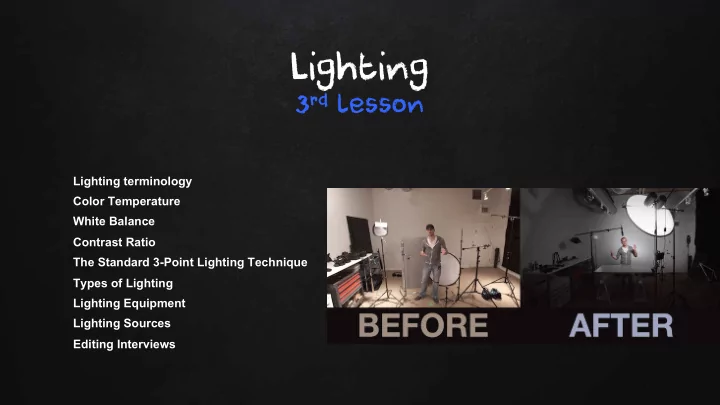
Lighting
3rd lesson
Lighting terminology Color Temperature White Balance Contrast Ratio The Standard 3-Point Lighting Technique Types of Lighting Lighting Equipment Lighting Sources Editing Interviews
Lighting 3 rd lesson Lighting terminology Color Temperature White - - PowerPoint PPT Presentation
Lighting 3 rd lesson Lighting terminology Color Temperature White Balance Contrast Ratio The Standard 3-Point Lighting Technique Types of Lighting Lighting Equipment Lighting Sources Editing Interviews Vox Vox Pop Time Pop Time Exercise
Lighting terminology Color Temperature White Balance Contrast Ratio The Standard 3-Point Lighting Technique Types of Lighting Lighting Equipment Lighting Sources Editing Interviews
Now that you already shooted for the vox pop, let’s edit the footage. You have to construct a video of a total maximum 6m just with the essential; Choose the content carefully; Have in mind issues with sound, the person’s face expressions like closing the eyes, opening too much the mouth or other weird body language movements, Camera shaking. Be aware to the content and trim it well!
Common Lighting Terminology Common Lighting Terminology
Ambient Light: The light already present in a scene, before any additional lighting is added. Incident Light: Light seen directly from a light source (lamp, sun, etc). Reflected Light: Light seen after having bounced off a surface. Colour Temperature: A standard of measuring the characteristics of light, measured in kelvins. Key Light: The main light on the subject, providing most of the illumination and contrast. Fill Light: A light placed to the side of the subject to fill out shadows and balance the key light. Back Light: A light placed at the rear of a subject to light from behind. Hard Light: Light directly from a source such as the sun.
Soft Light: which appears to "wrap around" the subject to some degree. Produces less shadows or softer shadows. Spot: A controlled, narrowly-focused beam of light. Tungsten: Light from an ordinary light bulb containing a thin coiled tungsten wire that becomes incandescent (emits light) when an electric current is passed along it. Tungsten colour temperature is around 2800K to 3400K. Also known as incandescent light. Ambient Light: Ambient light means the light that is already present in a scene, before any additional lighting is
Unfortunately ambient light can be a real nuisance if it conflicts with what the photographer wants to achieve. For example, ambient light may be the wrong color temperature, intensity or direction for the desired effect. In this case the photographer may choose to block out the ambient light completely and replace it with artificial light. Of course this isn't always practical and sometime compromises must be made.
Colour temperature is a standard method of describing colours for use in a range of situations and with different
Colour Colour Temperature Temperature in in Video Video
For video operations the relevant temperatures range from around 2,000K to 8,000K — these are common lighting
prevailing light or to create a particular colour effect. For example, a camera operator will select a "5600K filter" to use outside in the middle of a sunny day.
Video Video Camera Camera White White Balance Balance
White balance basically means colour balance. It is a function which gives the camera a reference to "true white" — it tells the camera what the colour white looks like, so the camera will record it correctly. Since white light is the sum
Incorrect white balance shows up as pictures with orange or blue tints, as demonstrated by the following examples: 1- Correct colour balance. 2 - Colour balance is too blue. 3 - Colour balance is too yellow.
1 2 3
Most consumer-level camcorders have an "auto-white balance" feature, and this is how most amateurs operate. The camera performs it's own white balance without any input from the operator. In fact, very few home-video users are aware of it's existence. Unfortunately, the auto-white balance is not particularly reliable and it is usually preferable to perform this function manually.
Contrast Contrast Ratio Ratio
Contrast Ratio is a measurement of the difference in brightness between the whitest white and the darkest black within an image. A ratio of 300:1 means the brightest point in the image is 300 times as bright as the darkest point. A higher contrast ratio therefore means a larger difference in brightness. Contrast ratio is of interest in two situations: Cameras: When recording an image (video, film, photography) TVs, Monitors, etc. When choosing or setting up a playback device (TV, computer monitor, etc) Video does not cope with extreme contrast as well as film, and nowhere near as well as the human eye. The result of
need to ensure that there is not too much contrast in your shot.
The Standard 3-Point Lighting Technique
The Three Point Lighting Technique is a standard method used in visual media such as video, film, still photography and computer-generated imagery. It is a simple but versatile system which forms the basis of most lighting. Once you understand three point lighting you are well on the way to understanding all lighting. The technique uses three lights called the key light, fill light and back light. Naturally you will need three lights to utilise the technique fully, but the principles are still important even if you only use one or two lights. As a rule: If you only have one light, it becomes the key. If you have 2 lights, one is the key and the other is either the fill or the backlight.
This is the main light. It is usually the strongest and has the most influence on the look of the scene. It is placed to
Fill Light This is the secondary light and is placed on the opposite side of the key light. It is used to fill the shadows created by the key. The fill will usually be softer and less bright than the key. To acheive this, you could move the light further away or use some spun. You might also want to set the fill light to more of a flood than the key.
Back Light The back light is placed behind the subject and lights it from the rear. Rather than providing direct lighting (like the key and fill), its purpose is to provide definition and subtle highlights around the subject's outlines. This helps separate the subject from the background and provide a three-dimensional look. If you have a fourth light, you could use it to light the background of the entire scene.
Lighting Equipment
Reflector Board: A specially-designed reflective surface used to act as a secondary light source. The board is lightweight and flexible, and is normally folded up for transport in a small carry-case. Gels: Materials which are placed in front of a light source to alter it's characteristics, e.g. colour temperature or dispersion (see diffusion gels).
You can buy cheap at Ebay http://www.ebay.co.uk/itm/111781220996
Light Sources
All video uses some sort of lighting, whether it be natural light (from the sun) or artificial lights. The goal of video lighting is to choose the best source(s) to achieve your goals. First and foremost you need enough light. You must ensure that your camera is able to record an acceptable picture in the conditions. With modern cameras this is seldom a problem except in very low light or strong contrast. Assuming you have enough light, you must then consider the quality of the light and how the various light sources combine to produce the image. If you have clashing light sources (e.g. artificial interior lights with sunlight coming through the windows), you may find the colours in your image appear unnatural. It's best to control the light sources yourself if possible (e.g. turn off the lights or close the curtains). When moving between locations, think about what light source you are using. If you move from an outside setting to an inside one with artificial lights, the amount of light may seem the same but the colour temperature will change according to the type of lights. In this case you need to white balance your camera for the new light source.
Camera-Mounted Lights The camera-mounted light is an easy, versatile solution used by amateurs and professionals alike. Typically the light will draw power from the camera battery, although a separate power supply can be used. Be aware that lights which draw power from the camera battery will significantly shorten the battery's charge time. This type of lighting does not create pleasing effects. it is a "blunt instrument" approach which is really only designed to illuminate the scene enough to allow normal camera operations. However it is a simple, practical solution. Night-Mode Video Shooting Some cameras offer a special "night vision" option which allows you to shoot with virtually no light. This mode uses infrared light instead of normal visible light.
If You Have Your Own Lights You need to decide whether or not they are actually necessary. Although conventional wisdom says you should control interview lighting yourself if possible, in many situations the existing light will be fine and more practical. Shooting outside The weather will obviously influence your decision. If the natural light is sufficient there may be no need to add artificial
If You Have No Lighting In many situations you are limited to the available light. This is where a reflector board (pictured) can be a lifesaver. Easy to carry and use, it can create useful lighting effects and compensate for unfavourable conditions. If you don't have a reflector board you can sometimes improvise with other reflective objects. With luck the natural sunlight will be fine, using the sun as the key light. If the sun is low, be careful not to make the guest
Try to avoid mixed lighting, e.g. sunlight through a window mixed with artificial light. Depending on the strength and quality
Overhead lights aren't desirable as they create ugly shadows on the face. If they are all you have you may be able to balance them with a reflector.
Reflectors You can make your own from just about any large reflective object, although the exact colour and reflectivity will obviously affect your lighting. Common suggestions for an improvised reflector include:
Lighting with Background Windows Shooting pictures indoors with external windows is a common issue for photographers and video makers. The large difference in light levels between the room and the outside view make finding the correct exposure a challenge. Video is particularly susceptible to this problem due to it's relatively low contrast ratio. Add more light to the room Reduce the light from the window Lighting Effects Cold / Warm You can add to the feeling of coldness or warmth by using additional filters or doubling up on gels. Very blue means very cold, very red/orange means very hot.
The Lights The standard budget light is the halogen work lamp which can be found at any hardware store or purchased at amazon.com for as little as $US10. These come with or without a stand and range from around 150W to 500W. The stand-less units have a small handle and can be rested on any solid surface such as a table or the floor. This is not ideal for your main lights but it can be useful for fill lighting, backgrounds, etc. In any case these units are so cheap that it can't hurt to buy a couple. Lights with stands are more versatile and you should have at least one of these (preferably two or three). Try to find a stand which goes up to around 2 metres (the height of a tall person). Taller than 2 metres would be even better but this type of light stand doesn't normally go that high. Some lights (like the W12665 unit pictured) can be used with or without the stand, making them even more versatile. One drawback of these cheap lights is that the colour of the light is quite yellow. As long as you white-balance your camera this isn't a huge issue, but if you want the best quality lighting you can try one of these solutions: Purchase a 32K white bulb (ask your hardware supplier). Place a coloured gel in front of the light to correct the colour. Speaking of gels, the other big drawback of these lights is that there is no built-in system for mounting accessories like gels and diffusers. You can improvise by creating a wire holder or separate stand for accessories. You will also find that you can't alter the spread of these lights, i.e. from floodlight to spotlight. This is not a big concern for most people but if you do need this functionality you might need to consider a professional video lighting kit.
Editing Interviews Editing Interviews
Before you shoot your interview you must know how it will be edited. For example, if there are going to be lots of other shots inserted you may want to hold a static shot throughout the IV so that these shots can easily be added anywhere. On the other hand, if there is to be little or no editing you may want to vary your shots to maintain interest. Despite the many different styles of interview, most have a fairly common basic structure. The following example outlines a typical approach: Establishing Shot A very wide shot which shows the location. Not always necessary. 2-Shot A visual introduction to both interview participants (interviewer and guest). Usually a wide shot or MCU. 1-Shot Begin concentrating on the guest with an MCU and overlay name/title key. Questions & Noddies While most of the interview concentrates on the guest, the interviewer is occasionally shown asking and responding to questions. Cutaways When appropriate, relevant cutaways can be dropped in.
Cutting Between Interviewer and Guest The most common edit is the cut between shots of interviewer and guest, whether it be live cuts between cameras or post- production edits. The natural instinct is to cut exactly between the end of a question and the beginning of the answer. However this tends to look stilted. Try cutting a little before or after the question/answer is complete. In live multi-camera situations it's easy to get caught behind the action, cutting to the wrong person at the wrong time. This can happen, for example, when you expect one person to speak but another person does. Do not "chase" the person speaking - it's better to have a shot of someone else listening for a few seconds than to cut quickly to the speaker and draw attention to your mistake. If you have the luxury of a wide shot, this can often get you out of trouble. Back-Cut Questions If you are using one camera and the IV is to be edited in post-production, the usual routine is to concentrate your framing
and shoot them asking the questions again. The interviewer is in exactly the same position as they were during the IV, facing the empty space where the guest was (which is of course out of shot). These shots are then inserted into the interview over the original questions. The result is an interview which looks like it was shot with two cameras. Obviously it's important to record the back-cut questions exactly the same as they were asked during the actual IV. You will usually have a pre-prepared list of questions to help you, but you should also make notes during the IV of any new
Noddies "Noddy" is the term given to a shot of the interviewer reacting to the guest. The interviewer may be nodding, smiling, frowning, looking concerned, etc. Noddies perform two functions: To include the interviewer and show their reactions. To provide edit points. Noddies are shot in the same way as the back-cut questions. The interviewer faces the same direction and provides a series of nods, smiles and any other expressions relevant to the interview. This is difficult for inexperienced presenters and will cause much hilarity for anyone watching who has never seen it done before. Note: If you are tempted to laugh and make jokes at your first professional shoot - don't! Experienced presenters have heard all the noddy jokes a million times and it just shows how new you are.
Some More Rules: When shooting for post-production create clean lead-in and lead-out space, and include information about the IV content. At the beginning of the IV have the presenter record a brief intro and 3-second countdown, leaving the "one" silent, e.g: "IV with John Smith regarding environmental contamination, starting in 3... 2.... (silence)...” The interviewer then begins the actual interview on "zero". At the conclusion of the interview, pause and don't move. This stops the guest from immediately looking or walking away, providing you with enough time to mix or wipe away to the next shot. Keep an eye on looking room and direction. When gathering and editing lots of different shots you must be constantly ensuring that everyone is facing the right way. For example, if you shoot your back-cut questions the wrong way the interviewer and guest will appear to be facing opposite directions. Cutaways and noddies will save your edit. You can't have too many of them.
General Tips for Shooting Interviews The KISS Principle When you're starting out shooting IVs it's probably best to keep it simple. It's better to have a boring static shot for 60 seconds than an empty or soft shot. Remember, the important stuff is what the guest is saying, not how creative your framing is. Dealing with Newbie Guests Guests who have never been interviewed before can be a challenge, especially if they are very nervous. It's important to reassure them and make them feel comfortable. Here are a few things you might find yourself saying to the nervous newbie: "Just treat it as a normal conversation. There's no reason for you to worry about anything else that's happening. The best thing you can do to look good for the cameras is to ignore them.” "Don't worry if you make a mistake or muddle up your words - just carry on. It actually happens all the time in interviews, but because it's something the audience is used to seeing in everyday conversations they won't even notice.” "You look fine!” Note: If the interview is to be edited, you can point out that any serious mistakes can be cut out.
Pace Yourself (and Everyone Else) Fatigue is the enemy. Interviewers and guests who are tired do not perform well, so be careful not to exhaust them. When preparing the set, use stand-ins to take their place while you set up the shots. Do not ask for multiple takes unless necessary (you will often find the first take is the best anyway). Clothing Beware of clothing which is un-camera-friendly. This includes shirts and jackets with fine patterns which produce the moire
Be Prepared Think about everything that could happen during the interview. Especially if you're shooting off-the-shoulder and there's a chance that your subjects could move around, you need to know how you're going to move. Try to ensure that unwanted bystanders aren't going to interrupt the IV. Summary Interview technique is a required skill for any serious camera operator. Know what the goal of the interview is and stay focused on that goal. Know the editing requirements. Double-check everything, then do it again. Be prepared for anything.
Interview with Neal Goldstein, Mobile App Developer - https://www.youtube.com/ watch?v=6weWighQhLk DIY Bounce Board & Interview Lighting! by Film Riot – https://youtu.be/TAcY5ob2UnE Interview Lighting and Golden Hour by Film Riot - https://www.youtube.com/watch?v=5LTG7ysLNH8 Interview with Fashion Designer Prabal Gurung | Neiman Marcus - https://www.youtube.com/ watch?v=tQbit5_kvOk Interview Examples: Lighting Tips: Quick Tips: 5 Tips For Shooting Outside! - https://www.youtube.com/watch?v=3r9GvqDiPSI
Divide in two groups; Decide two people to interview; Make 5 really good questions that allow the person to develop their answers – don’t use questions of yes/no answers; Now quickly, try to find materials to shoot (reflector, black sheet); Choose background and set up the reflector and black sheet; Film with two cameras, one more frontal, other more from profile; Use MS, MCU, CU and then shoot some Cut-aways, cut-ins and WS for the montage.