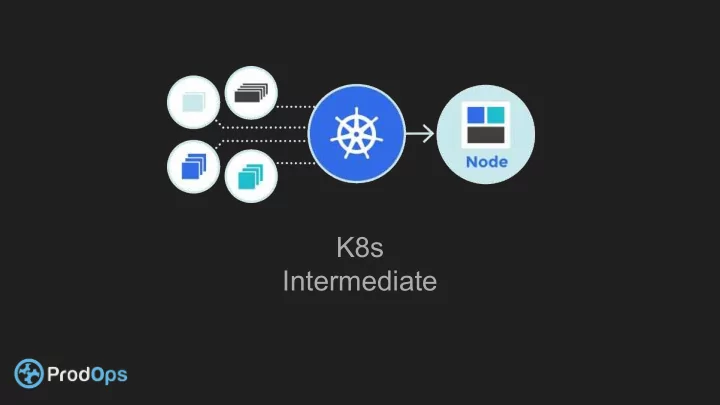
SLIDE 1
K8s Intermediate
SLIDE 2 Kubernetes a clustered container orchestration Software
an open-source system for automating deployment, scaling, and management of containerized applications.
It groups containers that make up an application into logical units for easy management and discovery. Kubernetes builds upon 15 years of experience of running production workloads at Google, combined with best-of-breed ideas and practices from the community. Now maintained by CNCF a non profit organization sponsored by the largest companies in tech like google,amazon,microsoft , redhat …...
SLIDE 3
CNCF PROJECTS Kubernetes is not the only project maintained by cncf
SLIDE 4 Kubernetes Basic resources
- K8s Master
- K8s Nodes
- Deployment
- Service
- Pod
- Statefulsets
- Daemonset
- Secrets
- Persistent Volumes
- Persistent Volumes Claim
- Storage Class
- Replicasets ……..
SLIDE 5
Desired State And the Declarative Model In k8s we use the declarative model instead of the procedural model . In the the declarative model we define the desired state of our object . unlike the procedural model where we define steps and execute them. In k8s every configuration is made using the declarative model where we describe the target status of our object So in the procedural model we would run a container like this : Docker run nginx
SLIDE 6
Desired State And the Declarative Model In the declarative model it would be: apiVersion: v1 kind: Pod metadata: name: nginx spec: containers: – name: nginx image: nginx
SLIDE 7
Basics - POD Pod Kubernetes targets the management of elastic applications that consist of multiple microservices communicating with each other. Often those microservices are tightly coupled forming a group of containers that would typically, in a non-containerized setup run together on one server. This group, the smallest unit that can be scheduled to be deployed through K8s is called a pod.
SLIDE 8 Basics - POD This group of containers would share storage, Linux namespaces, cgroups, IP
- addresses. These are co-located, hence share resources and are always
scheduled together. Pods are not intended to live long. They are created, destroyed and re-created on demand, based on the state of the server and the service itself.
SLIDE 9
Basics - DEPLOYMENT A Deployment controller provides declarative updates for Pods and ReplicaSets. You describe a desired state in a Deployment object, and the Deployment controller changes the actual state to the desired state at a controlled rate. You can define Deployments to create new ReplicaSets, or to remove existing Deployments and adopt all their resources with new Deployments.
SLIDE 10 Basics - SERVICE
As pods have a short lifetime, there is no guarantee about the IP address they are served on. This could make the communication of microservices hard. Imagine a typical Frontend communication with Backend services. Hence K8s has introduced the concept of a service, which is an abstraction on top of a number of pods, typically requiring to run a proxy on top, for other services to communicate with it via a Virtual IP address. This is where you can configure load balancing for your numerous pods and expose them via a service.
SLIDE 11
Basics - SERVICE
We can create different types of services : ➜ Clusterip Create a clusterIP service. ➜ externalname Create an ExternalName service. ➜ Loadbalancer Create a LoadBalancer service. ➜ nodeport Create a NodePort service.
SLIDE 12 Basics - SERVICE Nodeport
Node port
SLIDE 13
Basics - Tying it all together
SLIDE 14 Networking
The Kubernetes networking model is based on a flat address space. All pods in a cluster can directly see each other. Each pod has its own IP address. There is no need to configure any NAT. In addition, containers in the same pod share their pod's IP address and can communicate with each other through localhost. This model is pretty opinionated, but once set up, it simplifies life considerably both for developers and administrators. It makes it particularly easy to migrate traditional network applications to Kubernetes. A pod represents a traditional node and each container represents a traditional process.
SLIDE 15 Networking
Kubernetes use the CNI drivers model . where container networking is a driver in kubernetes and can be replaced The major cni drivers are Docker - Default network for single node ( minikube) uses macvlan network Weave - an overlay network driver Flannel - full subnet to every host backed by etcd to manage networks uses in kernel VXlAN Calico - layer 3 kernel level implementation uses bgp for node communication does not need to use nat Canal - a mix of both flannel and calico combines the best of bot
SLIDE 16 Networking
Kubernetes networking Inter-pod communication (pod to pod) Pods in Kubernetes are allocated a network-visible IP address (not private to the node). Pods can communicate directly without the aid
- f network address translation, tunnels, proxies, or any other obfuscating layer. Well-known port
numbers can be used for a configuration-free communication scheme. The pod's internal IP address is the same as its external IP address that other pods see (within the cluster network; not exposed to the outside world). That means that standard naming and discovery mechanisms such as DNS work out of the box. Pod to service communication Pods can talk to each other directly using their IP addresses and well-known ports, but that requires the pods to know each other's IP
- addresses. In a Kubernetes cluster, pods can be destroyed and created constantly. The service provides a layer of indirection that is
very useful because the service is stable even if the set of actual pods that respond to requests is ever-changing. In addition, you get automatic, highly available load balancing because the Kube-proxy on each node takes care of redirecting traffic to the correct pod:
SLIDE 17
Networking
SLIDE 18 Deployments
A Deployment controller provides declarative updates for Pods and ReplicaSets. You describe a desired state in a Deployment object, and the Deployment controller changes the actual state to the desired state at a controlled rate. You can define Deployments to create new ReplicaSets, or to remove existing Deployments and adopt all their resources with new Deployments.
SLIDE 19 Deployments The best practices for multi tier apps on k8s are standard we will discuss a few points .
- differentiate between the backend and the frontend with
some logical api
- all logs should be printed to stdout of containers
- all apps should be stateless except for the storage points
which should have an external storage
SLIDE 20 Deployments
- all apps should be defined in k8s as deployments with :
○ replicas more than one ○ health check should be defined ○ resource requests and limit should be set to be able to account for storage /cpu /memory starvation ○ versioning metadata should be defined .
SLIDE 21 Deployments
- when updating databases facing app:
○ have any update to be backward compatible or ○ every database should be wrapped with an api dal ○ in any case avoid multiple writers/readers to the same DB at most try to keep one reader/writer
- plan for failure and at any time fails pods to test for system
stability (chaos monkey)
SLIDE 22
METADATA
Metadata in k8s has a very big role . As k8s provides the ability to do service discovery . we need a way to describe our services and application And based on that discovery we do the internal data flow of our app . To help us in achieving manageable application k8s adds a meta data to all our apps . Based on that metadata we define and control the flow of data in our apps . In each pod/deployment/service/replicaset we can add a label inside our metadata section . That allows us to tag our resources with a simple key: value pair . We can use that key value pair to then connect services to pod/deployments and play with the flow of our apps .
SLIDE 23 Deployments yaml
apiVersion: extensions/v1beta1 kind: Deployment metadata: name: nginx spec: replicas: 1 strategy: type: RollingUpdate rollingUpdate: maxSurge: 1 maxUnavailable: 0 selector: matchLabels: app: nginx version: v1 minReadySeconds: 35 template: metadata: labels: app: nginx version: v1 spec: terminationGracePeriodSeconds: 60 containers:
image: mikiha/nginx-server:1.4 resources: requests: memory: "1G" cpu: "200m" ports:
livenessProbe: httpGet: path: / port: 80 initialDelaySeconds: 3 periodSeconds: 3 timeoutSeconds: 3 readinessProbe: httpGet: path: / port: 80 initialDelaySeconds: 30 periodSeconds: 3 timeoutSeconds: 3 volumeMounts:
name: logs volumes:
hostPath: path: /LOGS/
SLIDE 24 Deployments methods Canary Release is the technique that we use to “softly” deploy a new version of an application into Production. It consists of letting only a part of the audience get access to the new version of the app, while the rest still access the “old” version
- ne. This is very useful when we want to be sure about
stability in case of any changes which may be breaking, and have big side effects.
SLIDE 25
Deployments methods
The point is: canary release has never been easy to be put into practice. Depending on the environment we have, it can take so long to be put in place that we often prefer to leave this away. However, with Docker containers and Kubernetes orchestration it is quite friendly to do that.
SLIDE 26
Deployments methods
Blue-green deployment is a technique that reduces downtime and risk by running two identical production environments called Blue and Green. At any time, only one of the environments is accessable , with the live environment serving all production traffic. For this example, Blue is currently live and Green is idle.
SLIDE 27
Deployments methods
As you prepare a new version of your software, deployment and the final stage of testing takes place in the environment that is not live: in this example, Green. Once you have deployed and fully tested the software in Green, you switch the router so all incoming requests now go to Green instead of Blue. Green is now live, and Blue is idle. This technique can eliminate downtime due to application deployment. In addition, blue-green deployment reduces risk: if something unexpected happens with your new version on Green, you can immediately roll back to the last version by switching back to Blue.
SLIDE 28
Deployments methods A/B testing (sometimes called split testing) is comparing two versions of a web page to see which one performs better. You compare two web pages by showing the two variants (let's call them A and B) to similar visitors at the same time. The one that gives a better conversion rate, wins!
SLIDE 29 Deployments methods
Rolling update To update a service without an outage, kubectl supports what is called ‘rolling update’, which updates one pod at a time, rather than taking down the entire service at the same time. Rolling Update Deployment The Deployment updates Pods in a rolling update fashion when .spec.strategy.type==RollingUpdate. You can specify maxUnavailable and maxSurge to control the rolling update process.
SLIDE 30 Deployments Hands on
Login labs.play-with-k8s.com clone : https://github.com/mikiha81/k8smeetup.git On labs.play-with-k8s press the + button to add a node . and run the commands
- 1. kubeadm init --apiserver-advertise-address $(hostname -i)
- 2. kubectl apply -n kube-system -f
"https://cloud.weave.works/k8s/net?k8s-version=$(kubectl version | base64 |tr -d '\n')" Then press the + again and copy from the first node the kubeadm join command and run it in the second node
SLIDE 31
Deployments Hands on Deploy the yamls from nginx folder in the git project this is the base line deploy . Verify you can access it using curl run Kubectl get svc and check the node port in the 3XXXX range And from node 2 issue the command : while true; do curl http://localhost:30938/version.html ; sleep 1 ; done
SLIDE 32
Deployments Hands on
Canray release : In the canary-release folder print the yaml and look at the changes …. apply the deployment yaml . Run kubectl get pod verify the pod is up and ready . Then go back to the 2nd node and look at the result of the curl . Whats going on ? Next delete the deployment for canary kubectl delete -f deployment.yaml
SLIDE 33
Deployments Hands on
Blue green deployment : In the blue green deployment First apply the service-2.0.yaml Then apply the deployment.yaml Wait for the container to become ready . And apply the service.yaml … Look the result of the curl . What’s going on ? Now delete the deployment .. and apply the service.yaml from the nginx folder .
SLIDE 34 Deployments Hands on
A/B TESTING : How do you do it ? Play with the deployment yaml and the service.yaml from the nginx folder and use the v2.5 tag Remember to reset deployment and service back to nginx default before moving
SLIDE 35
Deployments Hands on
Rolling update : Because our default update policy is rolling update is To do a rolling update .. Run the command kubectl set image deployment nginx nginx=mikiha/nginx:2.6 Run a kubectl get pod and look the pods replacing ope by one . And go to the second node … look the curl log
SLIDE 36 K8s deployments limitations
deployments in kubernetes while being advanced still has some limitations
- no dependencies between different deployments
- no versioning of deployments
- somewhat limited variables declaration
- no flow control in descriptive
- no hooks when deploying and upgrading so /deploy/upgrade is linear
- no central repository for application deployment declaration
SLIDE 37 Deployment solution
The solution for our issues HELM helm is maintained by the CNCF which also maintains k8s helm uses go syntax for declarative language in deploying application to k8s advantages of helm
- central repository
- full descriptive language with flow control
- full hooks for before and after deploying
- allows specifying of dependencies
- full versioning support
- full templating support
SLIDE 38
Helm - intro
Helm is a clients server solution made out of two apps . Tiller thats the server that talks k8s and deploys the configuration to K8s. Helm . the Client that does some of the heavy lifting and compiles the charts and turns them into releases that deploys to tiller . both tiller and helm are go binaries . (small and static) as helm supports remote repositories helm know how to download charts from remote repositories (like yum apt brew apk) . but helm does not provide a way to upload a chart to a remote server .
SLIDE 39 Helm - intro continued
Helm deploys charts - those are the templates to create k8s deployments services and most of the resources that k8s supports .
- nce a chart is “compiled “ and deploys to a k8s server it turn to a release .
to look for releases in a repo you can use helm search to list charts and releases use helm ls for instance :
helm ls NAME REVISION UPDATED STATUS CHART NAMESPACE miki-wordpress 1 Sun Apr 15 00:32:55 2018 DEPLOYED wordpress-1.0.0 default viable-aardvark 1 Tue Apr 10 15:29:04 2018 DEPLOYED wordpress-1.0.0 default
SLIDE 40 Helm - intro continued
as you can see in this case we have two different releases for wordpress with the same chart , this is done when using the helm install. the first chart was installed with --name = RELEASE NAME flag , the second one was just helm install wordpress . also we can see the status, namespace and the revision , we can do rollback to previous versions
helm ls NAME REVISION UPDATED STATUS CHART NAMESPACE miki-wordpress 1 Sun Apr 15 00:32:55 2018 DEPLOYED wordpress-1.0.0 default viable-aardvark 1 Tue Apr 10 15:29:04 2018 DEPLOYED wordpress-1.0.0 default
SLIDE 41 Helm - intro
to create a chart we use the create command in helm once we do this we create a boilerplate folder with the name of the chart we use so . . helm create miki-small-app this creates the files we need for our owne chart Charts.yaml - contains the name,description,version of the chart values.yaml - default values that we can modify and access from each template templates folder - a template folder contains our resources templates, we will we will modify them for our deployments as the template files - this can al be yaml files we declare and container resources they must not start with _ _helpers.tpl - template file for go definitions such as function or descriptive logic code
miki-small-app/ ├── charts ├── Chart.yaml ├── templates │ ├── deployment.yaml │ ├── _helpers.tpl │ ├── ingress.yaml │ ├── NOTES.txt │ └── service.yaml └── values.yaml
SLIDE 42 Helm - intro
chart folder can container a number of other chart to install other charts manually
- an optional file is requirements.yaml in the that can link to dependent charts
and their versions like also alias field can point to a release name and is optional tags and condition is also
condition can link to a value that we can reference from our parent chart
miki-small-app/ ├── charts ├── Chart.yaml ├── templates │ ├── deployment.yaml │ ├── _helpers.tpl │ ├── ingress.yaml │ ├── NOTES.txt │ └── service.yaml └── values.yaml dependencies:
repository: http://localhost:10191 version: 0.1.0 alias: new-subchart-1 tag:
condition: subchart1.enabled
SLIDE 43 Helm - intro
looking at out default deployment : we see some default yaml we know and love from k8s but there are some {{ }} code . this is a generated code from the go engine of helm , we can use this to create descriptive code we can access from other files . so in the name field we have the {{template “chart.fullname”}} this actually goes to our templates file and looks for the name
- f the variables we define .
same as .Values.replicacount goes to our variable.yaml file . and the .Release.Name goes to our Charts.yaml and takes our release name .
apiVersion: apps/v1beta2 kind: Deployment metadata: name: {{ template "miki-small-app.fullname" . }} labels: app: {{ template "miki-small-app.name" . }} chart: {{ template "miki-small-app.chart" . }} release: {{ .Release.Name }} heritage: {{ .Release.Service }} spec: replicas: {{ .Values.replicaCount }} selector: matchLabels: app: {{ template "miki-small-app.name" . }} release: {{ .Release.Name }} template: metadata: labels: app: {{ template "miki-small-app.name" . }} release: {{ .Release.Name }} spec: containers:
image: "{{ .Values.image.repository }}:{{ .Values.image.tag }}" imagePullPolicy: {{ .Values.image.pullPolicy }}
SLIDE 44 Helm - intro
also in our code is a reference to toYaml this is for cases when our code is already in yaml format for this to Yaml solves our issue with importing code also in case where our code cannot be indented in the source file we need to match the it to the resulting generated yaml file we can pipe to an indent functions like so |indent NUM we can also include function from our _helpers file so for instance we define a code block in our template :
{{- define "my_labels" }} labels: generator: helm date: {{ now | htmlDate }} {{- end }}
and access it in our resource.yaml file like so
{{ template "mychart_app" . }}
- r use the include function in the template function the code is added as as and in include its proccesd
as a function .
{{ toYaml .Values.resources | indent 12 }} {{- with .Values.nodeSelector }} nodeSelector: {{ toYaml . | indent 8 }} {{- end }} {{- with .Values.affinity }} affinity: {{ toYaml . | indent 8 }} {{- end }} {{- with .Values.tolerations }} tolerations: {{ toYaml . | indent 8 }} {{- end }}
SLIDE 45 Helm- Lab
To install helm download the release from here https://storage.googleapis.com/kubernetes-helm/helm-v2.9.1-linux-amd64.tar.gz Unpack on node 1 and run helm init Once it's done run helm install