SLIDE 1
Instructions for Recording URD Presentation
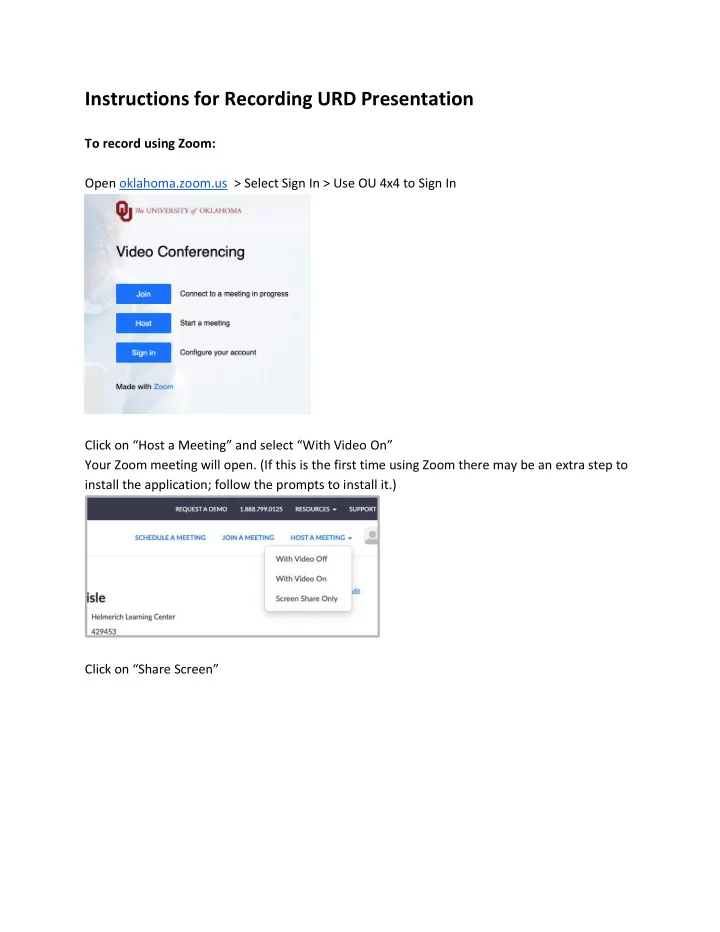
To record using Zoom: Open oklahoma.zoom.us > Select Sign In > Use OU 4x4 to Sign In Click on “Host a Meeting” and select “With Video On” Your Zoom meeting will open. (If this is the first time using Zoom there may be an extra step to install the application; follow the prompts to install it.) Click on “Share Screen”
SLIDE 2
Select Desktop 1 Open your presentation to full screen
SLIDE 3
When the presentation is in full-screen mode, you’ll see a red/green navigation button. Hover mouse over it to see additional functions Click the three dots “more” tab and select “Record to Computer” Now give your talk [please confine your talk to 10 minutes] After you finish your presentation, again click the three dots “more” and select “Stop Recording” Click “End Meeting,” which will close your Zoom session and save your recording as an .mp4 file to your computer’s hard drive
SLIDE 4
Some additional thoughts: You may want to carve out a consistent spot for your image to rest on your slides during your presentation; you do not want your image to cover your information. Alternatively, Zoom lets you select part of your computer’s screen to share with an arbitrary bounding box. (This is under Advanced when you go to Share Screen.) If you use this feature, you can show your PowerPoint in presenter view while only sharing, and thus recording, the main slide. One advantage of this strategy is that you can privately see your notes, next side, clock, etc. while recording; another is that your face will be off to the side of your slides in your final video, keeping it from covering your slides. (Alby Musaelian used this strategy in the sample he uploaded, which you can find here: Alby’s presentation.) Editing and transcribing your presentation: You can use QuickTime or Windows Movie Maker to trim the beginning and end of your video as needed. To create the required transcript of the video, an option is a free account at otter.ai. 1) Open otter.ai and use “sign in with Microsoft” to use your OU email credentials. (You can also create a separate account or use another sign in option.) 2) Click “Import audio/video”. 3) Click “Browse files”. Once you have selected your trimmed video, click “Done”. 4) You can check when the file has finished transcribing or ask otter.ai to email you when it is complete. 5) Open your transcript via the email link or by clicking “My conversations”, then your file.
SLIDE 5
6) Edit your transcript as needed with the blue “edit” button. Voice transcribing software is good but not perfect, especially with field-specific terminology. 7) Save your transcript edits by clicking “Done”. 8) Click on the three dots to the right of “Edit”/”Done”. Click “Export Text”. Leave the default settings (yes for “include timestamps” and .txt for the file type).