
SLIDE 1
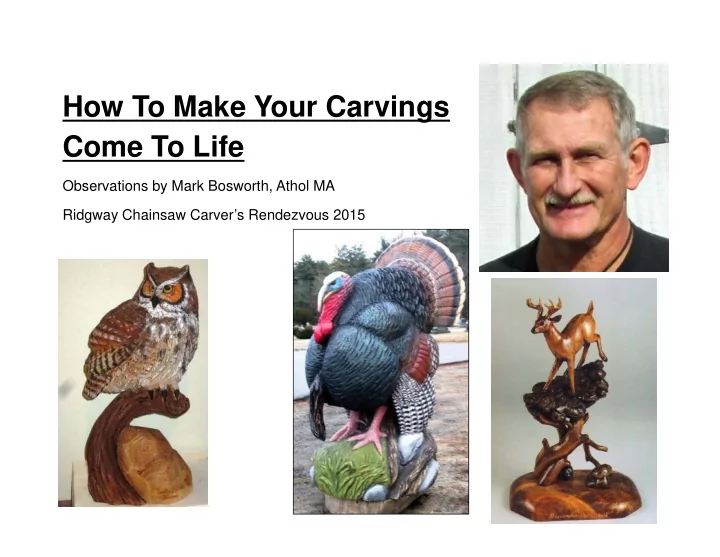
How To Make Your Carvings Come To Life
Observations by Mark Bosworth, Athol MA Ridgway Chainsaw Carver’s Rendezvous 2015
How To Make Your Carvings Come To Life Observations by Mark - - PowerPoint PPT Presentation
How To Make Your Carvings Come To Life Observations by Mark Bosworth, Athol MA Ridgway Chainsaw Carvers Rendezvous 2015 My Background Gift & Hobbies An artistic gift or bent to almost everything I do. -drawing -painting -taxidermy
Observations by Mark Bosworth, Athol MA Ridgway Chainsaw Carver’s Rendezvous 2015
…An artistic gift or bent to almost everything I do.
I love to hunt, hike, watch wildlife and photography I also play guitar and do some song writing and poetry.
sculpture, nor in the my other hobbies I have pursued
thought of wood as the medium… now both a passion
am merely a student of God’s creative excellence
expressions” from His incredible and marvelous creation
that is captivating and believable
emotion or action portrayed.
viewers eyes into the piece.
piece together as a whole
Within nature in birds, animals, reptiles, flowers, plants, …etc, there is a world full of repeated designs and patterns unique and yet common to each species. Learning about
think, greatly improve the desired and finished results.
Don’t try to imitate others, develop your own style, be true to your own instincts
expression or attitude.
fully lifting a wing, legs apart or extended, dropping or raising the neck head or shoulder.
need to emphasize an outstretching or extension
extension of some of the legs
Notice the almost identical wing pattern as well as artistic expression in these photos
…someone to your side calls your name; you turn your head to see …in the process your head naturally tilts, your brow will raise and your eyes will open a bit more as you turn and “look” in response. This movement creates an expression that was not there a second ago. Much of this holds true in many mammals as well.
Before you start your carve get close-up references
features of what ever subject you choose.
Think about the central weight of the subject foot placement, as well as the counter
Try to mentally place yourself in the caring so as to better feel the expression and attitude of my subject. If there is forward motion there is also a backward push. If an animal is turned sharply and looking back the neck as well as the body on the inside will naturally appear short and fur will likely be bunched up as the skin and rib cage compress, while
The balance of weight may be expressed by a wider stance or placement of the feet.
With birds the balance of weight varies with species and stance. Beautiful plumage covers a very strange looking creature –if you were to see them w/o the
form w/o the feathers is very much the same in most birds.
Learn where they connect Learn how they move. Understand your subject, Almost every living creature, person, bird, animal or reptile etc… has a skeletal frame with joints overlade with muscle covered with skin scales fur or feathers… having a basic understanding of you subject (I think) is very important to creating a convincing carving or sculpture, whether you are going for realism or crazy abstract, … especially true if realism is sought for.
Many, many resources on the web, also browse to “images” ‐ they are full of information.
Do some home work. Use and look at lots of references and even watch videos so you can observe your subject in motion. Stop and replay,
https://www.youtube.com/watch?v=37MNE8tOBG4
If you can’t draw well -find a picture as close to what you’re hoping to create as possible and trace it. Doing so will help to reinforce basic form, and lines and some of the major external features and characteristics of your subject. What lies beneath the fur or feathers is actually of greater importance; because it is here that the artist with that knowledge can accurately move and even exaggerate the position to express movement.
Need a good photo
As you look at bone structure, take note of placement and the natural angle of line they create Take special note of head and scull, jaw placement This will help when changing expression to “keep it real” and believable
These are key hints when exaggerating or moving toward a stylized carving
One of my favorite books, one I have had for years is, Ken Hultgren’s “The Art Of Animal Drawing” this edition was published in 1993 a replication of the original published in London 1951 it is very well done and has more to say with example and illustrations than I can cover here. This is one I have had for years.
If you purchase it “read the preface” in the beginning, it will help you so much more than just looking as the pictures. There are many similar helps available, like “An Atlas of Animal Anatomy for Artist.
http://www.ramanujanramanujan.com/folder/Ellenberger%20-%20Atlas%20Animal%20Anatomy%20For%20Artists.pdf
Unless you picture and understand some of the basic characteristics and flexibility of your subject, you will be very likely to limit the pose to a drab or ridged pose. Most species are very agile and incredibly flexible, unless they are posturing, for example a strutting turkey or a rutting buck approaching a competitor buck.
Before you start cutting, draw and make a rough outline of your subject on the wood, divide it into sections. Draw and redraw on the wood often, especially for newer carvers. Draw a profile of your carving and at least a front view, on paper and on the wood, or it might be easier for some to cut a small slab off two sides. If you want a one piece carving the make sure it all “fits” from all angles first or you will be forced to distort the anatomy and composition, or have to resize picture or your block. Try to cut as much of your profile out as you can from one viewing perspective at a time.