Happy Birthday Slide! We have created an option in the CCHD software - - PDF document

happy birthday slide
SMART_READER_LITE
LIVE PREVIEW

Happy Birthday Slide! We have created an option in the CCHD software - - PDF document

Creating A Birthday Slide 2009 Happy Birthday Slide! We have created an option in the CCHD software to post student birthdays every day. The birthdays are taken from the STI database in the student demographics screen. If the students birthday


slide-1
SLIDE 1

Creating A Birthday Slide 2009

1

Happy Birthday Slide!

We have created an option in the CCHD software to post student birthdays every day. The birthdays are taken from the STI database in the student demographics screen. If the student’s birthday is on Saturday or Sunday it is posted on Friday with a notation beside their name giving the day. The process is done by creating a template that includes an add‐on by CCHD created just for our district. The following is instructions on creating and posting this template. These instructions assume that you have a basic working knowledge of the CCHD software.

  • I. Create an Image in PowerPoint
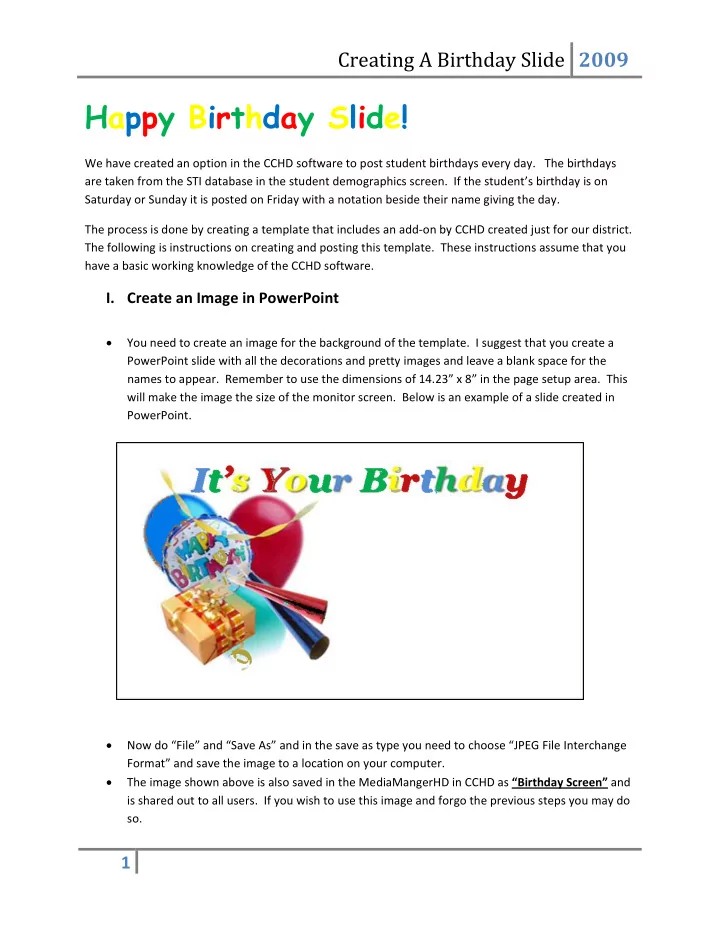
  • You need to create an image for the background of the template. I suggest that you create a

PowerPoint slide with all the decorations and pretty images and leave a blank space for the names to appear. Remember to use the dimensions of 14.23” x 8” in the page setup area. This will make the image the size of the monitor screen. Below is an example of a slide created in PowerPoint.

  • Now do “File” and “Save As” and in the save as type you need to choose “JPEG File Interchange

Format” and save the image to a location on your computer.

  • The image shown above is also saved in the MediaMangerHD in CCHD as “Birthday Screen” and

is shared out to all users. If you wish to use this image and forgo the previous steps you may do so.

slide-2
SLIDE 2

Creating A Birthday Slide 2009

2

  • II. Log in to CCHD, Upload Image, Create Template
  • Log into the CCHD software
  • Upload your image to MediaManagerHD

(only if you are not using the premade image) if you upload your image, be sure to Activate and check Background

  • At the Main Menu click on CampaignManagerHD
  • Click Add Template
  • Click on the icon next to “Blank Template” and

under the “Edit” label.

  • The page below should appear
  • III. Setup and Save Template
  • Enter a Template Name – I suggest “Birthday Slide”
  • Click “Browse” to the right of the Background Image Box
  • Choose your image you uploaded to MediaManagerHD or find the premade image “Birthday

Screen”. NOTE: if your image does not appear, make sure you checked “Background” on this image in the MediaManager.

  • Next you need to click the “Expand” option to the right of “Dynamic Content”

this will expand the area and give you several options to choose from

slide-3
SLIDE 3

Creating A Birthday Slide 2009

3

  • Find the “Live Data” box to

the far right of the “Dynamic Content” area

  • Check the Active box
  • Click the drop down arrow

and you should see your school name with birthdays beside it. I.e. “Griggs Birthdays”

  • In the same line beside the “Date” option, please uncheck the active box
  • Then click “Save Changes” to save the template and your page should look similar to the one

below.

  • The live data is the image that contains the names of the students that will show when we post

the slide. You need to move this to the area you want the names to show. You can adjust the size by clicking on the bottom right corner and dragging to the desired size.

  • Once you have the data feed where you want it click “Save Changes” again and we are ready to

create a slide in the “CampaignManager”.

  • It should look similar to the screen below.
slide-4
SLIDE 4

Creating A Birthday Slide 2009

4

  • IV. Create a Campaign using the new template
  • Click on the CampaignManagerHD

menu option

  • Click “Add Campaign”
  • Give the Campaign a name. For our

example we are naming it “Daily Birthdays”

  • Click the dropdown arrow and find the

template we built in the previous step. For our example it is “Birthday Slide”

  • Click “Save Campaign & Create Slides”
  • You are now ready to add a new slide

and save.

slide-5
SLIDE 5

Creating A Birthday Slide 2009

5

  • You should see “Daily Birthdays” or whatever you named your campaign with the name of the

template to the right

  • Click the icon below “Manage” and to the right
  • f your Campaign
  • At the top of the screen click “Add Slide”
  • Next click on the “Empty Slide” shown in gray.
  • You should see a screen similar to the one below
slide-6
SLIDE 6

Creating A Birthday Slide 2009

6

  • On the menu at the bottom of the page click “Slide Is Inactive” To activate the slide
  • Name the slide. In our example it’s named “Birthdays”
  • Click “Save”
  • V. Post the Campaign just created in ChannelMangerHd
  • Click on ChannelManagerHD
  • Find the channel that is currently being shown on the monitors. In the example below it is the

channel called “Announcements”.

  • Click on the icon under “Add/Remove Campaigns” and to the right of the channel name.
  • Click “Assign Campaign”
  • Click the down arrow and select the campaign we created in the previous steps. In this example

it is “Daily Birthdays”

  • Leave “Run a simple campaign (default)” checked
  • Click Save Time Frame
  • Your campaign will be added at the bottom of the Channel and will post when the monitors

update. Now everyday your slides will update with the student’s birthdays. CONGRATULATIONS!!! Have fun!