
SLIDE 1
Exploring Open Source Technology In The Classroom
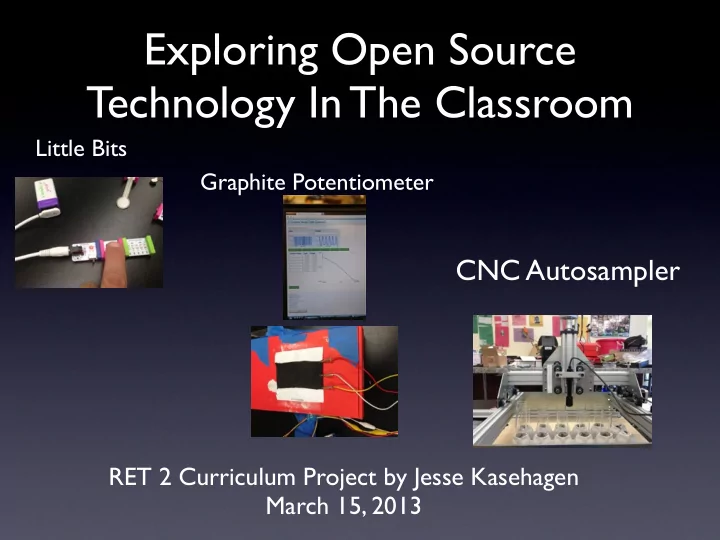
RET 2 Curriculum Project by Jesse Kasehagen March 15, 2013
Little Bits Graphite Potentiometer
Exploring Open Source Technology In The Classroom Little Bits - - PowerPoint PPT Presentation
Exploring Open Source Technology In The Classroom Little Bits Graphite Potentiometer CNC Autosampler RET 2 Curriculum Project by Jesse Kasehagen March 15, 2013 RET I: Research Research Topic: Biosensors Objective: To build a
RET 2 Curriculum Project by Jesse Kasehagen March 15, 2013
Little Bits Graphite Potentiometer
Objective: To build a point-of-care device for a doctorʼs visit Research Topic: Biosensors
Objective: To build a point-of-care device for a doctorʼs visit Research Topic: Biosensors
Objective: To build a point-of-care device for a doctorʼs visit Research Topic: Biosensors What 3 things did I learn?
provoking and rewarding. Objective: To build a point-of-care device for a doctorʼs visit Research Topic: Biosensors What 3 things did I learn?
provoking and rewarding. Objective: To build a point-of-care device for a doctorʼs visit Research Topic: Biosensors What 3 things did I learn?
troubleshooting (much like open-source technology does)
provoking and rewarding. Objective: To build a point-of-care device for a doctorʼs visit Research Topic: Biosensors What 3 things did I learn?
troubleshooting (much like open-source technology does)
provoking and rewarding. Objective: To build a point-of-care device for a doctorʼs visit Research Topic: Biosensors What 3 things did I learn?
actually contribute useful data to a research project.
troubleshooting (much like open-source technology does)
provoking and rewarding. Objective: To build a point-of-care device for a doctorʼs visit Research Topic: Biosensors What 3 things did I learn?
actually contribute useful data to a research project.
troubleshooting (much like open-source technology does)
provoking and rewarding. Objective: To build a point-of-care device for a doctorʼs visit Research Topic: Biosensors What 3 things did I learn?
Electricity is something students are commonly interested in...
Electricity is something students are commonly interested in...
Electricity is something students are commonly interested in...
Electricity is something students are commonly interested in...
Electricity is something students are commonly interested in...
Electricity is something students are commonly interested in...
Electricity is something students are commonly interested in...
Electricity is something students are commonly interested in...
Electricity is something students are commonly interested in...
Runs any program whether on a computer, as an integrated sensor
Runs any program whether on a computer, as an integrated sensor
Runs any program whether on a computer, as an integrated sensor
Runs any program whether on a computer, as an integrated sensor
Runs any program whether on a computer, as an integrated sensor
Built to run as a milling machine, explorative microscopy and autosampling
Benefits:
Benefits:
Benefits:
can modify any program to fit your unique needs
Benefits:
can modify any program to fit your unique needs
Benefits:
can modify any program to fit your unique needs
Benefits:
can modify any program to fit your unique needs
Cons:
Benefits:
can modify any program to fit your unique needs
Cons:
Benefits:
can modify any program to fit your unique needs
Cons:
no technical support to call!
Benefits:
can modify any program to fit your unique needs
Cons:
no technical support to call! Tinker but DONʼT give up!
Benefits:
can modify any program to fit your unique needs
Cons:
no technical support to call! Tinker but DONʼT give up!
Benefits:
can modify any program to fit your unique needs
Cons:
no technical support to call! Tinker but DONʼT give up!
Benefits:
can modify any program to fit your unique needs
Cons:
no technical support to call! Tinker but DONʼT give up!
to cut & paste code in the beginning.
Manylabs software) to learn about them (Lessons #1).
Manylabs software) to learn about them (Lessons #1).
Manylabs software) to learn about them (Lessons #1).
Manylabs software) to learn about them (Lessons #1).
Manylabs software) to learn about them (Lessons #1).
Manylabs software) to learn about them (Lessons #1).
Manylabs software) to learn about them (Lessons #1).
Manylabs software) to learn about them (Lessons #1).
Manylabs software) to learn about them (Lessons #1).
Manylabs software) to learn about them (Lessons #1).
Manylabs software) to learn about them (Lessons #1).
Manylabs software) to learn about them (Lessons #1).
Manylabs software) to learn about them (Lessons #1).
Manylabs software) to learn about them (Lessons #1).
Using Little Bits parts to investigate circuits and develop input/
To understand how various input/output modes can affect an outcome in a circuit by:
Manipulatives are good for Kinesthetic Learners (Middle School)
Logic statements are good for forming complex circuits in codes and programming (High School)
Place ¡a ¡“Y” ¡for ¡each ¡part ¡ “used” ¡to ¡complete ¡the ¡ circuit ¡in ¡the ¡table ¡below ¡ after ¡completing ¡the ¡task ¡
exercise:
Circuit # Button Knob Light Tilt And Or Not + <30 >30 <50 >50 1 2 y y 3 4 5 6 7
After tabulation, you can create coding sentence structure for programming languages.
If you know: Button= a switch; then “Copy & Paste Code” http://www.arduino.cc/en/Tutorial/Switch
Code /* switch* * Each time the input pin goes from LOW to HIGH (e.g. because of a push-button * press), the output pin is toggled from LOW to HIGH or HIGH to LOW. There's * a minimum delay between toggles to debounce the circuit (i.e. to ignore * noise). * * David A. Mellis * 21 November 2006 */ int inPin = 2; // the number of the input pin int outPin = 13; // the number of the output pin int state = HIGH; // the current state of the output pin int reading; // the current reading from the input pin int previous = LOW; // the previous reading from the input pin // the follow variables are long's because the time, measured in miliseconds, // will quickly become a bigger number than can be stored in an int. long time = 0; // the last time the output pin was toggled long debounce = 200; // the debounce time, increase if the output flickers void setup() { pinMode(inPin, INPUT); pinMode(outPin, OUTPUT); } void loop() { reading = digitalRead(inPin); // if the input just went from LOW and HIGH and we've waited long enough // to ignore any noise on the circuit, toggle the output pin and remember // the time if (reading == HIGH && previous == LOW && millis() - time > debounce) { if (state == HIGH) state = LOW; else state = HIGH; time = millis(); } digitalWrite(outPin, state); previous = reading; }
Lesson #2: Graphite Potentiometers
Goal: To understand what a potentiometer is and what it does
Measure Variable Voltage
Measure Variable Resistance
Students get to create a circuit with graphite and then test its voltage or resistance using a voltmeter or LED.
Leads of Voltmeter are closest to source: Reading=6.15V from a 9V battery.
Leads of Voltmeter are farthest from source: Reading - 167.9mV from a 9V battery. Hook an LED to resistive layer (graphite) and see what happens...
Lesson #3: Exploring Graphite Potentiometers using ManyLabs Software
Goal: To learn how to interpret data and determine a relationship between two variables (i.e., light and voltage)
Set Up:
Dilution
Light Box
Arduino Set Up
Bare Conductive Paint
Four Dilutions, two beakers per dilution by yourself = 20 minutes
Light Box Setup: I used a box 6”x10”x2.25” with ~ 1”x2” slot cut out at top and bottom, with a “tail” to set light sensor
Arduino Uno/Mega with Grove shield, and screw terminal to attach three alligator clips for your voltage sensor + connection for light sensor
Using an online software interface like ManyLabs www.manylabs.org
ManyLabs
Example: Clearly marked “potentiometer” and sample ManyLabs reading
Results after five readings:
Possible Problem with results: Make sure students clearly label dilutions!
Note: Have a backup set of “control” painted strips so students can trouble shoot what went wrong if it didn’t work
Goal: To learn how to set up a complex experiment, collect data, and interpret that data.
Open Source Desktop CNC Machine: ShapeOko Designed by Edward Ford
Equipment:
Atlas Scientific Dissolved Oxygen Sensor
Water samples
Goal: To learn how to set up a complex experiment, collect data, and interpret that data.
Open Source Desktop CNC Machine: ShapeOko Designed by Edward Ford
Equipment:
Atlas Scientific Dissolved Oxygen Sensor
Water samples
Goal: To learn how to set up a complex experiment, collect data, and interpret that data.
Open Source Desktop CNC Machine: ShapeOko Designed by Edward Ford
Equipment:
Atlas Scientific Dissolved Oxygen Sensor
Water samples
Trouble Shooting:
with programming gcode for smooth run
Atlas Scientific Dissolved Oxygen Sensor with Arduino Mega wiring
Laptop to run CNC & D.O. Probe