SLIDE 11 Lecture Handout 5-2: Multiple-Cycle Implementation Slide 21 EE 182 -- Winter 1989
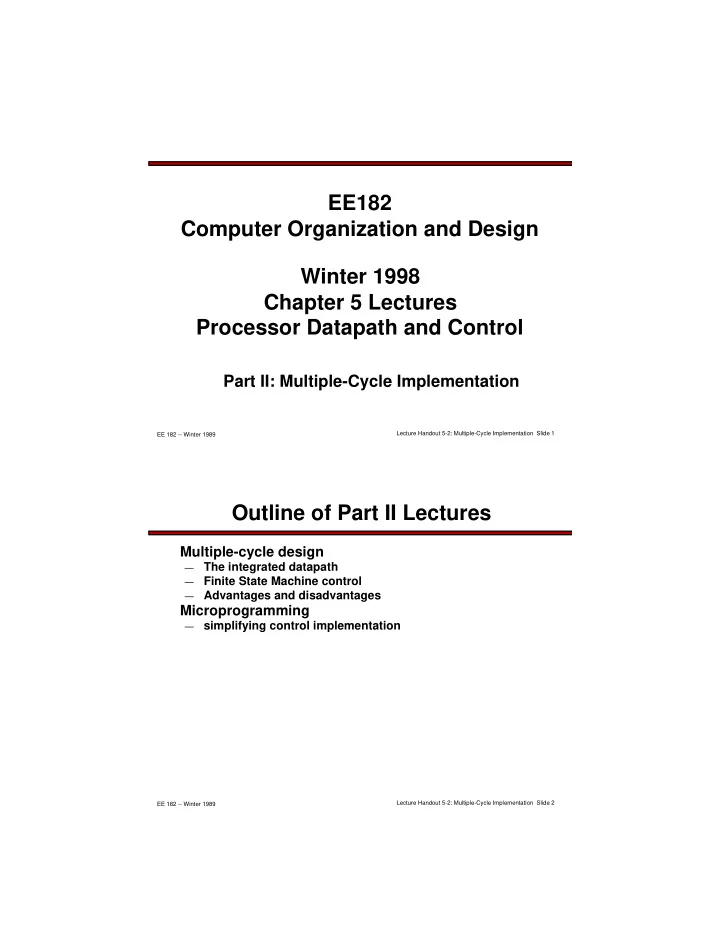
Shift left 2 PC M u x 1 Registers Write register Write data Read data 1 Read data 2 Read register 1 Read register 2 Instruction [15–11] M u x 1 M u x 1 4 Instruction [15–0] Sign extend 32 16 Instruction [25–21] Instruction [20–16] Instruction [15–0] Instruction register ALU control ALU result ALU Zero Memory data register A B
IorD MemRead MemWrite MemtoReg PCWriteCond PCWrite IRWrite ALUOp ALUSrcB ALUSrcA RegDst PCSource RegWrite Control Outputs Op [5–0]
Instruction [31-26] Instruction [5–0]
M u x 2 Jump address [31-0]
Instruction [25–0] 26 28
Shift left 2 PC [31-28]
1 1 M u x 3 2 M u x 1 ALUOut Memory MemData Write data Address
Need a write control signal
Multi-Cycle Datapath & Control Signals
Lecture Handout 5-2: Multiple-Cycle Implementation Slide 22 EE 182 -- Winter 1989
High-Level Control Flow
Common 2-clock sequence to fetch/decode any instruction Separate sequences of 1 to 3 clocks to execute specific types of instruction
Memory access instructions R-type instructionsBranch instruction Jum p instruc tion Instruction fetch/decode and register fetch Start