
SLIDE 1
3/22/2016 1
Central and Peripheral Venous Access
Gavin Budhram, MD Department of Emergency Medicine Baystate Medical Center
Disclosures
- I have nothing to disclose
Why Use Ultrasound?
- Decreases complications
- Excessive bleeding, inadvertent
arterial puncture, vessel laceration, pneumothorax, hemothorax
- Anatomic variation
- Quicker venous access
- Avoid multiple attempts
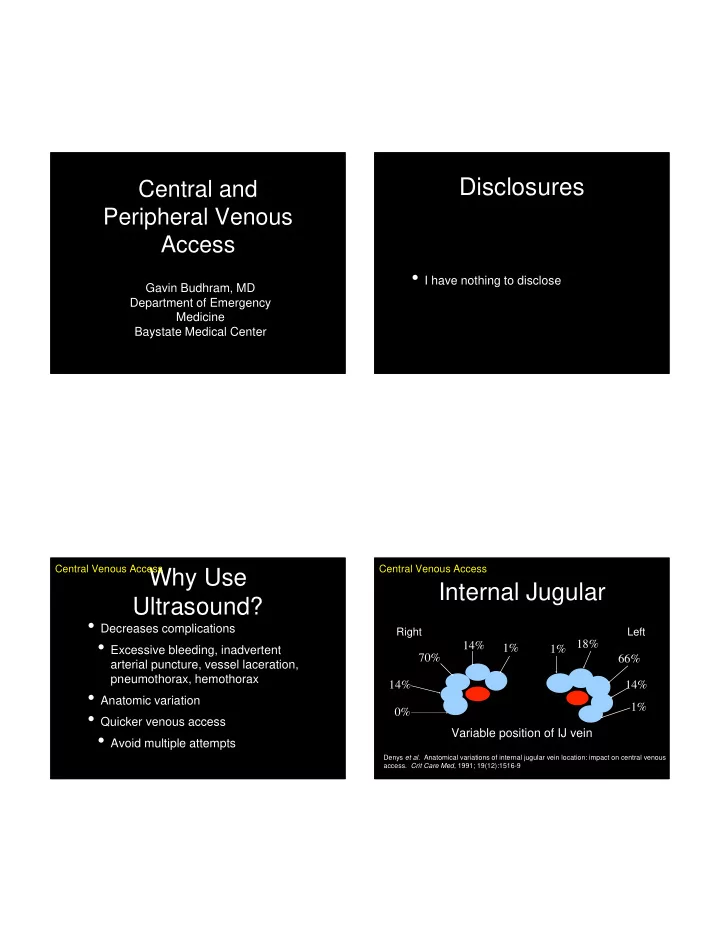
Central Venous Access Right Left
1% 1% 14% 18% 70% 66% 14% 0% 14% 1% Variable position of IJ vein
Denys et al. Anatomical variations of internal jugular vein location: impact on central venous
- access. Crit Care Med, 1991; 19(12):1516-9
Internal Jugular
Central Venous Access