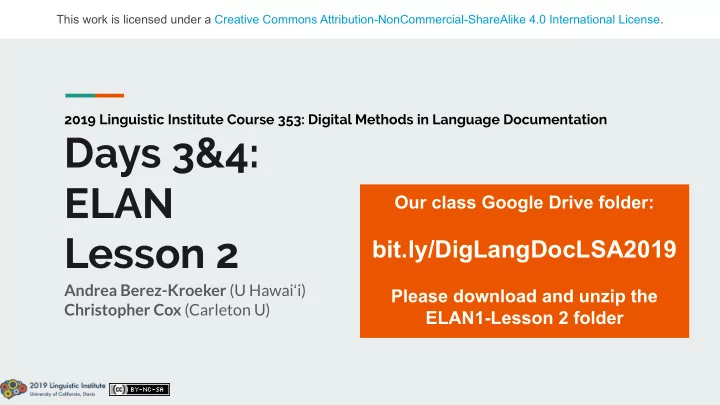
SLIDE 1 2019 Linguistic Institute Course 353: Digital Methods in Language Documentation
Days 3&4: ELAN Lesson 2
Andrea Berez-Kroeker (U Hawaiʻi) Christopher Cox (Carleton U)
This work is licensed under a Creative Commons Attribution-NonCommercial-ShareAlike 4.0 International License.
Our class Google Drive folder:
bit.ly/DigLangDocLSA2019
Please download and unzip the ELAN1-Lesson 2 folder
SLIDE 2 Review of Lesson 1
What is a time-aligned transcript?
Text and media that are linked together in time.
What is a tier?
Everything of the same kind of information. Top-level tiers are representations of the contents of the recording and are linked to the timeline of the recording.
SLIDE 3
Goals for lesson 2
We will learn to create an ELAN transcript with One language and Multiple speakers
SLIDE 4
Let’s get started!
SLIDE 5
Step 1: Create a new file
1. Open the ELAN software. Go to “File>New”
SLIDE 6 Step 1: Create a new file
- 2. In the pop-up, click “Add
Media File” and navigate to the lingthusiasm.wav file. Click “Open.”
SLIDE 7
Step 1: Create a new file
Your file should be listed in the text box. Click “OK.”
SLIDE 8 Step 1: Create a new file
“File>Save.”
SLIDE 9
Step 1: Create a new file
Call your file “lingthusiasm” and save it in the ‘exercise2_lingthusiasm’ folder on your computer. Click “Save.”
SLIDE 10
Your file is now saved
Listen to this file to get familiar with it. You can read the transcript in the “lingthusiasm-transcript.pdf” file in the folder.
SLIDE 11
Quiz: How many tiers do we need?
SLIDE 12
We need 4 tiers
There are 3 speakers, who each get their own tier: Gretchen, Lauren, and Nicole Plus a tier for music. These are all top-level tiers!
SLIDE 13
Step 3: Create tiers
ELAN comes with one tier ready to go. It’s called “default.” Let’s change it, and add 3 more.
SLIDE 14
Step 3: Create tiers
1. Right click on the tier label, and select “Change Attributes of Default”
SLIDE 15 Step 3: Create tiers
- 2. In the pop-up box, we can
add more helpful information. Change the tier name, participant, and annotator. Click “Change.”
Now the tier name has changed.
SLIDE 16 Step 3: Create tiers
- 3. Now we need to add 3 new
tiers, for Lauren’s speech, Nicole’s speech, and music. Go to “Tier>Add New Tier”
SLIDE 17 Step 3: Create tiers
- 4. In the “Add Tier” box, you
can add relevant information for Lauren’s tier. Click “Add.”
SLIDE 18
Step 3: Create tiers
Notice how the new tier has been added to the box at the top, and to the ELAN window. Now add tiers for Nicole Holliday and for music.
SLIDE 19
Your tiers are now ready
Congratulations! Check the information by hovering over the tier labels.
SLIDE 20
Step 4: Segment your recording
We’re going to segment this recording by using ELAN’s Transcription Mode. 1. Go to “Options>Transcription Mode”
SLIDE 21 Step 4: Segment your recording
- 2. Select “One keystroke per
annotation, press to mark start, release to mark end.” This is the easiest way to
- segment. Try the others too!
SLIDE 22
Step 4: Segment your recording
Note that the tier “Gretchen’s speech” is selected at the top of the tier list. You’ll be working on Gretchen’s speech only first.
SLIDE 23 Step 4: Segment your recording
- 3. To segment, press play.
Then press and hold enter/return while Gretchen is
- talking. Release when she stops.
ELAN will create an empty annotation box.
SLIDE 24
Step 4: Segment your recording
Keep going, making annotation boxes for all of Gretchen’s utterances. Try to be somewhat accurate, but you don’t have to be perfect.
SLIDE 25 Step 4: Segment your recording
- 4. Once you’ve gone through and
segmented Gretchen’s speech, you can easily fix mistakes. Hover over the annotation. It will turn green, and now you can adjust it to align with the waveform.
SLIDE 26
Step 4: Segment your recording
You can also delete and merge annotations by right-clicking on the annotation box. To listen to only the annotation, select it and click PlaySelection
SLIDE 27 Step 4: Segment your recording
- 5. When you are satisfied,
double-click the tier “Lauren’s Speech.” Her tier will move to the top. You can now segment as before. Continue for all the tiers.
SLIDE 28
Step 5: Annotate (transcribe)
Once you are satisfied with your segmentation, switch back into Annotation Mode to begin transcribing. 1. Go to “Options>Annotation Mode”
SLIDE 29 Step 5: Annotate (transcribe)
- 2. Double-click on an annotation
- block. A text box will open.
- 3. Use the selection player to
listen and type in your transcription.
SLIDE 30
Step 5: Annotate (transcribe)
Note: If your text disappears when you close the text box, change your preferences by going to “Edit>Preferences>Editing” and select “Enter key commits changes in the inline edit box.”
SLIDE 31
Step 5: Annotate (transcribe)
Continue transcribing all of your annotations until you are satisfied.
SLIDE 32
Alternative: Use “Transcription Mode”
You can also use “Transcription Mode” to transcribe. Some people find it easier. Go to “Options>Transcription Mode”
SLIDE 33
Alternative: Use “Transcription Mode”
In the first pop-up, leave the number of columns at 1, and select “default-lt” for the type for the column. Click “Select Tiers” and check all 4 tiers. Click “Apply,” then “Apply.”
SLIDE 34 Alternative: Use “Transcription Mode”
You now have a screen with the media on the left, and an ordered list of segments
Click into a text box to play the segment, and type what you hear. Press enter/return to jump to the next segment.
SLIDE 35
Alternative: Use “Transcription Mode”
Now if you go back to Annotation Mode, your transcriptions are in place.