SLIDE 1 Table of Contents Course Settings, Course Introductions and Announcements....................................................................1 Course Resources.......................................................................................................................................7 Labels................................................................................................................................................. 7 Files and URLs.................................................................................................................................. 11 Pages................................................................................................................................................ 17 Course Activities.......................................................................................................................................19 Assignment.......................................................................................................................................19 Create a Quiz....................................................................................................................................22 Chats.................................................................................................................................................30 Forums............................................................................................................................................. 32 Appendices...............................................................................................................................................40 Appendix A.......................................................................................................................................40 Appendix B....................................................................................................................................... 41 Appendix C....................................................................................................................................... 41
Course Settings, Course Introductions and Announcements
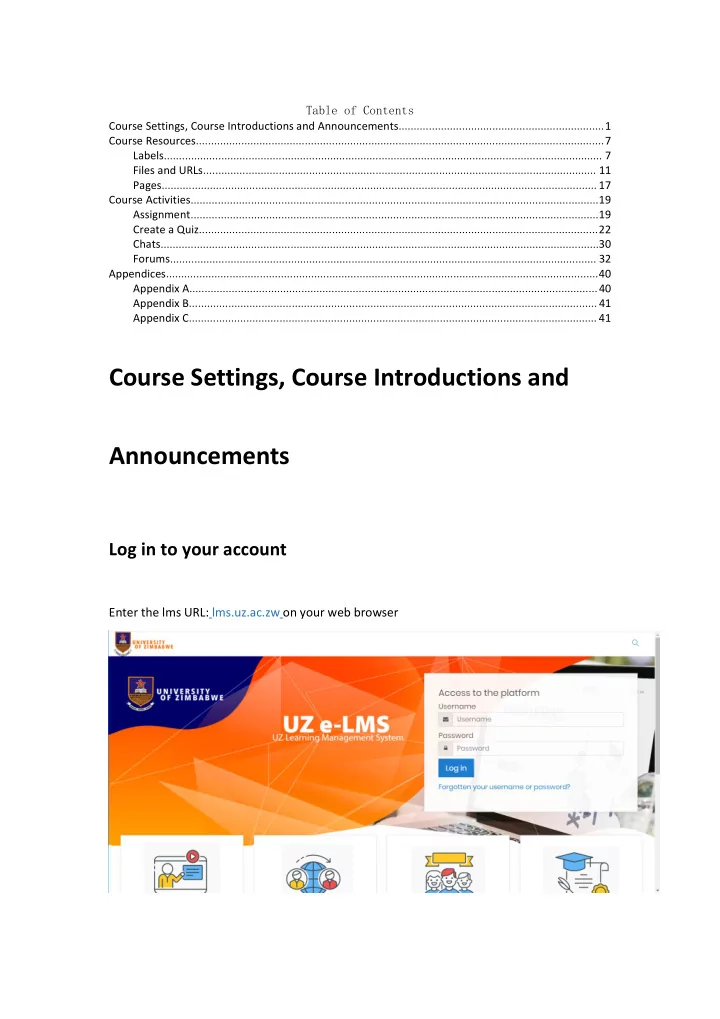
Log in to your account
Enter the lms URL: lms.uz.ac.zw on your web browser
SLIDE 2 Default, login credentials are set to: Username: your firstinitalsurname in lowercase Password: your ECNumber Click “Log in”
Search for your course
After logging in, you will find your courses that the chairperson has assigned to you. Click on a course to start adding Course Content.
Announcements What is an Announcement?
The course Announcements Forum is a special forum for announcements and is automatically created when a course is created. A course can have only one announcement
- forum. Only teachers and administrators can post announcements.
It can be used to post course welcomes, course outlines, assignment announcements and
SLIDE 3
How to make Announcements
Enable Editing Click gear icon and ‘’Turn editing on’’ Click on”Add an activity or resource” under Announcements Scroll down to select “Page” resource
SLIDE 4
Click “ADD” View page to ‘’Add a new Page’’ Enter page name
SLIDE 5
Enter Page Content Click “SAVE AND RETURN TO COURSE” View newly created Welcome! page Click on “Welcome!” to view how it will appear to the student
SLIDE 6
Student View
SLIDE 7 Course Resources
Labels
A 'Label' enables text and multimedia to be inserted into the course page in between links to
- ther resources and activities. 'Labels' are very versatile and can help to improve the
appearance of a course if used thoughtfully. Labels may be used: 1. To split up a long list of activities with a sub-heading or an image. 2. To display embedded content such as a video directly on the course page. 3. To add a short description to a course section.
Drag and Drop method
Resize browser window to view desktop with files Drag and drop desired file Select “Add media to course page”
SLIDE 8
View added file
Add an activity or resource method
Click “Add an activity or resource” Select“Label”
SLIDE 9
Click icon to add media Select media Paste video URL
SLIDE 10
Click “Save and return to course” View label of embedded youtube video
SLIDE 11
Files and URLs
How to add a File
Under a topic click “Add an activity or resource” Select and add a ‘’File’’ resource Enter Name as Course Outline
SLIDE 12
To select files click the highlighted icon Select ‘’Upload a file’’ Click ‘’Choose File’’ to browse for document on your PC
SLIDE 13
Selected file appears as highlighted in green Click ‘’UPLOAD THIS FILE’’ View Uploaded file Click ‘’SAVE AND RETURN TO COURSE’’
SLIDE 14
View newly uploaded file
How to add a URL
Enable editing Click “Add an activity or resource”
SLIDE 15
Select “URL” resource Copy desired URL Paste URL
SLIDE 16
Edit Appearance settings Click “Save and return to course” View newly created URL
SLIDE 17
Pages
Click ‘’Add an activity or resource ’’ Select and add ‘’Page’’ resource Enter Page name as e.g. Course Outline
SLIDE 18
Enter Page content as the Course Outline content Click ‘’SAVE AND RETURN TO COURSE’’ View Course Outline page created
SLIDE 19
Course Activities
Assignment
Enable editing Click “Add an activity or resource” Select ’’Assignment’’ Edit “Description”
SLIDE 20
Edit Assignment settings Availability Submission types Select “File submissions” if you was to upload one or more files Choose “Maximum number of uploaded files” Specify “Accepted file types”
SLIDE 21
Select submission type “Online text” if you want student to type their responses on the assignment page and submit Set “Word Limit” Feedback types This allows you to type directly on the student’s work as you mark Select “Yes” on Comment inline Ephorus Plagiarism Prevention
SLIDE 22 Click “Save and return to course” View assignment created
Create a Quiz
Creating a new quiz is a two-step process.
- 1. Create the quiz category
- 2. Add questions to the quiz category.
Create quiz category
SLIDE 23
Select “Add an activity or resource” Select “Quiz” activity Enter quiz category name
SLIDE 24
Edit quiz settings Timing Edit Timing Settings with desired dates and time limit as shown below N.B. If “Time limit” is enabled, ensure “When time expires” is set to Open attempts are submitted automatically always!!! When the time limit expires before student submits their work it will be deleted if this is not set. Layout Default is one question per page as shown below. Recommended is the default. Question behaviour Edit Question behaviour Settings with recommended settings as below. N.B ’’How questions behave’’ is set by default as ‘’Deferred feedback’’ - grading will be done at the end of the quiz.
SLIDE 25
Review options Leave as default. Linked to ’’How questions behave’’ above. Click “Save and return to course” View newly created quiz category
SLIDE 26
Add questions to quiz Click on quiz category
SLIDE 27
Click “Edit quiz” Click “Add” Select “a new question”
SLIDE 28
Select question type Select ‘’Category’’ to match quiz category you created Enter question number as the “Question name” Enter question text Select answer
SLIDE 29
Enter feedback Click “Save changes” View question added to quiz
SLIDE 30
Chats
Select “Add an activity or resource” Select “Chat”activity Enter chat name
SLIDE 31
Click “Save and return to course” View newly created chat
SLIDE 32
Click “Click here to enter the chat now” Type chat message and click “Send”
Forums
What is a Forum?
An activity enabling participants to have asynchronous discussions i.e. discussions that take place over an extended period of time.
SLIDE 33
Uses of Forums Forums can be used as the following: 1. A social space for students to get to know each other 2. For course announcements (using a news forum with forced subscription) 3. For discussing course content or reading materials 4. For continuing on-line an issue raised previously in a face-to-face session 5. For teacher-only discussions (using a hidden forum) 6. A help centre where tutors and students can give advice 7. A one-on-one support area for private student-teacher communications (using a forum with separate groups and with one student per group) 8. For extension activities, for example ‘brain teasers’ for students to ponder and suggest solutions to
How to add a Forum
Enable editing View course editing page Click ‘’Add an activity or resource’’ under desired topic
SLIDE 34
Enter discussion Forum name Select Forum type Click on question mark to show description of forum types - refer to ‘’How to pick which Forum type to use’’ section of this manual for more information Click ‘’SAVE AND RETURN TO COURSE’’
SLIDE 35
View added discussion forum on course page Always use ‘’Add an activity or resource’’ under topic to add a forum Student view of A single simple discussion forum
SLIDE 36 A single discussion topic which everyone can reply to (cannot be used with separate groups)
Student view of ‘’Each person posts one discussion’’ forum
Each student can post exactly one new discussion topic, which everyone can then reply to
Student view of ‘’Q and A forum’’ forum
Students must first post their perspectives before viewing other students' posts
Student view of ‘’Standard forum displayed in a blog-like format’’ forum
SLIDE 37 An open forum where anyone can start a new discussion at any time, and in which discussion topics are displayed on one page with "Discuss this topic" links
Student view of ‘’Standard forum for general use’’ forum
An open forum where anyone can start a new discussion at any time
SLIDE 38 How to pick which Forum type to use
Which Forum is best for you? In order to answer this question, it is useful to think how you might lead a discussion in a normal classroom setting. Would you throw the question out to the class and sit back to
- bserve them in their answers? Or would you break them up into smaller groups first and
ask them to have discussions with a partner before bringing them back to the main group? Or perhaps you would like to keep them focused on a particular aspect of a question and ensure that they do not wander away from the topic at hand? All of the above approaches are both valid and useful, depending on your learning outcomes, and you can replicate all of them in Moodle forums. Forum Type Environment in which the type is most useful How to control and use the discussion
1.Standard forum for general use Large discussions you intend to monitor/guide a)Lecturer-centred approach Provide overall remarks for particular topics Monitor threads and link them together b)Student-centred approach (N.B. For established community with a model for summarizing process) Ask students to summarize discussion topics at agreed points – e.g. weekly or when thread comes to an agreed conclusion c)Can utilize the ‘’Activity Completion’’ setting to track progress and participation(See Appendix A) d)Can utilize ‘’Discussion locking’’ setting to set deadline for responding(See Appendix B) e)Can utilize ‘’Post threshold for blocking’’ setting that specifies the number of posts which a user can post.(Appendix C) 2.A Single simple discussion Short/time-limited discussion on a single subject or topic. This kind
productive if you are interested in keeping students focused on a particular issue. a)Can rate/grade replies. b)Can utilize ‘’Activity Completion’’ setting to track progress and participation(See Appendix A). c)Can utilize ‘’Discussion locking’’ setting to set deadline for responding(See Appendix B) 3.Q and A The Q-and-A forum is best used when you have a)Requires students to post once before viewing other students'
SLIDE 39 a particular question that you wish to have answered. Lecturers post the question and students respond with possible answers. postings(default). This feature allows equal initial posting opportunity among all students, thus encouraging original and independent thinking. b)Can utilize ‘’Activity Completion’’ setting to track progress and participation(See Appendix A). c)Can utilize ‘’Discussion locking’’ setting to set deadline for responding(See Appendix B) 4.Each person posts one discussion For between a large discussion and a short and focused discussion. Allows students a little more freedom than a single discussion forum, but not as much as a standard forum where each student can create as many topics as he or she wishes. a)Inherent control in which each student can post one discussion topic which all can reply to. b)Can utilize ‘’Activity Completion’’ setting to track progress and participation(See Appendix A). c)Can utilize ‘’Discussion locking’’ setting to set deadline for responding(See Appendix B)
SLIDE 40 Appendices
Appendix A
Activity Completion Activity completion report
Lecturers (and any other users with the capability report/progress:view) have the ability to view Activity completion information. Click gear icon of course with editing enabled Select "More> Reports>Activity completion" (with the Boost theme) or from Administration> Course administration> Reports > Activity completion with non-Boost themes. Lecturers can mark activities complete on behalf of students by clicking into the relevant completion
- boxes. This requires the capability Override activity completion status which is enabled for editing and
non-editing teachers by default.
SLIDE 41
Appendix B
Discussion locking
Appendix C
Post threshold for blocking