Compost, Vermiculture, & Soil Fertility Cynthia Sandberg Love - - PowerPoint PPT Presentation

compost vermiculture amp soil fertility
SMART_READER_LITE
LIVE PREVIEW

Compost, Vermiculture, & Soil Fertility Cynthia Sandberg Love - - PowerPoint PPT Presentation

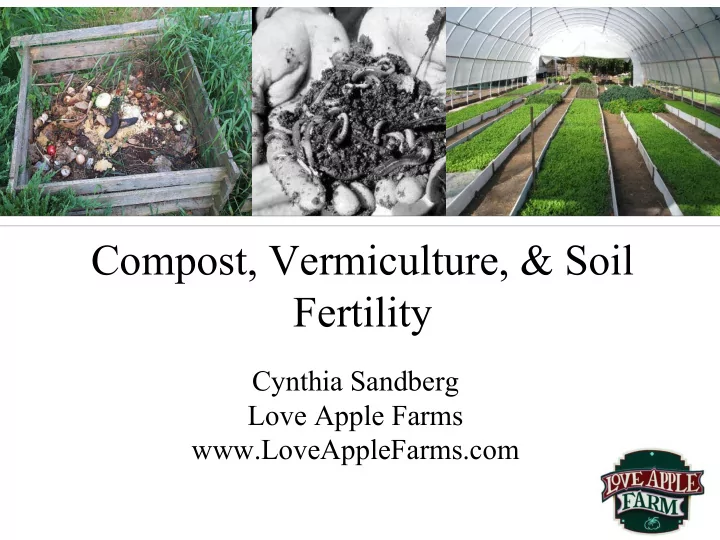
Compost, Vermiculture, & Soil Fertility Cynthia Sandberg Love Apple Farms www.LoveAppleFarms.com Class Introduction Please keep your talking to a minimum, allowing you and your neighbors to get the full value of the class. What this


slide-1
SLIDE 1

Compost, Vermiculture, & Soil Fertility

Cynthia Sandberg Love Apple Farms www.LoveAppleFarms.com

slide-2
SLIDE 2

Please keep your talking to a minimum, allowing you and your neighbors to get the full value of the class. What this class doesn't cover:

  • Growing tomatoes, vegetables, and perennials
  • Every possible soil amendment
  • Every possible method of composting

BUT WE LEARN LOTS ABOUT COMPOST AND WORMS!

Class Introduction

slide-3
SLIDE 3

It's All About the Soil

  • Increase yields
  • Decrease pests and diseases
  • Increase nutritional value of crops
  • Improve flavor
  • Reduce erosion of topsoil
  • Conserve water
slide-4
SLIDE 4

Macronutrients

  • Nitrogen, Phosphorus, Potassium (NPK)
  • Needed in larger quantities by plants
slide-5
SLIDE 5

Micronutrients

  • Calcium (Ca), Magnesium (Mg), Molybdenum (Mo),

Boron (B), Copper (Cu), Manganese (Mn), Zinc (Zn), Chlorine (Cl), Iron (Fe), Nickel (Ni)

  • Needed in trace quantities, too much can hurt plants more

than it can help

  • Regular additions of organic

matter essential

slide-6
SLIDE 6

Soil pH

  • Test your soil!
  • Rainfall increases soil acidity
  • Add lime to raise pH
  • Add sulfur to lower pH
slide-7
SLIDE 7

Importance of Soil pH

  • Most vegetables want a pH

between 5 and 7

  • 6.5 is a great pH for an

all-purpose veggie garden

  • Your pH could be way off
  • Plants cannot uptake nutrients

when pH is skewed

slide-8
SLIDE 8
slide-9
SLIDE 9

Soil Fertility

DON'TS

  • Rototilling
  • Fallow land
  • Chemical fertilizers,

fungicides, pesticides (organic ok)

  • Soil Compaction

DO'S

  • Double-digging
  • Cover cropping
  • Organic amendments
  • Compost!!!
slide-10
SLIDE 10

Double-Digging Technique

slide-11
SLIDE 11

Incorporate Compost & Dry Fertilizer While Double Digging

slide-12
SLIDE 12

Organic Amendments

  • Feed your soil like you feed your body
  • Cannot "Miracle Gro" soil into good health
  • Vegetables are fast-growing plants
  • Need more fertilizer than perennials because you

are harvesting (taking away nutrients)

  • Always amend beds before planting
  • Soil test will reveal deficiencies and

make amendment recommendations X

slide-13
SLIDE 13

Bed Amending Recipe

For a 50 square foot bed:

  • 1 wheel barrow homemade compost

OR 1 bag Gardner & Bloome Harvest Supreme

  • 2 quarts G&B 4-6-3 Tomato, Veg, &

Herb Fertilizer

  • 1 quart pure Worm Castings
  • 1 pound Mustard Meal
slide-14
SLIDE 14

Bed Amending Step by Step If Your Bed is Already Double Dug

  • Sprinkle all amendments evenly on

top

  • Turn over soil as deep as you can

using a spade fork

  • Rake smooth
slide-15
SLIDE 15

Cover Crops

slide-16
SLIDE 16

Cover Cropping Basics

  • Cover cropping aka “green manure” improves soil
  • Adds fertility
  • Prevent erosion from wind and rain
  • Produces and maintains top soil
  • When you have nothing growing in the bed (such as in the

winter time), put in a cover crop (maintains a “living soil”)

  • Good cover crops: mustards, vetch, fava beans, bell

beans, rye or a mix

  • 4-6 weeks before planting vegetables, cut it down to the

base, compost tops, and turn soil over, putting the tops upside down with roots exposed (or if able, break up clods after turning over)

slide-17
SLIDE 17

Composting

Definition: The controlled aerobic decomposition

  • f biodegradable organic matter, producing

compost.

slide-18
SLIDE 18

Pallet-Sided compost bin

  • Pallets are cheap and easy to find
  • Wire together, then unwire to turn or use compost
slide-19
SLIDE 19

Three-bin Compost System

  • Easy DIY project made of lumber, wire mesh and corrugated

metal top

  • 2x6 lumber slats fit into grooves on 4x4 posts
  • Add or remove 2x6s as pile increases and decreases in size
  • Turn first pile into second and third bins to aid in decomposition
slide-20
SLIDE 20

Compost Tumblers

  • Promise to give you

finished compost in 2 weeks

  • Don’t live up to that

promise w/o a lot of work

  • Don’t get benefit of

worms moving into compost as it finishes decomposing

  • Don’t waste your

money

slide-21
SLIDE 21

Free-Form Compost Pile

  • Easiest one to build
  • Be careful of N and C

ratios

  • Don’t let it get too wet in

winter

  • Don’t let it dry out in

summer

  • Only works if varmints

can’t get into it and scatter it everywhere

slide-22
SLIDE 22

Building a Compost Pile

  • Start with 6" layer of sticks and/or stalks criss-crossed

○Use twigs, sunflower stalks, corn stalks

  • Add a 2" layer of "green" matter (nitrogen)
  • Add a 3" layer of "brown" matter (carbon)
  • Water lightly
  • Another 2" layer of "green" matter
  • Another 3" layer of "brown" matter
  • Water lightly
  • And so on and so on...

If you build large enough pile all in one day, it should exceed 130 degrees Fahrenheit for 3 days, then cool down.

slide-23
SLIDE 23

Homeowner Method - Bit by Bit

If you're not building complete pile from scratch:

  • Add your buckets from under your sink one by one.
  • Ensure there is enough carbon in your bucket.
  • Carbon can be paper towels, napkins, Kleenex,

coffee filters, tea bags, torn up newspaper, junk mail, paper shredder refuse, etc. Caveat: If not enough carbon, pile will putrefy

slide-24
SLIDE 24

"Green" Matter: High Nitrogen Content

  • Kitchen scraps*
  • Garden scraps*
  • Grass clippings
  • Coffee grounds
  • Yard trimmings*
  • Green leaves
  • Most weeds
  • Animal manure (vegetarians
  • nly)

*Cut up into smaller pieces More surface area = faster decomposition

slide-25
SLIDE 25

"Brown" Matter: High Carbon Content

  • Animal bedding

(shavings, straw)

  • Cardboard
  • Paper
  • Coffee filters and tea

bags

  • Cotton rags and balls
  • Dryer and vacuum

cleaner lint

  • Eggshells
  • Fireplace ashes
  • Hair and fur
  • Hay and Straw
  • Dried leaves
  • Nut shells
  • Sawdust
  • Newspaper
  • Wood chips
  • Wool rags
slide-26
SLIDE 26

What Not to Compost

  • Black walnut tree leaves or twigs
  • Oak leaves and pine needles
  • Coal or charcoal ashes
  • Dairy products
  • Diseased or insect-ridden plants
  • Fats, grease, lard, or oils
  • Cooked meat or bones
  • Pet wastes
  • Yard trimmings treated with chemical pesticides
slide-27
SLIDE 27

Now let's go outside and build a compost pile!

slide-28
SLIDE 28

Vermiculture (Cold Composting)

  • Can be done
  • utdoors and

indoors, even in apartments!

  • Rich soil conditioner
  • Worm casting tea:
  • ur favorite

fertilizer!

slide-29
SLIDE 29

The Container: Store-Bought Examples

slide-30
SLIDE 30

The Container: Home-made Examples

slide-31
SLIDE 31

Drainage Holes

  • Drill holes in

bottom for drainage and sides for ventilation..

  • Place tray

underneath to capture excess liquid (use as plant fertilizer).

slide-32
SLIDE 32

Cover Bins

  • Retains moisture.
  • Provides darkness for worms.
  • If indoors: burlap sack or sheet of dark plastic.
  • If outdoors: solid lid to keep out unwanted

scavengers and rain.

slide-33
SLIDE 33

Bedding for Inside Bin

  • Necessary to provide damp bedding for worms to live in.
  • Shredded newspaper, cardboard, dry leaves, chopped up

straw, compost, sawdust.

  • Vary to provide more nutrients and create richer compost.
  • Add a few handfuls of sand or soil - necessary grit for

worm's digestion.

  • Wet as a wrung-out

sponge.

  • Fluff up to provide

air spaces.

slide-34
SLIDE 34

Compost Worms: Redworms

Eisenia foetida

  • Aka red wiggler, brandling, manure worm
  • Live at or near surface

Lumbricus rubellus

  • Aka driftworm, garden worm, angle worm, leaf worm, red march

worm, red wriggler

  • Live further down

Do not use dew-worms (found in soil)--they will not survive

slide-35
SLIDE 35

Worm Bin Location

  • Indoor all year round

○ Basements are great

  • Outdoor during milder climates

○Sheds, garages, patios, balconies, in yard

  • Temperature range: 40 - 80°F

○If < 40°F: move indoors or insulate well

  • Out of hot sun and heavy rain
slide-36
SLIDE 36

Feeding Your Worms

DO's

  • Fruit and vegetable

scraps, chopped up

  • Pulverized egg shells
  • Tea bags, coffee

grounds, filters DON'Ts

  • Meat
  • Dairy
  • Oily foods
  • Grains
  • Citrus
  • Onions
slide-37
SLIDE 37

Food/Worm Ratio 1 lb food waste every week to start 1/2 lb worms (roughly 500)

:

  • If starting with less

worms, reduce food accordingly

  • Worm population will

steadily increase over time

  • Then you can start

adding more proportionately

slide-38
SLIDE 38

Maintaining Your Bin

  • Add food for 3 months - little or no bedding

should remain ○Castings will be dark brown ○Contents will decrease in bulk

  • Harvest castings when your bin is AT LEAST

half full

slide-39
SLIDE 39

Harvesting your Castings

  • Worms move up into food, leaving castings behind
  • To harvest, remove top half of what is in the bin, which holds

the worms

  • Remove the top half to a tarp or box or bin
  • Take away bottom half of bin (these are your usable castings)
  • Add a couple of inches of new bedding on the bottom of the

bin: shredded newspapers, shavings, dried leaves, compost. Add water to the bedding. It can’t be dry!

  • Add back the removed top half.
  • Store castings in a bucket or plastic ziplock until ready to use.

Do not store in heat or sunlight.

slide-40
SLIDE 40

Worm Cocoons

slide-41
SLIDE 41

Problem: Worms Crawling to Sides and Lid

Worms will crawl when disturbed or when first placed in new bin. If they are crawling to sides or lid at other times, then bedding may be too acid if you add a lot of acidic foods. Solution:

  • Add a couple handfuls of dolomitic lime and cut down on

acidic wastes Worms may otherwise be unhappy: too hot, too cold, too wet. Analyze what may be the problem and react accordingly

slide-42
SLIDE 42

Problem: Unpleasant, strong odors

From overloading food waste that sits around too

  • long. This is a photo of what bin should NOT look

like! Solution:

  • Stop adding food waste
  • Gently stir contents to

allow more air in

  • Check drainage holes for

blockage, and drill more holes if necessary

slide-43
SLIDE 43

Problem: Fruit Flies

Solution:

  • Bury food waste in bedding a bit and don't overload
  • Keep bin covered
  • Move bin to new location
slide-44
SLIDE 44

Worm Casting Tea

  • Big handful of castings in a 5 gallon bucket
  • Let sit for two days
  • Can then be diluted with another 4 parts water
  • Strain through cheesecloth or FRC or strainer and apply to plants

with a watering can or garden sprayer

  • Do twice a month during growing season
  • Increase fertility, reduce incidence of disease, and reduce bug

stress

slide-45
SLIDE 45

Available in our Sales Tent Today

  • Worm castings to get you started on fertility

program

  • G&B Harvest Supreme
  • G&B 4-6-3 Tomato, Veg & Herb Fertilizer
  • G&B Liquid All-Purpose Fertilizer
  • Fan Nozzles for garden hoses
  • Jams & Pickles
slide-46
SLIDE 46

Upcoming Workshops

Beginning Cheese Making - September 18 Winter Vegetable Gardening - September 25 Backyard Chicken Keeping- October 9 Wreaths from the Garden - October 22 Garden Mosaics - November 12 Succulent Wreaths - November 19

slide-47
SLIDE 47

Final Word On Worms

  • Creates

responsibility.

  • Living creatures

with unique needs.

  • Create and maintain

a healthy habitat.

  • Your worms and

your garden will thrive!