compost vermiculture soil fertility
play

Compost, Vermiculture, & Soil Fertility Cynthia Sandberg Love - PowerPoint PPT Presentation

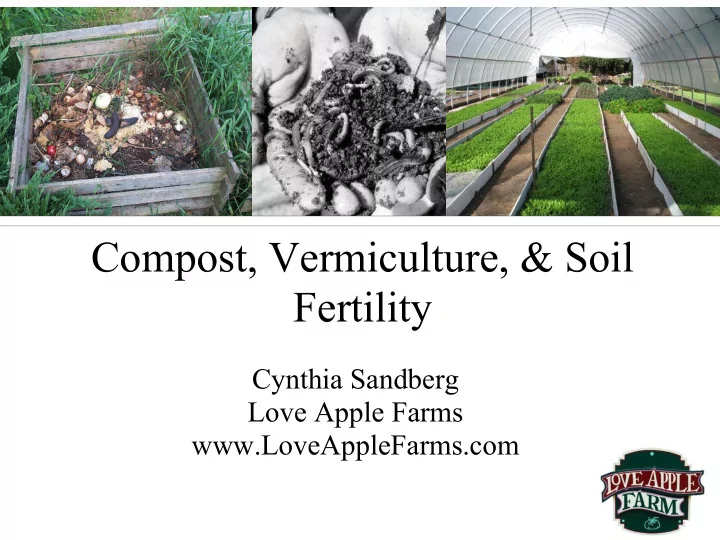
Compost, Vermiculture, & Soil Fertility Cynthia Sandberg Love Apple Farms www.LoveAppleFarms.com It's All About the Soil Increase yields Decrease pests and diseases Increase nutritional value of crops Improve flavor


  1. Compost, Vermiculture, & Soil Fertility Cynthia Sandberg Love Apple Farms www.LoveAppleFarms.com

  2. It's All About the Soil ● Increase yields ● Decrease pests and diseases ● Increase nutritional value of crops ● Improve flavor ● Reduce erosion of topsoil ● Conserve water

  3. Macronutrients ● Nitrogen, Phosphorus, Potassium (NPK) ● Needed in larger quantities by plants

  4. Micronutrients ● Calcium (Ca), Magnesium (Mg), Molybdenum (Mo), Boron (B), Copper (Cu), Manganese (Mn), Zinc (Zn), Chlorine (Cl), Iron (Fe), Nickel (Ni) ● Needed in trace quantities, too much can hurt plants more than it can help ● Regular additions of organic matter essential

  5. Soil pH ● Test your soil! ● Rainfall increases soil acidity ● Add lime to raise pH ● Add sulfur to lower pH

  6. Importance of Soil pH ● Most vegetables want a pH between 5 and 7. ● 6.5 is a great pH for an all-purpose veggie garden. ● Your pH could be way off. ● Plants cannot uptake nutrients when pH is skewed.

  7. Soil Fertility DO'S DON'TS ● Double-digging ● Rototilling ● Cover cropping ● Fallow land ● Organic amendments ● Chemical fertilizers, fungicides, and ● Compost!!! pesticides

  8. Double-Digging Technique

  9. Cover Crops

  10. Organic Amendments ● Feed your soil like you feed your body. ● Cannot "Miracle Gro" soil into good health. ● Vegetables are fast-growing plants. ● Need more fertilizer than perennials because you are harvesting (taking away nutrients). ● Always amend beds before planting. X ● Soil test will reveal deficiencies and and excesses.

  11. Bed Amending Recipe For a 50 square foot bed: ● 1 wheel barrow homemade compost OR 1 bag Gardner & Bloome Harvest Supreme or 1 bag G&B Farmyard Blend. ● 4 quarts G&B 4-6-3 Tomato, Veg, & Herb Fertilizer. ● 1 quart pure Worm Castings.

  12. Bed Amending Step by Step ● If bed too full, remove a barrow of soil. ● Sprinkle all amendments evenly on top. ● Turn over soil as deep as you can (two digs preferably) using a spade fork. ● Rake smooth

  13. Composting is..... The controlled aerobic decomposition of biodegradable organic matter, producing compost

  14. Building a Compost Pile ● Start with 6" layer of sticks and stalks criss-crossed ○ Use twigs, sunflower stalks, corn stalks, or a pallet ● Add a 2" layer of "green" matter (nitrogen) ● Add a 3" layer of "brown" matter (carbon) ● Water lightly ● Another 2" layer of "green" matter ● Another 3" layer of "brown" matter ● Water lightly ● And so on and so on...

  15. Homeowner Method - Bit by Bit If you're not building complete pile from scratch: ●Add your buckets from under your sink one by one. ●Ensure there is enough carbon in your bucket as you add. ●Carbon can be paper towels, napkins, Kleenex, coffee filters, tea bags, torn up newspaper, junk mail, etc. Caveat: If not enough carbon, pile will putrefy.

  16. "Green" Matter: High Nitrogen Content ● Kitchen scraps* ● Garden scraps* ● Grass clippings ● Coffee grounds ● Yard trimmings* ● Green leaves ● Most weeds ● Animal manure (vegetarians only) *Cut up into smaller pieces. More surface area = faster decomposition.

  17. "Brown" Matter: High Carbon Content ● Animal bedding ● Fireplace ashes (shavings, straw) ● Hair and fur ● Cardboard ● Hay and Straw ● Paper ● Dried leaves ● Coffee filters/tea bags ● Nut shells ● Cotton rags and balls ● Sawdust ● Dryer and vacuum ● Newspaper cleaner lint ● Wood chips ● Eggshells ● Wool rags

  18. What Not to Compost ● Black walnut tree leaves or twigs ● Oak leaves and pine needles ● Coal or charcoal ashes ● Dairy products ● Diseased or insect-ridden plants ● Fats, grease, lard, or oils ● Cooked meat or bones ● Pet wastes ● Yard trimmings treated with chemical pesticides

  19. Vermiculture (Cold Composting) ● Can be done outdoors and indoors, even in apartments. ● Rich soil conditioner ● Worm casting tea: our favorite fertilizer.

  20. The Container

  21. The Container

  22. Drainage Holes ● Drill holes in bottom for drainage and sides for ventilation. ● Raise bin on bricks or wooden blocks. ● Place tray underneath to capture excess liquid (use as plant fertilizer).

  23. Cover Bins ● Retains moisture. ● Provides darkness for worms. ● Indoors: burlap sack or sheet of dark plastic is ok. ● Outdoors: solid lid to keep out unwanted scavengers and rain.

  24. Bedding for Inside Bin ● Must have damp bedding for worms to live in. ● Shredded newspaper, cardboard, dry leaves, chopped up straw, compost, sawdust. ● Add a few handfuls of sand or soil - necessary grit for worm's digestion. ● As damp as wrung-out sponge. ● Fluff up to provide air spaces.

  25. Compost Worms: Redworms Eisenia foetida ● Aka red wiggler, brandling, manure worm ● Live at or near surface Lumbricus rubellus ● Aka driftworm, garden worm, angle worm, leaf worm, red march worm, red wriggler ● Live further down Do not use dew-worms (found in soil)--they will not survive

  26. Food/Worm Ratio 1 lb food waste 1/2 lb worms : every week to start (roughly 500) ● If starting with less worms, reduce food accordingly ● Worm population will steadily increase over time ● Then you can start adding more proportionately

  27. Feeding Your Worms DO's DON'Ts ● Fruit and vegetable ● Meat scraps, chopped up ● Dairy ● Pulverized egg shells ● Oily foods ● Tea bags, coffee ● Grains grounds, filters ● Citrus

  28. Worm Bin Location ● Can be indoor all year round ○ Basements are great ● Can be outdoor during milder climates ○ Sheds, garages, patios, balconies, in yard ● Temperature range: 40 - 80°F ○ If < 40°F: move indoors or ○ insulate well ● Out of hot sun and heavy rain

  29. Maintaining Your Bin ● Add food for 2.5 months - little or no bedding should remain. ○ Castings will be dark brown. ○ Contents will decrease in bulk. ● Separate worms from finished compost before using. ○ Move aside and add new food for worms to move in to. ○ Or dump on large plastic sheet and pick out worms. ■ Save tiny, lemon-shaped worm cocoons too. ■ Saves more worms, but more work.

  30. Worm Cocoons

  31. Common Problem: Unpleasant odors From overloading food waste that sits around too long. This is a photo of what bin should NOT look like! Solution: ● Stop adding food waste. ● Gently stir contents to allow more air in. ● Check drainage holes for blockage, and drill more holes if necessary.

  32. Worms Crawling to Sides and Lid Bedding may be too acid if you add a lot of acidic foods. Solution: x ● Add a couple handfuls of dolomitic lime and cut down on acidic wastes

  33. Fruit Flies Solution: ● Bury food waste in bedding a bit and don't overload ● Keep bin covered ● Move bin to new location

  34. Harvesting your Castings ● Worms move up into food, leaving castings below. ● To harvest, remove top half of bedding, which holds the worms. ● Remove the top half to a tarp or box or bin. ● Take away bottom half of bin. ● Add a couple of inches of new bedding on the bottom of the bin and water it to consistency of wrung-out sponge. ● Add back the removed top half. ● Store castings in a bucket or plastic ziplock until ready to use. Do not store in heat or sunlight.

  35. Worm Casting Tea ● Big handful of castings in a 5 gallon bucket of water. ● Let sit for two days. ● Can then be diluted with up to another 15 gallons of water. ● Strain through cheesecloth or strainer and apply to plants with a watering can or garden sprayer. ● Do twice a month during growing season. ● Increase fertility, reduce incidence of disease, and reduce bug stress.

  36. Upcoming Events at Love Apple ● Basic Cheese Making - August 1 or Sept 14 ● HOW-Day Garden Skills - August 3 ● HOW-Day Kitchen Skills - August 10 ● Pizza from Scratch - August 24 ● Sushi - August 31 ● Kombucha - September 7 ● Winter Vegetable Gardening - September 14 ● Yogurt - September 15 ● Advanced Cheese Making - September 28

  37. Final Word on Worms ● Taking worms out of their natural environment ● Creates responsibility ● Living creatures with unique needs ● Create and maintain and healthy habitat ● Your worms and your garden will thrive!

  38. Now Let's Go Build Our Worm Bins! ●Grab a bin. ●Add two to 3 inches of compost. ●Put your worm container nested into compost. Don't dump worms out yet. ●When home: sprinkle water - about 6 cups - onto compost and mix in well (consistency of bedding should be that of a wrung-out sponge). ●Now dump worms into compost - no need to mix. ●Add thick layer of newspaper or cardboard to top of worms ●Put in shady location ●Watch for leakage - you'll need to catch leakage (it's good stuff!)

Download Presentation
Download Policy: The content available on the website is offered to you 'AS IS' for your personal information and use only. It cannot be commercialized, licensed, or distributed on other websites without prior consent from the author. To download a presentation, simply click this link. If you encounter any difficulties during the download process, it's possible that the publisher has removed the file from their server.

Recommend


More recommend