
SLIDE 1
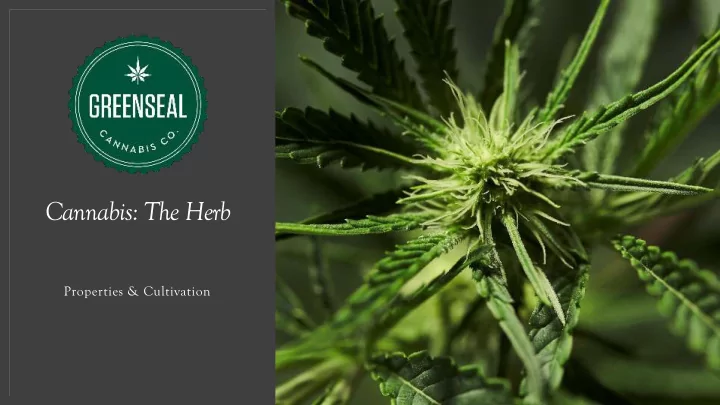
Cannabis: The Herb
Properties & Cultivation
Cannabis: The Herb Properties & Cultivation Founded in 2014; - - PowerPoint PPT Presentation
Cannabis: The Herb Properties & Cultivation Founded in 2014; broke ground on facility in 2015; started cultivating late in 2017; first harvest in early 2018. Highest vertical cannabis garden in the world (6 levels).
Properties & Cultivation
2015; started cultivating late in 2017; first harvest in early 2018.
(6 levels).
world (per square foot).
known as the “Sea of Green” method.
per square foot).
creating a new nursery facility 100% dedicated to breeding, genetic selection, and propagation.
Photoperiods The cannabis plant is “photoperiodic,” which means its growth stages are dictated by the light/dark periods it is subjected to. Plants require about 16 hours of light in a 24-hour period to stay in a full vegetative state; and 12 hours of light and 12 hours of dark to trigger the flowering stage. In June/July when the daylight hours are longer the plant will remain in a vegetative state (growing taller and leafier). As the daylight hours start to get shorter into Mid- August the plants will gradually start to show signs
When starting seeds or clones inside over the winter it’s vital that you supplement with artificial lighting (usually 24 hours) to maintain the plant in its vegetative state.
Choosing the Right Strain Cannabis seeds come in Feminized (100% female) and Regular (50/50 M/F). Choose Feminized (unless you plan on breeding). Autoflower is a relatively new type of strain (all have been crossbred with the early flowering Ruderalis). Autoflower strains are not photoperiodic; they start to flower automatically after they have grown for a short amount of time. They finish early, but generally have less THC. These strains cannot be cloned. The other two main categories are Sativa and Indica (or Hybrids combining both). When growing outdoors in Canada, choose an Indica for an earlier and shorter flowering time. Another feature when choosing a strain for
resistance.
Watering/Irrigation Overwatering = the single most common mistake among new growers. Pots should be soaked thoroughly; you should see 10%-15% of the water applied to the top of the pot come out of the bottom. Wait until the pot is almost completely dry before watering it again (lift it to determine if it is light). Overwatering causes the porous spaces to fill up with water, creating wet zones which prevent
This allows anaerobic fungi to thrive and causes root rot which eventually kills plants.
Macronutrients Nitrogen: The most important element for cannabis plant growth. Component of chlorophyll (responsible for green colour & making sugars through photosynthesis). Cannabis will assimilate ¾ of the nitrogen it will use in its lifetime during vegetative phase. Phosphorus: Provides the energy element for cannabis plants. Important for early root development, disease resistance, nutrient uptake, flower formation & yield. Should be increased during flowering. Potassium: Stimulates early growth, promotes disease resistance, improves efficiency of water use. Promotes formation of strong cell walls, reducing susceptibility to powdered mildew. Used in higher levels at end stage of flowering.
Micronutrients Calcium: Quality element in cannabis, responsible for sugar production. Higher uptake of calcium = higher brix (sugars), more flavor, more aroma. Using amino acids in fertilizer helps break down (chelate) calcium and improve uptake. Magnesium: Central atom for chlorophyll, has a direct impact on uptake of solar energy. Easily leached out through watering, should be added regularly to avoid deficiencies.
Ideal Ratio = 4:2:1 Potassium: Calcium: Magnesium
Water pH Stratford tap water = ~7.23 pH The uptake for micronutrients (Iron, Manganese, Boron, Copper/Zinc, Molybdenum) is not ideal at 7.23 pH. To correct this, it is important to adjust the pH of the water you are applying to your plants to 6.3-6.5 pH. There is a product at grow shops called “pH Down” you can add to bring down the pH of your irrigation water. You can also use powdered citric acid (available at Bulk Barn), or good
Security
Once flowers start filling in (September/October) security measures become important: Fairly inexpensive video cameras are available that connect to Wi-Fi and allow you to monitor from anywhere via your phone. These can also come with motion activated alarms/sirens, 2-way voice communication, and floodlights. Signage indicating premises are under surveillance can act as a deterrent. Creating a trellis system made of metal wire farm fencing prevents/slows down attempts to steal. Entire chain link cages (similar to outdoor dog kennels) are a more permanent solution. A cheaper solution is to surround your garden with cow bells hung on fishing lines, which will cause a commotion and likely send would-be thieves running.
Drying & Curing The goal of drying and curing is the slow release of moisture over time. Proper drying/curing is the key to producing smooth, well burning, flavourful cannabis. When done correctly, drying/curing stops the degradation process before the terpenes and cannabinoids evaporate or transform. It is critical to prepare enough dedicated space for the initial hang drying process. This includes accounting for the smell, which can permeate an entire house! If storing for 6 months or less, glass mason jars are fine, but if you’re planning to store longer it’s recommended to vacuum pack to preserve freshness and keep in a fridge (not freezer!).
Monthly Tasks For Outdoor Cultivation
(NOT direct-sown). There are two common methods:
paper towel. Once the seed “pops” and a small root appears transplant it ¼ inch deep into a 3-inch pot containing soil.
fingertip to create a ¼ inch deep hole in the top surface. Mist daily with water until the seed pops and the root starts to form usually for 3-4 days (but up to 14 days if they’re stubborn!) then cover with soil.
sprouting root downwards when planting.
clones) includes a T5 florescent tube fixture in a room at approximately 72-75°F and 60% Relative Humidity.
recommended over generic fertilizers (e.g. MiracleGro).
pinch-off or “top” the seedling to encourage fuller growth from the lower nodes (making the plant bushier rather than growing straight up as a single stalk).
planted) or buy/find rooted clones (be mindful of your 4 plant limit!).
while cuttings are suspended in rubber foam “pucks.”
with 5.5 pH water and placed in a tray with a clear plastic dome over it.
immediately dip the bottom of the freshly-cut stem in Stim Root (powdered/gel rooting hormone).
soaked rockwool/Oasis cubes or the rubber foam
and the clones should be ready to transplant into pots with soil after “hardening off.”
day and ZERO light at night.
your site location.
mixes with lots of perlite like ProMix HP).
rock salts, bone meal, blood meal).
started indoors by placing them outside (but not in direct sunlight) during the days and bringing them back inside at night.
holes in week one.
plants to prevent damage from small rodents, rabbits and deer.
weekly with pH-adjusted water during this phase.
branches, encouraging thicker, bushier growth
sprout multiple upward shoots rather than becoming a single, huge vertical “cola.” Multiple smaller tops rather than single huge
when the flowers are fully formed.
the heavy flowers, and a second layer 12 inches higher will hold up the flower tops.
should not be applied after mid-July.
dose of Flowering formula (aka “Bloom”) in anticipation of the plant switching from vegetative growth to flower production.
phosphorous (which promotes tighter node formation and flower production).
week 2 of flowering), remove bottom vegetation (aka de-noding). You can strip all the small branches and leaves below the first layer of trellis to encourage upper growth of flowers.
mid-August and mid-September.
normal when nitrogen is reduced).
leaves first to prevent spreading and manually pull leaves with visible PM off.
actually the 5th week of flowering, usually the last 2 weeks of September), add more potassium to the weekly nutrient feeding mix to promote ideal “ripening.”
nutrients to increase potassium.
“Finishing” which have increased potassium.
plant is ready. Ripeness is key, and plants should take 8 to 10 weeks of flowering to ripen fully.
and dramatically increase cannabinoids in the final 10 days.
exposure to light frosts (0˚C down to -2˚C). Light frost decreases the uptake of phosphorous, which
(lower than -2˚C) you need to harvest or cover up your plants.
flowers’ “hairs” have turned orange. If you have access to magnification, you can also look at the bud trichomes (mushroom shaped glands), which should all have turned milky white (with 25% appearing amber in colour) when the plant is ready to harvest.
roots, pull off all the big feeder leaves, and hang flower in a cool, dark environment with indirect fans circulating air. Ideal conditions for drying are 50% room humidity and 65˚F.
as possible as this will create a harsh flavour. It should take several days minimum.
can bend a small stalk and it snaps rather than
trimming and curing.
extremely time consuming. You can cut down on trimming time by only trimming the top flowers and leaving the smaller buds untrimmed to be used in edibles.
final curing. Fill a jar halfway to the top and seal;
to ensure the flower remains at ideal humidity.
(preferably a month!), you can fill them with the cured cannabis and keep the 62% Boveda pack in (replace when it becomes dried out).
THC over time.