A guide to microbreaks with practical exercises Why microbreak? To - - PowerPoint PPT Presentation

a guide to microbreaks with practical exercises why
SMART_READER_LITE
LIVE PREVIEW

A guide to microbreaks with practical exercises Why microbreak? To - - PowerPoint PPT Presentation

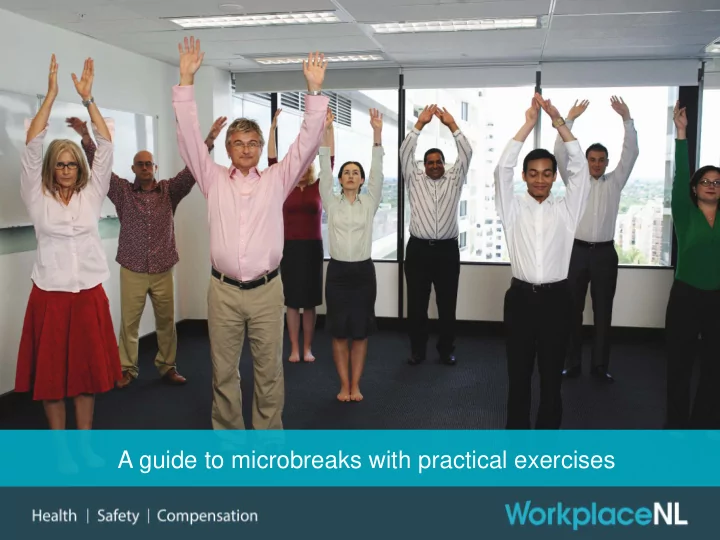
A guide to microbreaks with practical exercises Why microbreak? To avoid prolonged static postures Ensures a healthy musculoskeletal system Allows stressed body tissues to rest/recover Prolonged sitting, standing or physical


slide-1
SLIDE 1

A guide to microbreaks with practical exercises

slide-2
SLIDE 2
slide-3
SLIDE 3

Why microbreak?

  • To avoid prolonged static postures
  • Ensures a healthy musculoskeletal system
  • Allows stressed body tissues to rest/recover
  • Prolonged sitting, standing or physical labour,

fatigues body tissues (e.g. muscles)

  • Re-energizes the brain
  • Increases productivity
slide-4
SLIDE 4

Quick guidelines

  • Recommend a 1-2 minute microbreak following 20-30

minutes of sitting

  • Should aim toward a 1:1 sit-stand ratio
  • Suggest a postural change following 30 minutes of

static standing

  • Microbreak in opposite/different posture:

– if you sit for long periods: get up, move around and stretch – if you stand stationary for long periods: sit, rest and stretch – if you work in awkward postures or perform physical labour: rest the active muscles, and stretch to improve muscle balance and posture

slide-5
SLIDE 5

Safety

  • If you have an injury, please consult with your

health care provider before performing stretches

  • STOP if you feel pain or severe discomfort.

Consult your doctor for advice

  • NEVER perform stretches that cause discomfort

Photo credit: www.nbc29.com

slide-6
SLIDE 6

Stretching

DO

  • Ensure your body is

warmed up before stretching

  • Engage your core, but

breathe normally

  • Move/Bend with your

HIP joints, not with your low back

NEVER

  • Bounce
  • Push/pull excessively
  • Lock the knees of your

supporting leg(s)

slide-7
SLIDE 7

PRACTICAL EXERCISES

Pick a couple stretches per microbreak

slide-8
SLIDE 8

Eyes

  • Close your eyes. Cup your hands

and place them lightly over your

  • eyes. Rest your elbows on your

desk and breathe deeply for a minute

  • Focus on a distant object (at least

20 feet away)

  • Look up, down, and side to side

without moving your head

Photo credit: homeremediess.com

slide-9
SLIDE 9

Fingers

  • Separate and straighten

your fingers until you feel a

  • stretch. Hold 10 seconds
  • Relax
  • Bend your fingers at the
  • knuckles. Hold 10 seconds
  • Repeat first outward

stretch once more

Photo credit: 1) www.osteoinfo.com.au 2) www.rsipain.com

slide-10
SLIDE 10

Forearms/Wrists

  • Arm straight, palm facing down, gently

push on back of the hand to point the fingers down until you feel a stretch. Hold 3-5 seconds. Relax. Repeat 3 times

  • Point the fingers upward, place hand on

palm and press until you feel a stretch. Hold for 3-5 seconds. Relax. Repeat 3 times

  • Elbows on table and palms together,

slowly lower wrists to table until you feel a stretch. Keep palms together throughout stretch. Hold 3-5 seconds.

  • Relax. Repeat 3 times

Photo credits: ccohs.ca/oshanswers/ergonomics/office/stretching.html

slide-11
SLIDE 11

Neck

  • Lower chin to

chest keeping shoulders straight

  • Hold 15-20 sec
  • Rotate head to
  • ne side keeping

shoulders straight

  • Hold 15-20 sec
  • Rotate other side
  • Tilt head to bring

ear to one shoulder (do not raise shoulder)

  • Hold 15-20 sec
  • Repeat other side

Photo credit: 1) stretchify.com 2) tclinic.co.uk. 3) calewellphysicaltherapy.com/neck_exercises

slide-12
SLIDE 12

Neck

Photo credits: 1) www.kybbmassage.com 2) www.physiowarzish.in

  • Sit or stand tall
  • Bring right arm behind back,

diagonally

  • Rotate head 45 degrees to the left
  • Place left hand behind on your

head and gently pull neck toward your left knee for 15 to 20 seconds

  • Repeat with opposite side
slide-13
SLIDE 13

Shoulders

  • Stand tall. With arms held
  • ut to side at shoulder

height, rotate arms in forward direction making progressively larger circles

  • Repeat in opposite direction
  • 8-10 in each direction

Photo credit: www.forconstructionpros.com

slide-14
SLIDE 14

Shoulders/Upper Back

  • Keep your arm straight and bring it

across body horizontally. Pull your arm in to your body by pressing your other hand just above your elbow

  • Hold 15-20 seconds
  • Repeat with opposite arm

Photo credit: www.iposture.com

slide-15
SLIDE 15

Shoulders/Chest/Upper Back

  • Stand tall
  • Arms at chest level,

gently swing arms back and forth

  • Repeat 8-10 times

Photo credit: http://www.hosmerchiropractic.com

slide-16
SLIDE 16

Shoulders/Mid Back

  • Gently swing

arms up and down (front to back)

Photo credits: brooksidepress.org

  • Gently swing

arms up and down (to the side)

Stand tall and repeat each 8-10 times

  • Elbows at

shoulder height, rotate hands straight up and down

slide-17
SLIDE 17

Chest/Shoulders

  • Head upright, shoulders back

and down, clasp your hands behind your back, slowly turning your elbows inward (imagine grasping a ball)

  • Lift your arms up behind you

until you feel a stretch

  • Hold for 15-20 seconds

Photo credit: CCOHS ccohs.ca/oshanswers/ergonomics/office/stretching.html

slide-18
SLIDE 18

Chest

  • Sit or stand tall
  • With shoulders and

elbows at 90 degrees, bring elbows back and squeeze shoulder blades together and down

  • Hold 15-20 seconds
slide-19
SLIDE 19

Chest

  • Stand in doorway or next to a wall
  • Bend the arm being stretched and

place the forearm flat against the wall or doorframe, elbow a little higher than shoulder

  • Step forward and rotate your body

away from your outstretched arm

  • Hold 15-20 seconds
  • Repeat with other arm

Photo credit: stretchify.com

slide-20
SLIDE 20

Mid Back/Shoulders

  • Take a deep breath and reach

up over your head with both arms

  • Hold 15-20 seconds
  • Exhale and lower arms slowly

Photo credit: www.webmd.com

slide-21
SLIDE 21

Mid Back/Shoulders/Side Core

  • Raise arms overhead, palms

facing ceiling

  • Reach toward the sky (do not

arch back)

  • Slowly lean to right while keeping

the tension of the reach, drawing ribcage down as you bend

  • Hold 3-5 seconds
  • Return to upright. Repeat with
  • ther side

Photo credit: trinitychiro.com

slide-22
SLIDE 22

Mid/Upper Back

  • Sit tall with knees at 90

degrees

  • Grasp the armrest on one

side of your chair with both hands

  • Gently rotate through the

torso toward your hands, pulling gently to increase the stretch

  • Breath full inhales and

exhales

  • Hold 15-20 seconds
  • Repeat on other side

Photo credit: www.bodyandsoul.ca

slide-23
SLIDE 23

Mid Back/Hips

  • Stand tall, hips pointing forward
  • Raise arms to the sides

shoulder level. Rotate torso at 90 degrees to your right, rotating the hips also, then return and rotate to left

  • Repeat 10 times

Photo credit: hifitnessclub.wordpress.com

slide-24
SLIDE 24

Hips/Low Back

  • Place left ankle over right

leg, just above knee

  • Slowly bend forward at

the hips (do not round back)

  • Hold 15-20 seconds
  • Switch sides and repeat

Photo credit: www.iptmiami.com

slide-25
SLIDE 25

Hips

  • Kneel on right knee
  • Place left foot in front of you,

knee bent

  • Place hands at waist as a

guide to avoid bending the waist

  • With back straight, engage

core and buttocks and push pelvis down and forward, shifting weight into front leg

  • Hold 15-20 seconds
  • Switch legs and repeat

Photo credits: 1) sportskneetherapy.com 2) fitnessrevolutionrowlett.com

(deeper hip flexor stretch) You may wish to place padding under knee for support

slide-26
SLIDE 26

Glutes/Low Back

  • Stand tall. Bring one

knee up towards the

  • chest. Hug knee,

hold for 2 seconds

  • Repeat with other leg
  • 8-10 per leg
slide-27
SLIDE 27

Glutes/Quads/Hamstrings

  • Stand tall, feet shoulder-width apart
  • Take a large step forward with one

foot and lower body straight down by lowering back knee toward the

  • floor. Stop just before touching knee

to floor

  • Raise back to standing position
  • Repeat with other leg
  • Repeat 5-8 times per leg

Photo credit: gethealthyu.com

slide-28
SLIDE 28

Quads/Hamstrings

  • Stand tall, feet facing outwards, slightly wider

than shoulder-width apart

  • Slowly descend, hinging at hips

– Plant your feet, support body weight through heels – Shift buttocks backward before descending – Knees stay in line with toes, or behind – Back stays neutral (shoulders back, chest tall, natural low back curve maintained)

  • Dig heels into the floor to stand back up,

straightening knees and bringing hips forward

  • 8-10 repetitions; stop if form begins to suffer

Photo credit: https://www.youtube.com/watch?v=7kzSgz9JIIU

slide-29
SLIDE 29

Quads

  • Stand tall and place one hand
  • n solid structure for balance
  • Grab an ankle/pant leg and

bring heel towards buttocks

  • Gently push hips forward
  • Hold 15-20 seconds
slide-30
SLIDE 30

Hamstrings/Calves

  • Place one leg in front of the other
  • Bend the back knee and support

your weight on the bent leg

  • Pointing your front toes upward,

flex at the hips (maintaining neutral spine) until you feel a stretch

  • Hold 15-20 seconds
  • Alternate method: Use a platform

to rest front foot on and raise it’s height as capability increases

Photo credits: 1) www.teachpe.com 2) fitness.stackexchange.com 3) fitness.stackexchange.com

slide-31
SLIDE 31

Treat microbreaks like an essential job duty. By doing so, you will reduce your risk of MSIs!