
SLIDE 1
Salem Alazmi - Schedule and Budget Liaison Collin Krawczyk - Analytical Lead Jeremy Reber - Manufacturing Lead
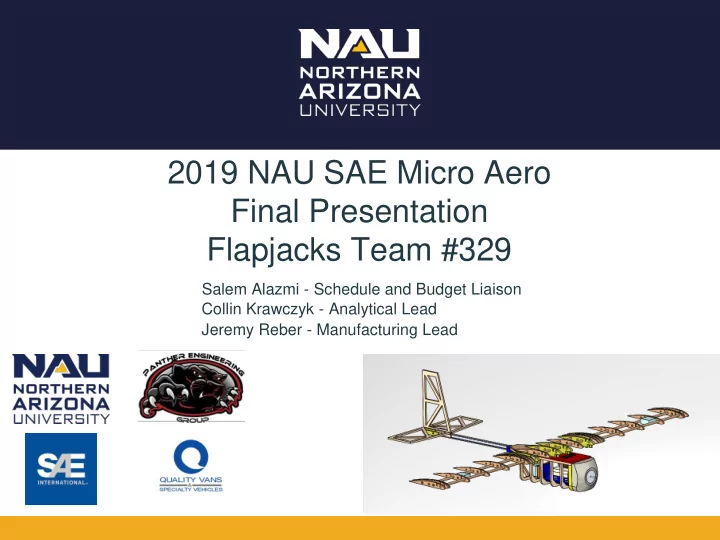
2019 NAU SAE Micro Aero Final Presentation Flapjacks Team #329 - - PowerPoint PPT Presentation
2019 NAU SAE Micro Aero Final Presentation Flapjacks Team #329 Salem Alazmi - Schedule and Budget Liaison Collin Krawczyk - Analytical Lead Jeremy Reber - Manufacturing Lead Project Description The goal of this project was to create a micro
Salem Alazmi - Schedule and Budget Liaison Collin Krawczyk - Analytical Lead Jeremy Reber - Manufacturing Lead
The goal of this project was to create a micro aircraft capable of completing competition requirements in one academic year and compete in Van Nuys, California on April 5th at the SAE Aero Design West Competition [1]. The team’s goal was to place in the top 50th percentile at competition and complete multiple test flights.
Salem - 2
Salem - 3
5 Carry a high payload-to-weight fraction
Salem - 4
Figure 1: Aircraft control surfaces [2]
–
Controls rolling
–
Controls yawing or side- to-side motion
–
Controls pitching or up and down motion
–
Main body
Salem - 5
Salem - 6
Figure 1: Fuselage mounting bracket
○ Holds wings in place ○ Mounts payload
Jeremy - 7
Figure 2: Wing and payload attachment rib Figure 3: Wing dowel attachment
Jeremy - 8
Figure 5: Payload attachment Figure 4: Wing to fuselage attachment
9
cutting for tail, wings, and fuselage
replacement
Jeremy - 10
Figure 6: Laser cutter Figure 7: Laser cut parts
○ Wing Stiffness ○ Self-Centering
Jeremy - 11
Figure 8: Turning on the lathe Figure 9: Comparison to a pen
Jeremy - 12
13
1.
Must fit within specific box dimensions
2.
Must be electrically powered
3.
Must be assembled within 3 minutes
4.
Must be radio controlled
5.
Payload is 2” PVC standard wall pipe
6.
Carry a high payload-to- weight fraction
Requirement Design
Jeremy - 14
○ Unsuccessful flight in 4 flight attempts ○ Main issue was airspeed needed ■ 1.4 pounds of lift at cruise speed (20 mph)
○ Wing length increased to 42 inches from 30 inches ○ Chord length increased to 7 inches from 4 inches
Jeremy - 15
– Selig S1223 airfoil that is used for high lift at low speeds.
Figure 11: Selig S1223 Airfoil Figure 10: Clark Y 11.4% Airfoil
Collin - 16
– Difference was minimal
– 1.6 lbs for Clark Y – 3.4 lbs for Selig – 2x the lift at same speeds
Figure 12: Lift comparison
Collin - 17
– Increases aircraft stability by allowing the aircraft to roll back towards the center during turns
Figure 13: Final CAD design with dihedral
Collin - 18
○ A boom (fishing rod) ○ Mounts (3D printed) ○ A wing
○ Foam cut sections ■ Saw ■ Fiberglass mesh to increase wing strength
Figure 14: A 3” foam cut section of the S1223 airfoil
Collin - 19
○ Successful test flight in Flagstaff, AZ (7,000 feet)
○ Resulted in crashes at hand launch in Van Nuys, CA (sea level)
○ Once completion of final design, a flight test will be performed
Collin - 20
○ This resulted in competition being a learning experience on how to construct a new micro aircraft.
○ A new airfoil was selected ○ A dihedral was implemented ○ A new center boom was inserted
payload ○ Provides a base model for the next micro team
Collin - 21
○ Funding project and making this project possible
○ Senior design mentor
○ Being our client and providing necessary knowledge
○ Use of the laser cutter at CHS
○ Providing travel funds
22
[1] 2019 Collegiate Design Series SAE Aero Design Rules. SAE Aero
http://www.saeaerodesign.com/cdsweb/gen/DocumentResources.aspx [2] A. Iftikhar. Computer based movement of flight control surfaces.
http://anasiftikhar.blogspot.com/2012/10/computer-based-movement-of- flight.html