13 As you arrive: 1. Start up your computer and plug it in. Loop - - PowerPoint PPT Presentation

13
SMART_READER_LITE
LIVE PREVIEW

13 As you arrive: 1. Start up your computer and plug it in. Loop - - PowerPoint PPT Presentation

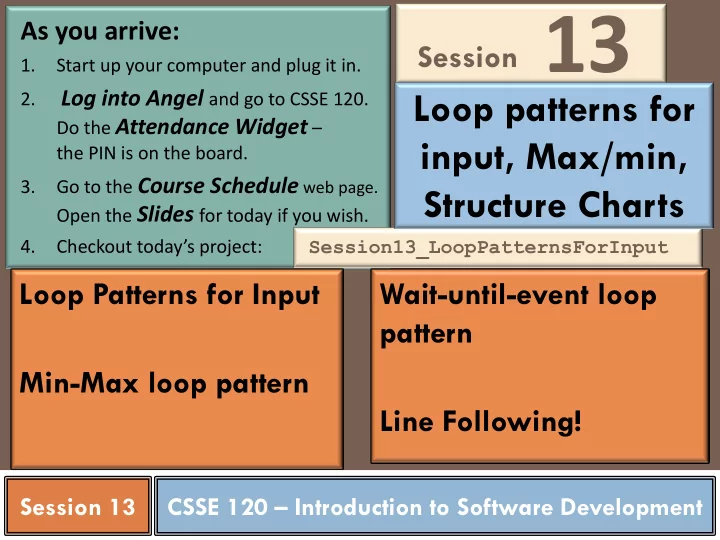
Session 13 As you arrive: 1. Start up your computer and plug it in. Loop patterns for Log into Angel and go to CSSE 120. 2. Do the Attendance Widget input, Max/min, the PIN is on the board. Go to the Course Schedule web


slide-1
SLIDE 1

CSSE 120 – Introduction to Software Development

As you arrive:

1. Start up your computer and plug it in. 2. Log into Angel and go to CSSE 120. Do the Attendance Widget – the PIN is on the board. 3. Go to the Course Schedule web page. Open the Slides for today if you wish. 4. Checkout today’s project:

Session XX

Session

Session13_LoopPatternsForInput

Wait-until-event loop pattern Line Following! Loop Patterns for Input Min-Max loop pattern

Session 13

Loop patterns for input, Max/min, Structure Charts

13

slide-2
SLIDE 2

Checkout today’s project: Session13_LoopPatternsForInput

Are you in the Pydev perspective? If not:

Window ~ Open Perspective ~ Other then Pydev

Messed up views? If so:

Window ~ Reset Perspective

No SVN repositories view (tab)? If it is not there:

Window ~ Show View ~ Other then SVN ~ SVN Repositories 1. In your SVN repositories view (tab), expand your repository (the top-level item) if not already expanded.

  • If no repository, perhaps you are in the wrong Workspace. Get help.
  • 2. Right-click on today’s project, then select Checkout.

Press OK as needed. The project shows up in the Pydev Package Explorer to the left. Expand and browse the modules under src as desired.

Troubles getting today’s project? If so:

slide-3
SLIDE 3

Recap: Two main types of loops

 Definite Loop 

The program knows before the loop starts how many times the loop body will execute

Implemented in Python as a for loop. Typical patterns include:

  • Counting loop, perhaps in the Accumulator Loop pattern
  • Loop through a sequence directly
  • Loop through a sequence using indices

Cannot be an infinite loop

 Indefinite loop 

The body executes as long as some condition is True

Implemented in Python as a while statement

Can be an infinite loop if the condition never becomes False

Python's for line in file: construct Indefinite loop that looks syntactically like a definite loop!

slide-4
SLIDE 4

Recap: Definite Loops

 Definite loop

The program knows before the loop starts how many times the loop body will execute

 Counted loop

Special case of definite loop where the sequence can be generated by range()

 Implemented in Python as

a for loop

 Example to the right shows

3 typical patterns

Examples of definite loops :

  • All three of these examples illustrate the

Accumulator Loop pattern

  • The first example is a counted loop
  • The second and third examples are equivalent

ways to loop through a sequence

  • Second example is NOT a counted loop
  • Third example IS a counted loop

sum = 0 for k in range(10): sum = sum + (k ** 3) sum = 0 for number in listOfNumbers: sum = sum + number sum = 0 for k in range(len(listOfNumbers)): sum = sum + listOfNumbers[k]

slide-5
SLIDE 5

Recap: Indefinite Loops

 Number of iterations is not known when loop starts  Is typically a conditional loop  Keeps iterating as long as a certain condition remains True  The conditions are Boolean expressions  Typically implemented using a while statement

sum = 0 k = 0 while k < 10: sum = sum + (k ** 3) k = k + 1 sum = 0 for k in range(10): sum = sum + (k ** 3) Indefinite loop that computes the same sum as the definite loop Definite loop

slide-6
SLIDE 6

The input-compute-in-a-loop pattern

 We have seen the input-compute-output pattern:  A cousin of that pattern is the input-compute-in-a-loop

pattern:

Input from the user or as a parameter Or return the result

get data compute using the data print the result

We’ve seen a special case of this pattern: the Accumulator Loop

  • pattern. Today we will examine
  • ther special cases.

pre-loop computation repeatedly: get data compute using the data post-loop computation

slide-7
SLIDE 7

 Suppose that you want to get a bunch of numbers (or other data)

from the user.

 Do you need a loop?

If so, what will you do each time through the loop?

 Answer: Yes. Get one number from the user each time through the loop.  What are some different ways that you might use to let the

program know when the user is finished entering numbers?

 Ask the user how many numbers she wants to enter. Then loop that many times.  Each time through the loop, ask the user “Are you done?”.

Exit the loop when she says “Yes.”

 The user enters a special sentinel value

(e.g. a negative number) to indicate that she is done.

 The user enters nothing (just an empty line) to indicate that she is done.

Getting inputs (more than one) from the user

We’ll now see examples of each of these approaches.

slide-8
SLIDE 8

 Open the

m1_input_by_user_count.py

module and execute it together

 When does the loop terminate?  Is this the best way to make the user enter input?  Why?  Why not?

For loop pattern

pre-loop computation for [amount of data] : get data compute using the data post-loop computation

This approach is a lousy way to get numbers that the user supplies, because: The user has to count in advance how many numbers they will supply.

slide-9
SLIDE 9

Interactive loop pattern

 One version: an

interactive loop

pre-loop computation while [there is more data]: get data compute using the data post-loop computation set a flag indicating that there is data

  • ther pre-loop computation

while [there is more data]: get data compute using the data ask the user if there is more data post-loop computation

This approach is also a lousy way to get numbers that the user supplies, because: The user has to answer repeatedly the “more numbers?” question. Examine and run the m2_input_by_asking_if_more.py module in the project you checked out today.

slide-10
SLIDE 10

Sentinel loop pattern

 Better version:

use a sentinel

pre-loop computation while [there is more data]: get data compute using the data post-loop computation get data

  • ther pre-loop computation

while [data does not signal end-of-data]: compute using the data get data post-loop computation

Examine and run the m3_input_using_sentinel.py module in the project you checked out today. This approach (using negative numbers as the sentinel) has a flaw. What is that flaw? Answer: You cannot have negative numbers included in the average! User signals end of data by a special “sentinel” value. Note that the sentinel value is not used in calculations.

slide-11
SLIDE 11

Better sentinel loop pattern

 Best (?) version:

use no-input as the sentinel

Examine and run the m4_input_using_better_sentinel.py module in the project you checked

  • ut today.

pre-loop computation while [there is more data]: get data compute using the data post-loop computation get data as a string

  • ther pre-loop computation

while [data is not the empty string]: data = float(data) compute using the data get data as a string post-loop computation

User signals end of data by pressing the Enter key in response to a input. The sentinel value is again not used in calculations.

Above converts the data to a float, but other problems might do other conversions.

slide-12
SLIDE 12

Loop-and-a-half pattern

 Use a break

Examine and run the

m4_input_using_sentinel_in_loop_and_a_half

module in the project you checked out today.

pre-loop computation while True: get data as a string if data == "": break data = float(data) compute using the data post-loop computation

This pattern is equivalent to the pattern on the preceding slide. Some prefer one style; others prefer the other. You may use whichever you choose. pre-loop computation while True: get data if data signals end-of-data: break compute using the data post-loop computation The break statement exits the enclosing loop. Here we continue to use no-input as the sentinel.

slide-13
SLIDE 13

Escaping from a loop

 break statement ends the loop immediately  Does not execute any remaining statements in loop body  continue statement skips the rest of this iteration of

the loop body

 Immediately begins the next iteration (if there is one)  return statement ends loop and function call  May be used with an expression

 within body of a function that returns a value

 Or without an expression

 within body of a function that just does something

slide-14
SLIDE 14

Summary of input-compute-in-a-loop patterns

 For loop, asking how many inputs  Interactive loop, asking repeately “more inputs?”  Sentinel loop using a special value as the sentinel  Sentinel loop using no-input as the sentinel  Loop-and-a-half  Combined with use of no-input as the sentinel

Coming up – another loop pattern:

  • Wait-for-event loop

Next session – More loop patterns:

  • Nested loops

Your turn: do TODO #1 and #2 in m6_input_loops_practice.py TODO #3 is for homework.

slide-15
SLIDE 15

 Here is an example for finding the smallest number is

a sequence of numbers.

The Min-Max loop pattern

def min_of_list(numbers): """Returns the smallest of the numbers in the given list.""" smallest = numbers[0] for k in range(1, len(numbers)): if numbers[k] < smallest: smallest = numbers[k] return smallest You can run this code in m7_min_max_example.py and see how it uses an oracle to do unit-testing. You’ll apply this concept for homework.

Sometimes you want to know where in the list the smallest number is. In that case you would:

  • Start minK at 0
  • When smallest

changes, change minK to k

slide-16
SLIDE 16

 What are they? A visual representation of:  Which functions use (call) which other functions  What parameters are sent

to the called function

 What values are returned

by the called function

 Why use them?

To help you design the structure of your program.

Structure charts

slide-17
SLIDE 17

 Your boss wants a line-following program that works like this:  It starts the robot, putting it in FULL mode.  Then it enters a loop in which the user can press any of the following:

 Play Button – the robot begins following the line (and stops when it bumps into anything).  Advance Button – the program shuts down the robot and exits.  Left Bumper – the program reads the two front cliff sensor values and saves them. The

program expects that the user will have placed the robot on a WHITE surface just before pressing this bumper.

 Right Bumper – the program again reads the two front cliff sensor values and saves them. But

now the program expects that the user will have placed the robot on a BLACK surface just before pressing this bumper. When the robot does its line following, it uses the 2 pairs of cliff sensor readings for calibration.

 Together, let’s design a structure chart for this program.  What functions should main call?  What functions should those functions call?  What parameters are sent and what values are returned by the calls?

A structure chart for a line-following program

slide-18
SLIDE 18

Develop a structure chart for a line-following program

main

get_bumper_states get_button_states perform_line_following get_front_cliff_values update_wheel_speeds

quit

perform_white_calibration perform_dark_calibration  2 states  2 states  robot start_robot

slide-19
SLIDE 19

Line-following algorithms

Left light sensor sees white (light) Right light sensor sees black (dark) Action:

  • Speed up the left wheel
  • Slow down the right wheel
  • So the robot veers right

Both light sensors see white (the robot is straddling the line) Action:

  • Set wheel speeds equal
  • So the robot goes straight ahead

Left light sensor sees black (dark) Right light sensor sees white (light) Action:

  • Speed up the right wheel
  • Slow down the left wheel
  • So the robot veers left

 There are many algorithms

for following lines, depending on how many and where your sensors are, along with other factors. Let’s figure out a simple 2-sensor approach.

 First, what is the effect of

different wheel speeds?

 Left faster  veer right

Right faster  veer left

 Now look at the situations

to the right, starting at the

  • bottom. What should the

robot do in each situation?

slide-20
SLIDE 20

Line-following algorithms

Left light sensor sees white (light) Right light sensor sees black (dark) Action:

  • Speed up the left wheel
  • Slow down the right wheel
  • So the robot veers right

Both light sensors see white (the robot is straddling the line) Action:

  • Set wheel speeds equal
  • So the robot goes straight ahead

Left light sensor sees black (dark) Right light sensor sees white (light) Action:

  • Speed up the right wheel
  • Slow down the left wheel
  • So the robot veers left

If you speed up to a fixed, large amount, and slow down to a fixed, small amount, and ignore the middle case, that is called bang-bang control.

You could speed up the wheels proportional to how far from dark the sensor readings are:

 So completely white by a

sensor would speed up its wheel to 100% and completely black would slow it to 0% of its normal speed

 Let W, D = completely white

and dark. Let L be the current reading for the left sensor. What should the left motor speed be?

slide-21
SLIDE 21

Line-following algorithms

Left light sensor sees white (light) Right light sensor sees black (dark) Action:

  • Speed up the left wheel
  • Slow down the right wheel
  • So the robot veers right

Both light sensors see white (the robot is straddling the line) Action:

  • Set wheel speeds equal
  • So the robot goes straight ahead

Left light sensor sees black (dark) Right light sensor sees white (light) Action:

  • Speed up the right wheel
  • Slow down the left wheel
  • So the robot veers left

 Proportional control:  Let W, D = completely

white and dark. Let L be the current reading for the left sensor. What should the left motor speed be?

 Answer:

p = (L – D) / (W – D) speed = p * some_constant But add to speed to give it a minimum speed, and clip it at a maximum speed.

 Similarly for the right wheel White numbers are large and black are small (near 0).

slide-22
SLIDE 22

 With your instructor, discuss how to do line following.  Work on m9_line_follower.py  Ask questions as needed!  Sources of help after class:

Assistants in the CSSE lab

 And other times as well (see link on the course home page)

Email

 You get faster response from the above than from just your instructor

Rest of Session

CSSE lab: Moench F-217 7 to 9 p.m. Sundays thru Thursdays

csse120-staff@rose-hulman.edu