
SLIDE 1
CS1114 Section 6: Convolution
February 27th, 2013
1 Convolution
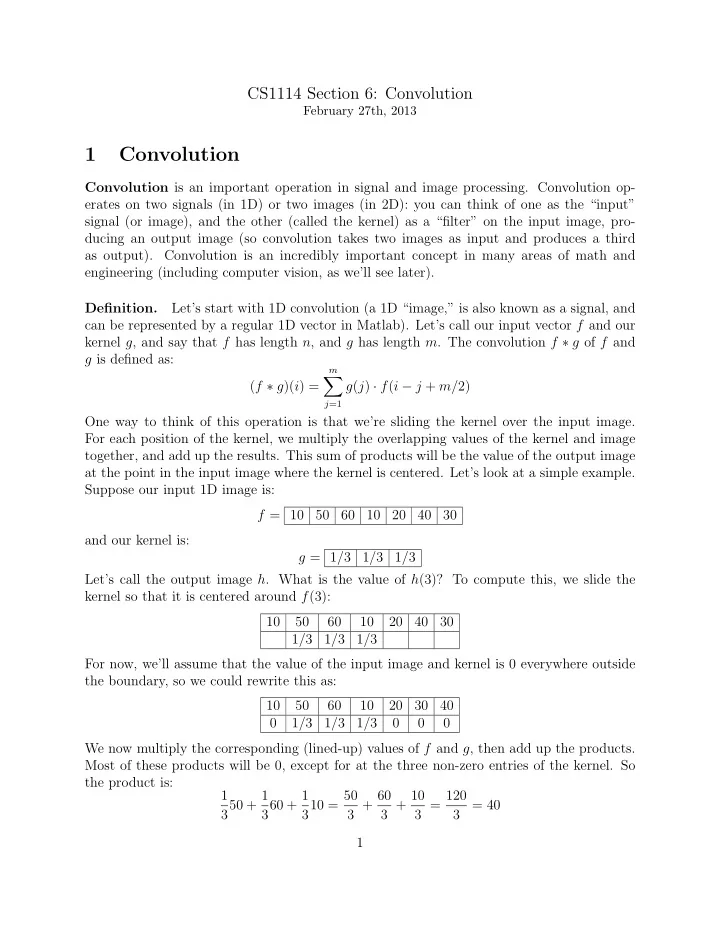
Convolution is an important operation in signal and image processing. Convolution op- erates on two signals (in 1D) or two images (in 2D): you can think of one as the “input” signal (or image), and the other (called the kernel) as a “filter” on the input image, pro- ducing an output image (so convolution takes two images as input and produces a third as output). Convolution is an incredibly important concept in many areas of math and engineering (including computer vision, as we’ll see later). Definition. Let’s start with 1D convolution (a 1D “image,” is also known as a signal, and can be represented by a regular 1D vector in Matlab). Let’s call our input vector f and our kernel g, and say that f has length n, and g has length m. The convolution f ∗ g of f and g is defined as: (f ∗ g)(i) =
m
- j=1