
SLIDE 1
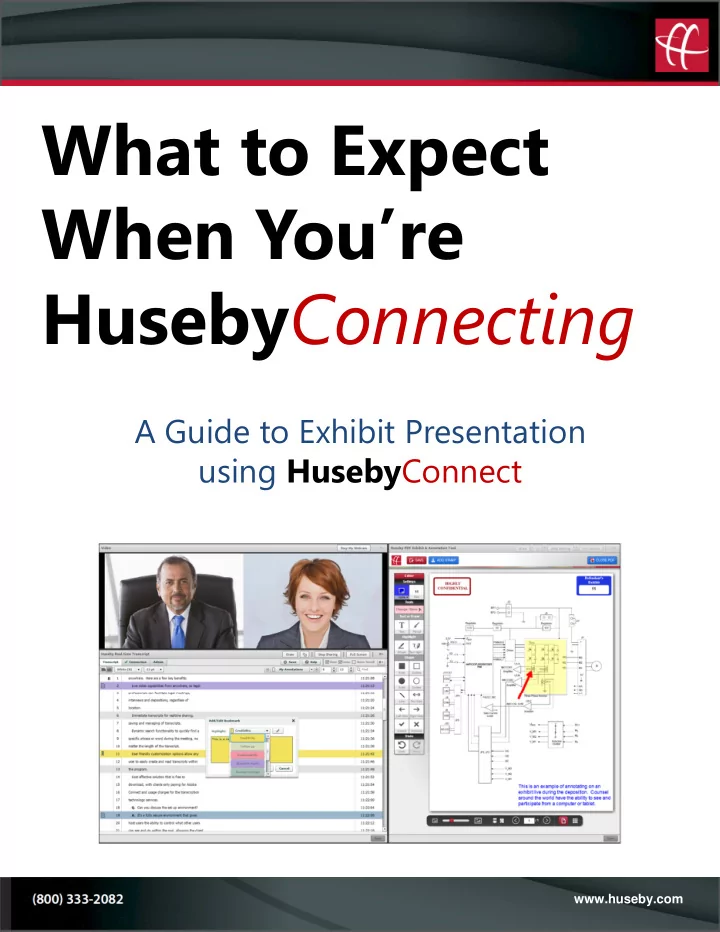
What to Expect When You’re HusebyConnecting
A Guide to Exhibit Presentation using HusebyConnect
www.huseby.com
What to Expect When Youre Huseby Connecting A Guide to Exhibit - - PDF document
What to Expect When Youre Huseby Connecting A Guide to Exhibit Presentation using Huseby Connect www.huseby.com Table of Contents Preloading Exhibits When can I preload and what kinds of files ... 3 Presenting
A Guide to Exhibit Presentation using HusebyConnect
www.huseby.com
Table of Contents
Preloading Exhibits When can I preload and what kinds of files ……………………... 3 Presenting Exhibits How do I present and mark an exhibit …….……………………… 4 Providing a courtesy copy and witness annotation rights .……… 5 How to use annotation tools .………………………………………. 6 Saving an exhibit …………………………………………….……… 7 What to Expect Presenting PDF Exhibits Presenting a large PDF file ………………………………....……… 8 Presenting a mid-sized PDF file …………………………....……… 9 Presenting a small PDF file ….………..…………………....……… 10 Suggestions for presenting larger documents …………………… 10 Presenting Files Natively How to share non-PDF files ………………………………....…….. 11 Portal Repository How do I view and/or download exhibits ………………....……… 13 Exhibit Practice Module How to practice presenting exhibits …………………………......... 15
2
Preloading Exhibits
When can I log on and pre-upload my exhibits? You are able to login to the room any time the same day of the deposition. Typically the room is opened 1 hour prior to the start of the deposition, however if you will need to be able to access the room earlier you can contact the HusebyConnect Support Team at webconference@huseby.com to ensure you gain presenter rights needed for uploading documents. What type of file can I upload? You can only pre-upload PDF files in the exhibit presentation module, however you can present files in native formats such as videos and Excel documents. How long are my preloaded documents saved? The preloaded document section is temporary storage and the files will be wiped off the system each morning at 4am. Any files marked and saved during the deposition will be retained in the exhibit history. When preloading documents, what does the “is shared” check box mean? Clicking the “is shared” check box allows other counsel in presenter mode the ability to see the documents you have added to the preloaded documents queue. Select this only if you would like the documents in your queue seen by others. The system defaults to “private”. Any files uploaded in the Private queue are only seen by the individual user who uploaded the files. Note: Files uploaded in the Preloaded Documents section cannot be renamed or removed from that section.
3
Presenting Exhibits
Presenting a preloaded exhibit To present a new exhibit from the Preloaded Documents section, click the
present. Add exhibit/confidential sticker(s) Click Add Stamp and select the preferred sticker(s). Place sticker on exhibit. Enter exhibit number if manual exhibit numbering is enabled.
4
Note: Manual exhibit numbering is the system default. As a safeguard, the system will not let you duplicate numbers for the same witness. If you would like automated numbering, it must be set at the beginning of the case and cannot be changed mid-case. Automated numbering assumes you are starting at Exhibit 1 and sequentially numbering for each deponent.
Providing opposing counsel a courtesy copy Provide opposing counsel a courtesy copy of the presented exhibit in just three clicks using the Attorney File Share pod: 1. Click Upload File 2. Click 3. Select the file to upload Opposing counsel can download the selected file locally to be able to flip through independently of the presented “live” exhibit. Giving the deponent annotation rights Counsel can pass annotation rights to the deponent by using the Delegate button on the top right of the exhibit presentation pod. Note: You can also use the Attorney File Share to allow the deponent to upload files brought to the deposition. Note: Delegation rights allow the deponent to scroll through the exhibit and/or make annotations. Witness annotations can be saved as a part of the final exhibit or used only as a point of reference and deleted before saving. Taking away the deponent annotation rights Counsel can take away annotation rights from the deponent by using the Done Editing button.
5
How to use the annotation tools
Color Transparency Size Collapse Toolbar Add Text Box Free Draw Shape Highlight Text Highlight Add Shape Change/Move an Object
6
How do I edit, move or delete an annotation? Click the Change/Move option in the annotation tool bar. Select the object you wish to change or delete. Change options include:
Saving an exhibit To save an exhibit into record, click the button on the top left of the exhibit pod. When an exhibit is saved, it will become non-editable in order to flatten any added layers and preserve the integrity of any annotations and stickers saved as part
Can I pre-mark my exhibits before the deposition and open from the Exhibit History when I am ready to present? The answer is yes, but when you mark an exhibit and click save it then becomes un- editable in order to maintain the integrity of the annotations made to the exhibit. Unless you are not planning to make any annotations on the exhibit, we suggest you mark the exhibit when presenting during the event. Once an exhibit is marked and saved it will show up in the exhibit history. Note: Exhibits in the Exhibit History section are accessible to opposing counsel.
7
Note: You can also use the undo button to change/delete an annotation.
We did a test for you. In our test we used a 510-page color document that is 17.6 MB in size. Below are the results of our test. When uploading the file in the Preloaded Documents section in all three tests the file took 2 minutes 32 seconds to complete. Below are the home internet speeds of the test computer during the upload. When loading the file into the live exhibit presentation mode, in the three tests the load time ranged from 2 minutes 2 seconds to 4 minutes 30 seconds. When saving the annotated and marked file to the exhibit history, in the three tests the conversion/save time ranged from 4 minutes 3 seconds to 5 minutes 55 seconds.
What to Expect Presenting PDF Exhibits
How long does it take to preload, present, mark and save a large exhibit? Note: When uploading larger exhibits into the live presentation mode and saving exhibits to the exhibit history, depending on internet speed, video could be choppy at times.
8
We did a few tests for you in a variety of sizes. In our first test we used a 50-page color document that is 6.7 MB in size. Below are the results of our test. When uploading the file in the Preloaded Documents section in all three tests the file took 45 seconds to 47 seconds to complete. When loading the file into the live exhibit presentation mode, in the three tests the load time ranged from 54 seconds to 1 minute 7 seconds. When saving the annotated and marked file to the exhibit history, in the three tests the conversion/save time ranged from 1 minute 8 seconds to 1 minute 29 seconds. How long does it take to preload, present, mark and save a mid-sized exhibit? Note: When uploading larger exhibits into the live presentation mode and saving exhibits to the exhibit history, depending on internet speed, video could be choppy at times. In our second test we used a 66-page color document that is 2.4 MB in size. Below are the results of our test. When uploading the file in the Preloaded Documents section in all three tests the file took 20 seconds to 25 seconds to complete. When loading the file into the live exhibit presentation mode, in the three tests the load time ranged from 19 seconds to 33 seconds. When saving the annotated and marked file to the exhibit history, in the three tests the conversion/save time ranged from 22 seconds to 27 seconds.
9
We did a test for you. In our test we used a 11-page color document that is 227 KB in size. Below are the results of our test. When uploading the file in the Preloaded Documents section in all three tests the file took 9 seconds to 10 seconds to complete. When loading the file into the live exhibit presentation mode, in the three tests the load time ranged from 8 seconds to 10 seconds. When saving the annotated and marked file to the exhibit history, in the three tests the conversion/save time ranged from 12 seconds to 14 seconds. How long does it take to preload, present, mark and save a small-sized exhibit? For most PDF’s, a file can be preloaded, introduced and saved in under 15 seconds
faster and more efficient than introducing and marking hardcopy documents in person, it is important to take into consideration the time it may take to introduce and save larger PDF files. When introducing larger documents, you might consider timing questions in your deposition that do not require handling documents to coincide with the upload and save time larger documents may require – if you are not prepared to talk through the upload/save time, 2-5 minutes may feel like a very long period of time. Note: An alternative to consider for larger files is to electronically hand counsel and the deponent a complete version of the large PDF using the Attorney File Share to download locally and flip through independently to confirm the document is complete and potentially use to answer questions.
the full application version is loaded, marked and saved.
introduce a preloaded document containing only the pages you plan to ask questions about with a slip sheet (including a description of the document) as the first page to mark and save. Following the deposition, the full document will be produced as the final exhibit. Suggestions for presenting larger documents
10
To present files in a native format other than PDF, click Stop Sharing at the top right of the exhibit presentation pod. If you are sharing your screen, you will see a window to show what you are currently sharing in the bottom of your screen. Click on the icon to expand the window. Click Stop Sharing to go back to the main screen.
Presenting Files Natively
How to share non-PDF files (i.e. video, audio, Excel) Select between two options:
To go back to the exhibit presentation module, click Recently Shared and then click Huseby Exhibit Presentation.
11
Using the Share Document option, video, audio and PowerPoint files will be integrated into the presentation pod. Accepted File Formats Using the Share Document Option:
Note: The Share Document option works best for video, audio and PowerPoint files. Share Screen works best for Excel files.
12
Portal Repository
How do I view and/or download exhibits? Visit https://cloud.huseby.com Enter your username and password. Select the Case Management tab. Select the case associated with the file(s) you would like to view and/or download. Click the History tab on the right side of your screen. Search the file(s) to view or download by witness or date range.
13
Note: When you are first setup with a HusebyConnect account you will receive a Welcome Email with a link to create a password. If you did not receive an email to create a password, please contact Support at webconference@huseby.com. If you forgot your password, please click Forgot Password.
Three ways to download exhibit files: 1. Double-click on any exhibit to open individually 2. Click on an exhibit and hold the shift/Ctrl key and select a group of exhibits 3. Click the Select All Files button on the bottom right Click Download and choose a location to save the Zip folder.
14
Exhibit Practice Module
How to practice presenting exhibits We highly recommend clients spend some time navigating the practice module to become familiar with how to preload, present, annotate, mark and save exhibits. Visit https://cloud.huseby.com Enter your username and password. Select the Exhibit Tool (Practice Mode) tab. Practice preloading and presenting exhibits using the practice mode. Note: The two sections of the live exhibit presentation tool that you will not find in the practice module is an exhibit history of saved practice exhibits or the ability to delegate scroll/annotation rights to the deponent.
15
www.huseby.com