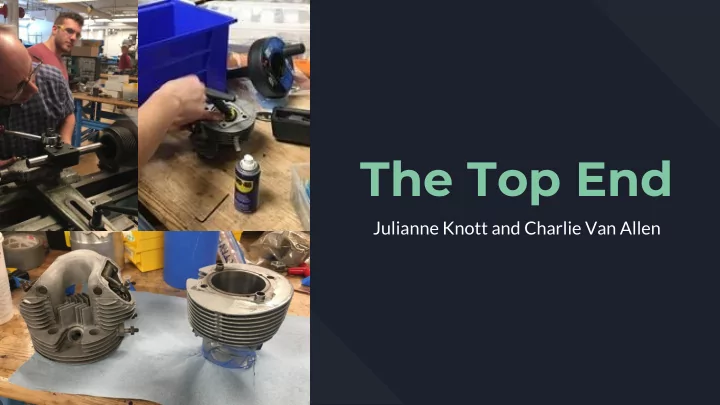
the top end
play

The Top End Julianne Knott and Charlie Van Allen Overview What We - PowerPoint PPT Presentation

The Top End Julianne Knott and Charlie Van Allen Overview What We Did: Parts: Take Everything Apart Cylinder Clean and Sandblast Cylinder Head Cut the Valve Seats Piston Lapping the Valves Valves


  1. The Top End Julianne Knott and Charlie Van Allen

  2. Overview What We Did: Parts: Take Everything Apart ● Cylinder ● Clean and Sandblast ● Cylinder Head ● Cut the Valve Seats ● Piston ● Lapping the Valves ● Valves ● Replace the Piston ● Valve Springs ● Rebore the Cylinder ● Rocker Arms ● Put It Back Together! ● Push Rods ●

  3. Cleaning, Sandblasting, and Glass Beading Why We Did It: To make the parts look nicer, identify missing and broken pieces, and make ● the engine run smoother over all. How We Did It: We used the parts cleaners to wash off excess oil and grime. ● We used the sand blaster to remove the toughest layers of dirt. ● We used the glass beader to give it a smoother appearance. ● In order to properly glass and/or sand bead we had to cover the inner ● surfaces, as seen to the left, in order to keep the innards of the engine untouched by the sandblasting If we were to not tape over the cylinder or the valves, the sandblasting ● would have offset the measurements within the cylinder and valves.

  4. Cutting the Valve Seats Why We Did It: It’s important for the valves to sit flush in the valve seats to form a proper ● seal. The better the seal, the better the efficiency of the engine. ● How We Did It: We used the valve cutter with the proper diameter and angle and rotated it ● in the valve seat. We used machinist’s bluing to ensure that the cut was even along all sides ● of the valve seat. The ‘bible’ had all of the proper measurements that we should have been ● using, allowing us to choose the proper diameter in which to cut the valves.

  5. Lapping the Valves and Valve Seats Why We Did It: It’s important that the valves fit the valve seats exactly so ● that the seal formed between the two is 100% complete. How We Did It: We applied valve lapping compound to the surface and used ● the plunger tool to spin the valves in the valve seats. We used machinist’s bluing to ensure that all the surfaces ● were evenly lapped. The valve lapping compound ensured for an even cut on the ● seats.

  6. Replacing the Piston Why We Did It: The old piston was burnt, damaged, and gross looking. ● The Cylinder was worn out and needed to be rebored, thus requiring a larger ● piston. How We Did It: We went to the bunker and looked around for a suitable piston. We needed one ● that was slightly bigger than the one we had so that when we rebored the cylinder, it would fit exactly. Fun Fact: The Piston is actually elliptical in shape because it is designed so that when the ● engine is running it heats up and expands to form a perfect circle.

  7. Reboring the Cylinder Why We Did It: It’s important to make sure the cylinder and piston fit perfectly ● with one another so that the engine is as efficient as possible without seizing up. How We Did It: Glen used the lathe to cut the hole in the cylinder to the proper ● diameter Then we honed the cylinder to make the surface more porous so ● that it would better retain oil. Furthermore, we ordered the correct diameter piston online ● with the help of Professor Littman.

  8. Putting it Back Together! Key Challenges: Inserting the push rods ● Compressing the Springs ● Checking the lash with the feeler gages ● Inserting the rocker arms ●

  9. Springs and Rocker Arms What do they do? The springs and rocker arms are pushed by the pushrods and allow for the opening and ● closing of the valves. Again, as one pushrod pressurizes one side, that rocker arm is pressed downward, ● resulting in the opening of either of the exhaust or intake valves. What did we do? There are two springs for each side and each spring runs counterclockwise to the other ● so it is vital to keep track of which spring is which when putting it all back together. We used a special tool to compress the springs to insert them. ● In order to keep the rocker arms in place, a spring washer and 3 regular washers are ● inserted next to it. This makes it especially challenging to put together and take apart. Finally we set the lash on both sides using the feeler gages. ●

  10. The Pushrods What do they do? The Pushrods are located on the back of the engine, above the cylinder. ● They move up and down as the engine does and as one moves up, the other moves ● down. As each makes their successive upward movement, they open the valve. Then as they ● move down they close the valve. The pushrods are free floating in their positioning, allowing for some bend and some ● leeway on the rods. The pushrods are made out of a steel alloy that allows them to be pliable, yet sturdy. ● What did we do? We placed the push rods in their free floating positions. ● It takes a while since nothing is holding the pushrods in, so you have to make sure to go ● slowly and be sure that each pushrod is successfully in its correct position.

Download Presentation
Download Policy: The content available on the website is offered to you 'AS IS' for your personal information and use only. It cannot be commercialized, licensed, or distributed on other websites without prior consent from the author. To download a presentation, simply click this link. If you encounter any difficulties during the download process, it's possible that the publisher has removed the file from their server.

Recommend


More recommend