TCPA Keyfobs Honeywell.com TCPA Keyfobs Ergonomic and compact - - PowerPoint PPT Presentation

tcpa keyfobs
SMART_READER_LITE
LIVE PREVIEW

TCPA Keyfobs Honeywell.com TCPA Keyfobs Ergonomic and compact - - PowerPoint PPT Presentation

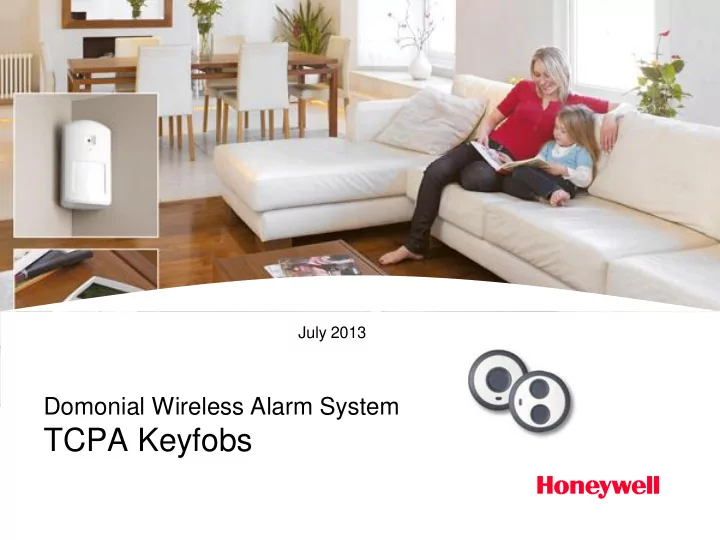
July 2013 Domonial Wireless Alarm System TCPA Keyfobs Honeywell.com TCPA Keyfobs Ergonomic and compact design Multiple accessories fitting all usages Water resistance LED to acknowledge successful command Backward


slide-1
SLIDE 1

Domonial Wireless Alarm System

TCPA Keyfobs

July 2013

slide-2
SLIDE 2

Honeywell Proprietary

Honeywell.com 

2

TCPA Keyfobs

  • Ergonomic and compact design
  • Multiple accessories fitting all usages
  • Water resistance
  • LED to acknowledge successful command
  • Backward compatibility

– TCPA1B: 1-button -> emulation of TCM800HF (on Domonial) – TCPA2B: 2-button -> emulation of TCBPA8M-1 (on Domonial) – See compatibility table for other panels

  • Added value functions

– Panic Alarm, Drive of actuators, Arming/Disarming, Door bell (with upcoming new panel firmware) – Supervision (with upcoming new panel firmware)

slide-3
SLIDE 3

Honeywell Proprietary

Honeywell.com 

3

Wireless Keyfobs Range

slide-4
SLIDE 4

Honeywell Proprietary

Honeywell.com 

4

Compatibility with other Panels

slide-5
SLIDE 5

Honeywell Proprietary

Honeywell.com 

5

TCPA1B

1-Button Panic Alarm Keyfob

APPLICATIONS

  • Panic/Hold-up alarm
  • Life comfort
  • User supervision

BENEFITS

  • Usable all time
  • Simple to operate
  • Well fitting design
  • Long battery life

KEY FEATURES

  • Panic Alarm (default)
  • Multi-wear accessories
  • Water resistant IP67
  • Supervised (upcoming)
  • Status LED
  • 4 years battery life
  • Alpha, V2, Alpha Russia

radio protocols

  • Backward compatible
  • Other optional modes:
  • Home automation
  • Doorbell (upcoming)
  • User supervision (upcoming)
slide-6
SLIDE 6

Honeywell Proprietary

Honeywell.com 

6

TCPA2B

2-Button Panic Alarm Keyfob

APPLICATIONS

  • Panic/Hold-up alarm
  • Life comfort
  • User supervision

BENEFITS

  • Usable all time
  • Simple to operate
  • Well fitting design
  • Long battery life

KEY FEATURES

  • Panic Alarm (default)
  • Multi-wear accessories
  • Water resistant IP67
  • Supervised (upcoming)
  • Status LED
  • 4 years battery life
  • Alpha, V2, Alpha Russia

radio protocols

  • Backward compatible
  • Other optional modes:
  • Home automation
  • Setting/Unsetting
  • User supervision (upcoming)

Stickers included

slide-7
SLIDE 7

Honeywell Proprietary

Honeywell.com 

7

Multi-wear Accessories Included

Pendant Belt clip / Wall/Desk mount Keychain Wristband

slide-8
SLIDE 8

Honeywell Proprietary

Honeywell.com 

8

Wall/Desk Mount of Bracket Accessory

Possible hole positions for wall or desk mount

  • Make a hole in the predefined hole positions.
  • Use screws with a head thickness of less than 2mm
slide-9
SLIDE 9

Honeywell Proprietary

Honeywell.com 

9

Enrolment on Domonial

REGISTRATION PROCEDURE

  • First, set the panel to registration mode
  • To start registration, press the keyfob button for 5
  • seconds. The LED will start blinking.
  • The keyfob will try to register with the following

sequence of radio protocols: Alpha, V2, Alpha Russia

  • On DomoPC 6.0 the keyfob are enroled with the

« TCB800M » type. The new « TCPA1B » or « TCPA2B » type are supported starting from DomoPC 6.2

  • After the first registration, to enroll again the keyfob

with a different panel remove and put the battery back before starting the registration procedure

slide-10
SLIDE 10

Honeywell Proprietary

Honeywell.com 

10

TCPA1B Configuration

CONFIGURATION VIA DOMOPC

  • Select the wanted button behavior on the Alert column of the

Keyfobs/Standard settings window for the registered keyfob

  • Current panels only offer Alert1/2/3 options. Other optional

TCPA1B modes will be supported by upcoming panel SW

slide-11
SLIDE 11

Honeywell Proprietary

Honeywell.com 

11

TCPA2B Configuration – DomoPC 6.0

CONFIGURATION VIA DOMOPC 6.0

  • Select the wanted buttons behavior using the following

Keyfobs settings:

  • Long push (2s) of both buttons  Standard tab / Alert column
  • Right button  Advanced tab / «Ctrl+Part Arm» column
  • Left button  Advanced tab / «Ctrl+Arm» column
  • Short push (300ms) of both buttons  Advanced tab / «Ctrl+Disarm» column
  • Current panels only offer some options. Other optional

TCPA2B modes will be supported by upcoming panel SW

slide-12
SLIDE 12

Honeywell Proprietary

Honeywell.com 

12

TCPA2B Configuration – DomoPC 6.2

CONFIGURATION VIA DOMOPC 6.2

  • Select the wanted buttons behavior using the

following settings in the Keyfobs Advanced tab:

  • Short push (300ms) of both buttons  Short double push
  • Long push (2s) of both buttons  Long double push
  • Right button
  • Left button
  • Current panels only offer some options. Other
  • ptional TCPA2B modes will be supported by

upcoming panel SW

slide-13
SLIDE 13

Honeywell Proprietary

Honeywell.com 

13

Battery Replacement

BATTERY REPLACEMENT

  • 1. Remove 4 screws (①) and lift off cover.
  • 2. Using a small flat-blade screwdriver remove old battery (②).
  • 3. Insert new battery by placing new battery under the gold tab

and then pressing down (③). Ensure the positive (+) side of battery is face up after installation

  • 4. Align cover and attach with 4 screws

NOTE: When replacing the battery, wait a minimum of 10 seconds prior to installing the new battery

slide-14
SLIDE 14

Honeywell Proprietary

Honeywell.com 

14

Battery Lifetime

BATTERY LIFETIME

  • Battery lifetime depends on number of activations per

month and supervision period

  • Protocol alpha example: more than 4 years of lifetime

with 200 activations per month without supervision

slide-15
SLIDE 15

Honeywell Proprietary

Honeywell.com 

15

THANK YOU

slide-16
SLIDE 16

Honeywell Proprietary

Honeywell.com 

16

Enrolment on Vista (1/2)

SELECTION OF THE PROTOCOL

  • To work with Vista + 5882EUHS, TCPA1B/TCPA2B must

be set into V2 protocol

  • This must be done BEFORE enrolment on panel

− TCPA1B: press the button for 5sec − TCPA2B: press simultaneously both buttons for 5sec

  • Then, the keyfob LED will blink during 10-15sec
  • Without any « answer » coming back in ALPHA or

RUSSIA protocol, the keyfob will be automatically set in V2

  • IMPORTANT: This must be done before setting the panel

into enrolment mode.

slide-17
SLIDE 17

Honeywell Proprietary

Honeywell.com 

17

Enrolment on Vista (2/2)

ENROLMENT

As any other keyfob working with Vista panels, enrolment will be done by pressing the button(s) on panel request. 1. Enter in programming mode (install code +8+0+0) 2. Enter in zone programming (*56) 3. Select zone where keyfob will be enrolled 4. Choose appropriate zone type (mostly 06-07: panic silent or audible, or any other type desired) 5. Select RF button 6. For enrolment, on panel request, press the keyfob button (TCPA1B) or the 2 buttons simultaneously (TCPA2B) 7. Press the button(s) again, and if requested confirm a 3rd time 8. Program then alpha description, pass to another zone

  • r exit zone programming with 00.

10 Input S/N L AXXX-XXXX 1 Xmit to Confirm Press * to Skip