
SLIDE 1
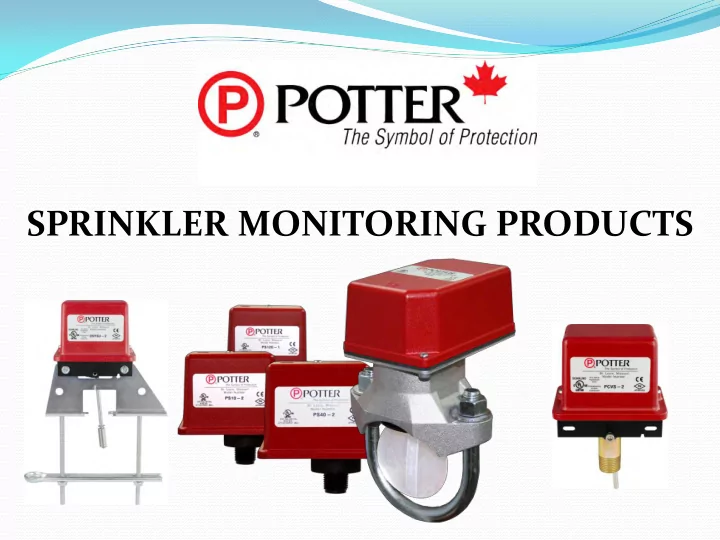
SPRINKLER MONITORING PRODUCTS
SPRINKLER MONITORING PRODUCTS TWO TYPES OF SPRINKLER SYSTEMS USED - - PowerPoint PPT Presentation
SPRINKLER MONITORING PRODUCTS TWO TYPES OF SPRINKLER SYSTEMS USED IN CANADA DRY SYSTEM (In areas where water can freeze) WET SYSTEM WITH EXCESS PRESSURE (To prevent false alarms from pressure fluctuations in the water supply) WE
SPRINKLER MONITORING PRODUCTS
DRY SYSTEM (In areas where water can
freeze)
WET SYSTEM WITH EXCESS PRESSURE
(To prevent false alarms from pressure fluctuations in the water supply)
WE WILL LOOK AT BOTH WITH
SPRINKLER MONITORING DEVICES INSTALLED
PS40 Low Air Pressure Switch to
monitor drop in air pressure Supervisory Device
BVL Pump is used to pressurize system to 40 lbs – Some Dry Systems now have lower Supervisory pressures – around 20 lbs (Depends on valve) This allows for supervision of the piping and keeps water from entering the dry system No Pressure Air Pressure Water Pressure PS10 to monitor the Alarm Port Alarm Device OSYSU to monitor gate valve position (Open or Close) Supervisory Device Ball valves on the alarm port should be monitored using RBVS Supervisory Device
PS120 is used to
monitor the excess pressure
Supervisory Device
PS10 Pressure type Water Flow Switch monitors water flow in the alarm line Alarm Device To water motor gong
Excess pressure pump is used to pressure system to approximately 120 lbs
No pressure Water supply Excess pressure
OSYSU to monitor gate valve position (Open or Close) Supervisory Device Ball valves on the alarm port should be monitored using RBVS Supervisory Device
Sprinkler alarm devices activate a RED LED on the fire panel This will indicate a fire emergency
Smoke or Heat Detectors Manual pull stations Sprinkler Water Flow Devices (Water Flow Switch or Water Flow Pressure Switch)
THREE TYPES OF WATER-FLOW ALARM DETECTION SWITCHES
(VSR-S) Vane (Paddle) screw mount style for smaller pipe sizes (1/2” to 2” sizes) (VSR) Vane saddle style with U Bolt mounting for pipe sizes from 2” up to 10” PS10 Pressure type of water flow detection (Detects increase of water pressure in the Alarm Line)
WATER FLOW SWITCH FEATURES
Complete separation of the contacts to allow both 120VAC and 24VDC wiring Field replaceable contact switches and Pneumatic Retard. (Switch replacement without discharging sprinkler system) Pneumatic Retard timer from 0 to 90 seconds (Reduce False alarms) Non-corrosive insert (saddle) along with composite trip stem means there is no water to metal contact. Also no dissimilar metals
Corrosion) Visual (White Flag) indicator to indicate paddle activation. Flag is visible in normal condition and not visible when activated. (No volt meter or continuity tester required)
NEMA 4 Standard Enclosure
WATER-FLOW SWITCH INSTALLATION – U BOLT STYLE
Water-Flow Switch Mounting
VSR-F PCVS 2” Main Drain Supply pressure gauge System pressure gauge Butterfly valve Riser check valve Riser to sprinklers From water supply
Vane type water- flow switches can be installed in either vertical or horizontal sections of pipe. If they are installed in a horizontal section, they must be installed
the throat area of the flow switch and affecting the paddle movement.
Vertical Horizontal
Drill the correct size hole for the flow switch. The hole should be de-burred and the inside of the pipe should be cleaned of any rust, scale or corrosion.
The flow switch should be centered in the pipe and the “U” bolt should be tightened evenly. This will prevent the paddle from dragging on the inside of the pipe and prevent the flow switch from leaking.
Do not trim the paddle.
1.25” to 2” hole size depending on the water flow switch model
Do not leave cover off for extended period of time Tighten U Bolt nuts alternatively Mount on pipe so arrow
direction of water-flow Roll paddle in
water-flow Pneumatic Retard Timer should be set to reduce false alarms
To Sprinklers Riser Drain valve, closed VSR-F OSYSU Upon activation of a Sprinkler Head, water will begin to flow in the sprinkler piping
When the flow rate reaches 10 GPM, the Water Flow switch will activate an Alarm condition on the FACP
PADDLE TENSION ADJUSTMENTS
Spring tension indicator
Sensitivity adjustment screw. Turn clockwise to increase activation flow
activation flow rate
WATER-FLOW SWITCH INSTALLATION – SCREW MOUNT STYLE
INSTALLING SCREW TYPE WATER-FLOW SWITCH
When installing the screw mount type into a tee fitting, the proper sized tee must be used. Never use a reducing bushing to make the switch fit the tee. Bushings prevent the paddle from being in the proper location in the tee. Also make certain that the correct paddle for the size and type of piping is used and that the paddle is on the stem tight. (VSR-S Comes with different sized paddle kits) The flow switch must be screwed into the tee to the proper depth.
WATER-FLOWN SWITCH TESTING ULC-S536
VSR Series Water – Flow and PS10
6.7.8.1 Water flow Detection Devices
6.7.8.1.1 Each water flow detecting device shall be inspected and
tested to confirm operability, including the following functions, as applicable:
A Water flow detecting devices (paddle and pressure type)
including associated input circuits, shall be tested by an appropriate water flow means; and
B Time delay setting shall be recorded in the individual device
Water Flow Pressure Switch (Detects Water
Pressure)
Primarily used to detect water pressure
increase in the alarm line (6 PSI)
Dual contact model operates on Pressure
Increase of 6 PSI and Decrease of 5 PSI
Adjustment Range is between 4 – 20 PSI
Activates the Water Motor Gong
Water in the alarm line also activates the PS10 when the pressure reaches 6 PSI The PS10 is used as an alarm device in both dry and wet systems applications
6 PSI
When a sprinkler head activates water flows into the alarm line
The alarm line has a water motor gong In normal conditions the alarm line has no water or pressure
There is also a Low air or excess pressure supervisory switch depending on the system
Flow Alarm Bell Alarm Low Pressure Signal
COMM
NO NC
The contact’s output should be metered to ensure that it produces the appropriate output condition Example - In this scenario the contact should be wired (Common & N/C) because the logic is shown as being N/C on Alarm! On
The contact logic can also show alarm wiring as terminals A & C Manufacturers use various contact labels and logic where N/C and N/O may mean the contrary
TO FIRE PANEL
A C A B C
Sprinkler supervisory devices activate an AMBER LED on the fire panel This will indicate a supervisory condition (Abnormal)
A break or short in the supervised
wiring
A trouble condition indicates a problem with the control panel or associated wiring which may render the system inoperable A trouble will activate a YELLOW LED
Loss of secondary power (battery) Loss of primary power (120VAC)
WIRE SUPERVISION ON THE SPRINKLER DEVICES
Sprinkler devices use an end of line resistor
(EOLR) to supervise the wiring
5.1K
The resistive value differs depending on the
panel design. In this example = 5.1K ohms
When the wiring is intact, the panel detects the 5.1 K resistive load and the condition remains normal SPRINKLER DEVICE If there is a break or short in the wiring, the panel no longer detects the 5.1K load and activates a trouble condition
TROUBLE
PS40 and PS120 Designed to detect a pressure increase or decrease (Water
Pressure setting is factory set, but pressure range can be adjusted in the field Each model has its own specific pressure range Models available with single or dual contact output Contacts designed to accommodate AC and DC voltages NEMA 4 Enclosure Models available with either brass or nylon fittings
Low Air Pressure Switch Primarily used to detect a pressure
decrease in Dry-Systems
Dual contact model operates on Pressure
Decrease of 30 PSI and Increase of 50 PSI
Adjustment Range is between 10 – 60 PSI
Dry Systems are installed in unheated buildings or where there is a danger of sprinkler pipes freezing. (Underground Parking Garage Areas)
PS10A BVS
The air pressure also keeps the dry pipe valve closed which prevents water from accidently entering the system A pressurized systems allows for supervision of the piping in case
Low air pressure switch is installed to monitor the air pressure. The switch is set to trip on the decrease at 30 PSI Dry systems have roughly 40 lbs of pressurized air in the sprinkler piping PS40
PS40A BVL PS10A RBVS
In the event of a fire, the sprinkler head opens allowing water to run and the pressure in the system to drop. When the pressure drops down to 30 PSI, the PS40 contacts will activate to produce a Supervisory condition Water will also flow in the alarm port activating the PS10
PS40A BVL PS10A RBVS
BVL (Bleeder Valve) Allows the PS40 to be tested without bleeding the system pressure
RBVS can be used to monitor any ball valves on the system
ADDITIONAL DEVICES THAT SHOULD BE INSTALLED ON DRY SYSTEMS
Preassembled Ps40-TM can be installed to facilitate low air test
RTS-O (Room Temperature Switch) Will activate when temperature drops to 40F or 5C
Excess Pressure Supervisory Switch Primarily used to detect a pressure
decrease in Wet Systems under Excess Pressure
Operates on Pressure Decrease of 110 PSI
and Increase of 130 PSI
Adjustment Range is between 25 – 175 PSI
PS120 Wet systems with excess pressure are used in Canada to minimize false alarms The system is pressurized to 120 lbs by an excess pressure pump
The excess pressure keeps the valve clapper closed, so fluctuations from the city’s water supply does not get into the system side A PS120 is used to monitor the excess pressure
In the event of a fire, the sprinkler head
water to flow in the system. This also creates a pressure drop in the system When the pressure drops to 110 PSI, the PS120 activates to produce a supervisory condition
Open sprinkler head Leak in the system Excess Pressure Pump Failure
PRESSURE SWITCH INSTALLATION
1.
Connect the pressure switch to the appropriate valve as per data sheet instructions
2.
Apply Teflon tape to the threaded male connection on the
3.
Device should be mounted in the upright position. (Threaded connection down)
4.
Tighten the device using a wrench on the flats on the device.
Nylon or brass fitting is ½” NPT
WIRING PRESSURE SWITCHES
TO FIRE ALARM PANEL
PRESSURE DECREASE PRESSURE INCREASE
WIRING PRESSURE SWITCHES
PRESSURE INCREASE & DECREASE ON SAME PAIR OF WIRES
PS40 & PS120
6.7.8.2.2 Each low pressure supervisory device shall be inspected and
tested to confirm the operability of the following functions, as applicable:
A) A decrease of pressure beyond the set limit results in an audible
trouble signal and a visual indication; and
B) The low pressure (kPa) setting at which the device initiates a trouble
signal and the upper pressure setting where the device is no longer activated shall be recorded. (Refer to AppendixC3.2, Individual Device Record.)
OSYSU & PCVS
NEMA 4X* (IP 65) and 6P (IP 67) *Enclosure is 4X. For additional
corrosion protection of mounting hardware, use model PCVS-2 CRH
-40º to 140º (-40ºC to 60ºC)
Visual Switch Indicators Two conduit entrances Adjustable length trip rod Accomodates up to 12AWG wire Switch detects tampering and
valve closure
RoHS compliant (Lead free
components)
Two SPDT contacts
ADDITIONAL FEATURES ON OSYSU
Three position switch detects tampering and valve closure Knurled mounting bracket prevents slipping Fine adjustment feature for fast, easy installation One or two SPDT contact models (-1,-2)
PS40A BVL PS10A BVS
OSYSU (Outside Screw & Yoke) Gate Valves with moving stem
Bracket Clamp bar Carriage bolts [2] Roller Groove Yoke Valve stem Trip Rod Packing Gland Slotted mounting holes for fine adjustment
As the valve is being shut the trip rod roller moves along the valve stem until it activates
OSYSU is set to operate within two turns of the valve handle or when the stem of the valve has moved 20% of the distance from its normal position Some OSYSU Valves come with a notch already included on its stem. Some valves may require the installer to file one on the stem. The trip rod arm of the switch will ride along the stem until it moves outside
activate the switch.
Please check with data sheet for installing on small and large gate valves
BUTTERFLY VALVES REQUIRE PCVS SWITCH
Butterfly Valves have a moving cam when the valve is opened or closed As the valve is being closed the cam activates the trip rod on PCVS Switch
INSTALLING ON BUTTERFLY VALVES
Please check with data sheet for installing on butterfly valves
POST INDICATOR VALVES REQUIRE A PCVS SWITCH
Target moves up as valve is shut-off Target moves down as valve is shut-off PCVS trip rod is activated by a moving target that can move up
installation) PCVS should be oriented appropriately (When the valve is fully open the target should be pushing the trip rod against the spring force of the rod)
INSTALLING ON POST INDICATOR VALVES
Please check with data sheet to install on post indicator valves KEY POINTS TO KEEP IN MIND When the valve is fully open, the target should be pushing the trip rod against the spring force of the rod (You may need to reverse the position of the switch for this to happen) As the valve is closed, the spring force causes the rod to follow the target of the valve, tripping the switch.
WIRING OSYSU & PCVS SWITCHES
TESTING SHUT OFF VALVE MONITORING SWITCHES ULC-536
6.7.8.2 Supervisory Devices 6.7.8.2.1 Each shut-off valve position supervisory switch shall be tested to determine that within two turns of the valve handle, or when the stem of the valve has moved 20% from its normal position, it shall result in a supervisory signal. 6.7.8.4 Supervisory Devices – Other Types (RBVS, PTS-C and RTS) 6.7.8.4.1 Each device shall be inspected and tested to confirm the operability of the following functions, as applicable: A Installed correctly; and B Tested in accordance with the manufacturer’s requirements, or an appropriate test means, to ensure that the correct operation will result in an audible trouble signal and a visual indication.