SLIDE 1
SLIDE 2
SLIDE 3
SLIDE 4
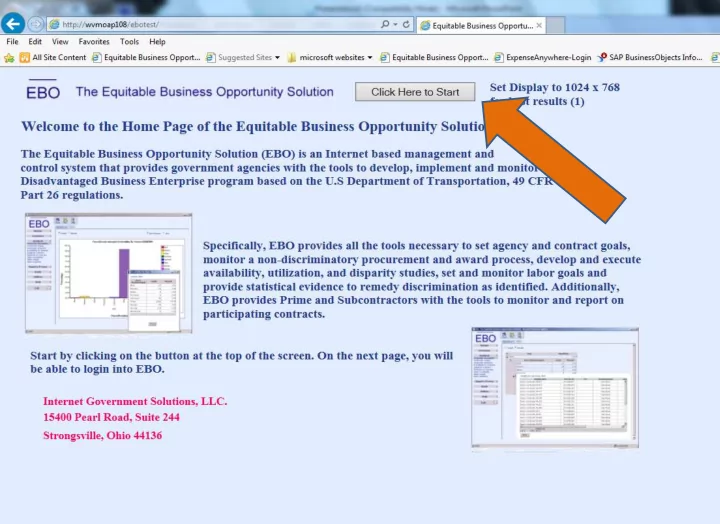
Splash Screen – important messages from Main Office EBO Team are listed here…. schedule for maintenance, reports due, etc.
SLIDE 5
These are the menu options available to you. 1) Click on the down arrow for the CONSTRUCTION MENU item and it will expand and show you the sub-menu items 1
SLIDE 6
1) To review a contract, click on the CONTRACTS sub-menu item. 1
SLIDE 7 This is what you will see when the sub-menu (CONTRACTS) is
- pened. In order to review the data
that you wish, you will have to search or FIND the project you are working on.
SLIDE 8
There are several ways to FIND the contract you are looking for. The easiest way is to search by contract number. 1) Enter the ENTIRE contract number 2) Click on FIND 1 2
SLIDE 9 Once you click on CONTRACTS, the SEARCH SCREEN will open. You can search several
- ways. The easiest is by CONTRACT NO.
1) Enter the entire contract number (LETTERS AND NUMBERS) 2) Click on FIND Another option is by SPONSOR. 1) Click the DOWN ARROW next to sponsor. 1
SLIDE 10
1) All sponsors are listed by type (city, county, village, etc, if available) in alphabetical order. In this case, our project is in Albany County, so you would scroll down to find that Sponsor. 1 1
SLIDE 11
1) As you scroll down, you will see the various Sponsors, find and select Albany County. 2) Click on FIND 1 2
SLIDE 12 1 2 1) This search was by CONTRACT number:
- AV123456. Once FIND is clicked the screen
Will refresh and you will see your contract. Ensure that the contract is highlighted blue/green. 2) To see contract details, click EDIT. This is the function that actually will OPEN the contract for you. NOTE: You can either search by CONTRACT Number
- r by SPONSOR – you don’t have to use both in
- ne search.
SLIDE 13
SLIDE 14
SLIDE 15
SLIDE 16 NOTE: In Region 11, the minority goals have a “RANGE” from a lower percentage to a higher percentage for each trade. That is why the columns reflect this. The remainder
specific percent based on COUNTY, not a range by TRADE.
SLIDE 17
SLIDE 18
This is an example of what the Change Order screen looks like. AV123456 has not yet been awarded and therefore, this screen can’t be seen on that project.
SLIDE 19
For the Aviation folks to review pre-award details: 1) Select PRE-AWARD APPROVALS 2) Enter Contract Number (If Not There) 3) Click on FIND 4) Once the contract is located, ensure it’s highlighted 5) Click on EDIT 5 4 3 2 1
SLIDE 20 Pre-award information lists:
- M/WBE firms that have been added
- What program they are in (MBE or WBE?)
- What they’ve been assigned
- What they are being paid
- What the goal is, and
- If that goal is being met
M/WBEs MUST confirm or acknowledge their participation on the project. They are listed in RED until they acknowledge and then they are annotated in GREEN.
SLIDE 21
1) To see what items of work the subs/vendors have, click on the EXPAND Button or the drop down arrows for each firm. 2) The category is the type of work the firms are doing – construction, providing materials, equipment rental, etc. (we only track M/WBE suppliers, equip rental, fabricators, etc) 1 1 1 2
SLIDE 22 This is an example of a change to a M/WBE firm…. 1) Expanded info for A&K Slipforming 2) We see that what was originally of commitment of $118,899 is now only $15,000! 3) And, in looking at other information on this screen, as there is no “LAST APPROVAL DATE”, we can tell that Traffic Lane Closures is a recent M/WBE addition toward goal
- attainment. This shows continual Good Faith Effort.
2 1 3
SLIDE 23
Example of the Sub Approval screen 1) The “Y” indicates that approval is required. 2) Regardless whether a firm is a M/WBE or not. 3) These can be approved separately, on different dates, as the paperwork is received. 4) As there is no “LAST APPROVAL” dates, you can tell this is the initial approvals for the contract. 1 3 2 3 4
SLIDE 24
Payments from SPONSOR to Prime are here: 1) Select PAYMENTS 2) Enter Contract number (if needed) 3) Click FIND 4) Highlight contract 5) Click EDIT 5 4 3 2 1
SLIDE 25
1 1 Expand the information using either method.
SLIDE 26
1) Payment date (day check was mailed by sponsor) 2) Amount 3) Estimate 4) Amount received by the prime 5) Theses two numbers should match – if not, there is an error 5 4 3 2 1 5
SLIDE 27 This screen is the one that you really want to be familiar with….especially if your boss is asking for information! CONTRACT ANALYSIS contains most everyting that you need for a quick review of where a project stands. This is a current NYSDOT FEDERAL AID
- project. Using this due to size and number of
firms.
SLIDE 28 The header includes:
- Award amount
- The Goal Amount (this is federal)
- The actual dollar amount of the goal
- The actual payments to minority firms
to date (attainments)
- Percent complete (based on
payments to the prime)
SLIDE 29 The data includes:
- Vendors
- Programs (D/M/WBE) if applicable
- Commitment (the amount “committed”
by the prime to the sub/vendor
- Amount paid
- Percentage of payment based on total
commitment
SLIDE 30
- $745,696 represents 7% of bid amount of $10M
- $52,571 represents what has been paid to the D/M/WBEs
- 7.05% is the percentage of the goal ($745,696) that has been
met.
SLIDE 31
Using INTERSTATE REINFORCEMENT for an example: 1) The prime COMMITTED to pay this firm $320,576. 2) As of this date, $41,090 was received by Interstate 3) The amount received represents 12.82% 3 2 1
SLIDE 32
To obtain information on the Minority and Female Workforce (EEO Goals), select REPORTS/FORMS.
SLIDE 33
Select MONTHLY UTILIZATION
SLIDE 34
If you were currently in the contract information and selected this menu item, your contract number would be listed already. In the case that it is not, click the SELECT button below.
CONTRACT NUMBER LISTED HERE!!!
SLIDE 35
Search for your contract via: 1) Contract Number 2) Sponsor 3) Click on SEARCH 3 2 1
SLIDE 36
After hitting SEARCH: 1) Highlight the contract 2) Click on ADD 2 1
SLIDE 37
After hitting ADD: 1) The contract will drop into lower box 2) Click on APPLY 2 1
SLIDE 38 The screen will refresh and you can start building your report. 1) You can start with the dates
- Inception will be the default start date – if you change it,
the only way to amend it is to RESET the report and start from the beginning or specifically adding the date on the drop down calendar
- “Today” is the default end date of the report - you can amend
the drop down calendar or manually entering the date. 1 1
SLIDE 39
1 1) Drop down calendar for start and end dates of the period of your report.
SLIDE 40
You can build the report to show the CONSOLIDATED data (the prime and all working subs) or for a specific firm. 1) When done with customizing, click Report
SLIDE 41
SLIDE 42
3 1 You can toggle back and forth between: 1) Options 2) Monthly Utilization And change the customization as you wish. 3) Just click REPORT when you want everything to refresh 2
SLIDE 43
2 1) Open REVIEW 2) COMMITMENTS & ITEMS screen is where the Prime will go to enter their commitments to subcontractors and assign them work items. 3) You can open/expand a firm to see the items, what was committed by the prime to the sub. 4) A “N” indicator means that approval has been done, but a “Y” means an approval is required or a change has been made. 3 4 1
SLIDE 44
2 Payments & Receipts screen illustrates who has been paid and how much they have received. In process of monitoring contract, Sponsor should note any discrepancies that appear on this page.
SLIDE 45
To review the M/WBE and Sub Approval forms: 1) Open REVIEW 2) Select CONSTRUCTION
2 1
SLIDE 46 After the screen refreshes, you will see this. 1) Note the selection of forms that are available to
- review. The three that you should be familiar with
at this point:
- AAP20 – D/M/WBE Utilization Worksheet
- CONR89 – Approval to Subcontract
- AAP19 – D/M/WBE Schedule of Utilization
2) Program Vendors Column – this will show just who is listed as an M/WBE on the contract. 3) Project Vendors Column – this will show ALL the firms on the contract.
1 2 3
SLIDE 47 To access your contract: 1) Click on SELECT CONTRACT 2) The pop-up screen will appear….if your
- rganization is NOT shown, click SEARCH
3) If it is shown, it will automatically show your contracts, so click on the contract you want, it will highlight blue/green 4) Click on APPLY
1 2 3 3 4
SLIDE 48 This is your working screen….
- Forms
- M/WBEs under PROGRAM Vendors
- ALL Firms under PROJECT Vendors
- Select the form(s) that you want
- Select the Vendors
1) Click on REPORT 2) To return to this screen from the report, click on the OPTIONS tab – this will allow you to change your configuration – new form, new vendors
2 1
SLIDE 49
SLIDE 50
SLIDE 51
SLIDE 52
Payment Notarizations or Affidavits of Payment were previously done on form AAP21c. They are now in EBO and are automatically filled with data from the payment screens. To review payment information: 1) Open review 2) Select PAYMENT NOTARIZATION 1 2
SLIDE 53
The screen will refresh to this. 1) Click SELECT CONTRACT 2) NOTE: You can amend the dates for a specific period, but it is recommended that if you are searching for a specific payment, you use the PAYMENTS/ RECEIPTS screen. 1 2
SLIDE 54
The screen will again refresh to this. 1) As it shows your sponsor organization – County of Albany, all you have to do is….. 2) Click SEARCH 2 1
SLIDE 55
The screen will refresh to this and show you all the contracts that PAYMENTS have been made on. 1) Click on the contract you wish to review – it will turn green/blue 2) Click APPLY 2 1
SLIDE 56
This screen will show all subs/vendors assigned to the contract within EBO. 1) You can SELECT ALL or just those you want to see by clicking SELECT ALL (which will unselect all) 2) If you remove the SELECT ALL Option, you can choose whose payment info you wish to see by clicking the RUN box next to that firm (an “X” will appear) 3) Once you are ready, click REPORT 3 2 1
SLIDE 57 This is the reports (AAP21 – Affidavit of Payment) that are required when the contract is final’d. If all the information is in EBO and accurate, you would not need this to be printed. The only times that we are printing these are:
- FHWA Compliance Reviews
- If there is a payment complaint by a sub/vendor….we
ask that they print the report for their firm, mark any discrepancies, sign, notarize and submit. Once received, the Region will start reviewing the complaint.
SLIDE 58
1 2 This screen will show all subs/vendors assigned to the contract within EBO. 1) Open REVIEW 2) Select PAYROLL AUDIT 3) Screen will refresh – use the CONTRACTOR drop down box to select the contractor you want to review 4) Use the down arrow to select the payroll end date you are seeking 4 3
SLIDE 59
This screen will show all subs/vendors assigned to the contract within EBO. 1) Select any contractor working on the contract. 2) The payrolls entered by the selected contractor can then be viewed. 2 1
SLIDE 60 When you’ve selected a payroll to review, you will see all the employees that were working on the project during the payroll
- period. After checking hours/trade/race/gender and all is well,
1) Click on REVIEWED 1
SLIDE 61
You will note above that the approver’s or reviewer’s name appears with the date that the payroll was approved. It is important that this information is checked and accurate as these work hours and ethnic/gender data feeds other reports.