Sherry Pettis ACP S ITRT August, 2014 Change your PASSWORD BY - - PowerPoint PPT Presentation

sherry pettis acp s itrt august 2014 change your password
SMART_READER_LITE
LIVE PREVIEW

Sherry Pettis ACP S ITRT August, 2014 Change your PASSWORD BY - - PowerPoint PPT Presentation

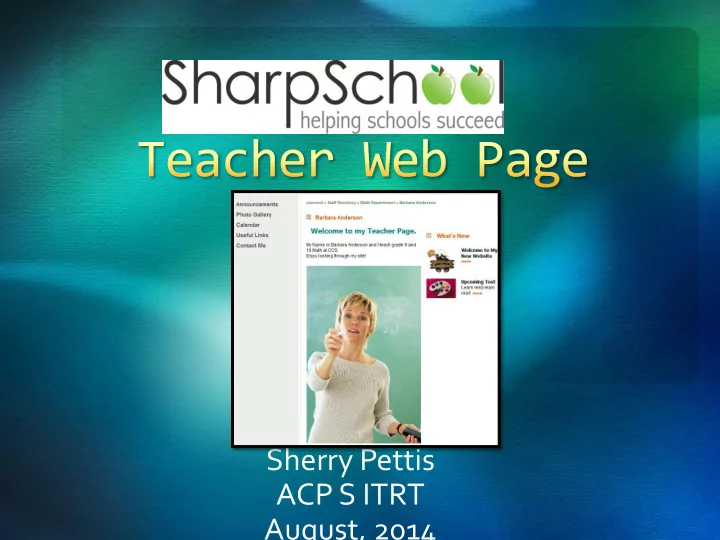
Sherry Pettis ACP S ITRT August, 2014 Change your PASSWORD BY CLICKING ON YOUR NAME beside LOGOUT at the top of the page. Change the way your Name appears in the Staff Directory dropdown from Advance then Page Properties (ex. John


slide-1
SLIDE 1

Sherry Pettis ACP S ITRT August, 2014

slide-2
SLIDE 2
  • Change your PASSWORD BY

CLICKING ON YOUR NAME beside LOGOUT at the top of the page. Change the way your Name appears in the Staff Directory dropdown from Advance then Page Properties (ex. John Jones or Mr. Jones)

Identifies the owner Shows date last updated 3 options, Review, Move and Archive. *** Under

the Review option, you have the ability to schedule a reminder to review a particular page on a pre-defined date.

slide-3
SLIDE 3

A great place to publish other important dates ex. school events, upcoming assignments, Tests Homework and Field Trip Announcements, Exciting news and information , School News , and deadlines .

  • 1. Click on the Calendar link from

the left navigation bar of your teacher page.

  • 2. To add event Click on in the

calendar menu ( you may add a document on the date)

  • 3. Add information and click on

Create Event

You can add event also by clicking date

You can have your student and/or parent subscribe to your calendar!

slide-4
SLIDE 4

Photo Gallery allows you to create album(s) and view pictures as a slideshow to showcase class/student projects and creative work.

To access the Photo Gallery :

1. Click on the Photo Gallery link from on the left navigation bar of your teacher page. This will lead you to a blank gallery page. Click Add Album. 2. Add a Name and Description for your Album 3. For the Cover Picture Options Select either the Random Picture from Album option (the system will pick any image from your album) or Selected Cover Picture to select an image of your choice (from your computer) 4. Click Create 5. Click add album and upload images 6. To make changes to the image, click on Manage Images 7. To delete a n Album ,Click on Album Properties

Click Picture to:

  • 1. Rename – Click on

picture, change name & click update

  • 2. Delete – Click

beside the image and then click ok

slide-5
SLIDE 5

Allows you to upload document(s) and

  • ther resources such

as website links, homework assignments, field trips, parent forms/information and etc. that may be added to a folder

slide-6
SLIDE 6
  • To Create a Folder and add Files:
  • 1. From the Useful Link page, click on the Add New

Item drop-down menu and select Folder

  • 2. Add Name for folder and a description if you like and

Click Create Folder button when done

  • 3. Click on the folder to add file(s)
  • 4. From the Add New Item dropdown Click on File
  • 5. The select either Upload File or Upload Multiple

Files tab. You may be require to install a software for multiple files at one time.

slide-7
SLIDE 7

To create Links to other web pages:

1. Select Link from the Add New Item drop-down menu 2. Add Name & full web address of the site within the Web Address (URL) field 3. Click the Add Link button.

Files, Folders and Links can be deleted by clicking Delete from the Actions Menu

slide-8
SLIDE 8

This page allows visitors to your site to contact you via email. Once users have completed this form and click Submit, the information in the form is sent to the owner of the page.

slide-9
SLIDE 9

You have the ability to add more pages as needed.

  • To add additional pages to your teacher page, hover

your mouse over Page Properties on the gray toolbar

  • n top of the page and scroll down to Add New Page
  • The Content Space Page is the best page to add for

Daily Schedule, Course Description, etc.

  • Be sure to be on the page that you want the additional

page to appear ex. If you want the page to appear under Calendar click on Calendar before adding the page

Only the a Content Space allows you select when to publish!

slide-10
SLIDE 10
slide-11
SLIDE 11

You may change the order of pages, to hide, show, or archive a page Hover your mouse over Page Properties, scroll down and click on Manage Sub- Pages. This will open a pop-up window with all the sub-pages under the home page. Make changes by selecting the radio button by Show, Hide Section or Hide Selection. The Arrows under Actions enables you move pages to reorder You can make any page a sub-page of another page by clicking on Advance then Move Page

Hide Section hides your sub-pages & calendar from top & side menu bar. Hide Selection removes a page from the top & side menu bar.

slide-12
SLIDE 12

Pages must be archived before they can be deleted from the site. To delete a page hover your mouse over Page Properties, scroll down and click on Archived Sub-pages. Here click on button next to the sub-page you wish to delete. To retrieve archived pages click on Un-Archive.